Understanding GE Self-Cleaning Ovens

GE self-cleaning ovens simplify upkeep․ High temperatures incinerate food residue and baked-on messes․ This converts into easily removed ash‚ providing effortless pristine interiors․
What is a Self-Cleaning Oven?
A self-cleaning oven‚ a standard feature in many modern GE appliances‚ is engineered to simplify oven maintenance․ This innovative function utilizes a specialized‚ high-temperature cycle to eliminate baked-on food and grease without manual scrubbing or harsh chemicals․ Its core principle involves generating extremely high temperatures within the sealed oven cavity‚ often reaching hundreds of degrees Fahrenheit․ This intense heat meticulously incinerates all organic food particles and stubborn residues from interior surfaces‚ reducing them to a fine ash․ Once the cycle finishes and the oven cools completely‚ this powdery ash is effortlessly wiped away‚ leaving a pristine interior․ Many GE models also offer a Steam Clean option for lighter soils‚ providing versatile cleaning solutions․ This technology transforms a laborious chore into a convenient‚ automated process‚ enhancing overall kitchen hygiene․
How the Self-Cleaning Feature Works

The self-cleaning feature in GE ovens operates through a sophisticated‚ high-temperature process designed to eliminate stubborn food spills and grease․ When activated‚ the oven door locks securely‚ preventing access during the intense cycle‚ and the internal temperature gradually escalates to extreme levels‚ often exceeding 800-900 degrees Fahrenheit․ At these incredibly intense temperatures‚ any food particles‚ splatters‚ or baked-on residues within the oven cavity are subjected to pyrolysis․ This chemical decomposition process effectively incinerates the organic matter‚ converting it into a fine‚ powdery ash․ The oven’s design is specifically engineered to contain the heat and any minimal smoke safely within the sealed cavity throughout this rigorous cleaning cycle․ After the intense heating phase concludes‚ the oven automatically begins a crucial cooling period․ Once sufficiently cool and the door unlocks‚ the remaining ash can be effortlessly wiped away with a damp cloth․ This method provides a thorough‚ chemical-free‚ and highly effective way to maintain a pristine oven interior with minimal effort from the user․
Benefits of GE Self-Clean Technology
GE Self-Clean Technology offers numerous advantages‚ transforming oven maintenance from a dreaded chore into a remarkably simple task․ Primarily‚ it provides unparalleled convenience; users can effortlessly initiate a thorough cleaning cycle with just the touch of a button‚ allowing the oven to handle all the intensive‚ high-temperature work․ This advanced feature effectively removes even the most stubborn‚ baked-on messes and accumulated food residue‚ ensuring a consistently pristine oven interior without the need for strenuous manual scrubbing or harsh chemicals․ The unique‚ high-temperature process efficiently incinerates grime‚ converting it into a fine‚ easily wiped-away ash․ This significantly reduces cleaning effort and time․ The availability of options like the Self-clean with Steam Clean also provides users with greater flexibility‚ enabling them to choose the most appropriate method for varying levels of soil․ This innovation simplifies after-dinner cleanup‚ making it a breeze‚ and promotes a healthier kitchen environment by minimizing reliance on chemical agents‚ enhancing the overall user experience․
Essential Pre-Clean Steps for GE Ovens
Before cleaning‚ remove all racks and ensure the oven is completely empty․ Wipe up any heavy soil from the oven bottom․ Properly close the oven door before activating the self-clean cycle․
Removing Oven Racks
Before initiating the self-cleaning cycle on your GE oven‚ a crucial preliminary step is the complete removal of all oven racks․ These racks‚ often constructed from materials like chrome-plated steel‚ are not designed to withstand the extreme temperatures generated during the self-clean process․ Exposing them to such intense heat can lead to permanent damage‚ including discoloration‚ warping‚ or even the breakdown of their protective coating․ If left inside‚ the high heat can bake on any food spills or grease more intensely‚ making them exceedingly difficult‚ if not impossible‚ to clean afterward․ Therefore‚ it is essential to slide them out carefully․ Once removed‚ these racks should be cleaned separately using traditional methods․ A simple soak in warm‚ soapy water‚ followed by scrubbing with a non-abrasive brush or sponge‚ is typically effective for removing baked-on food and grease․ This ensures that both your oven interior and its accessories are properly maintained and remain in excellent condition․ Always refer to your GE owner’s manual for model-specific rack removal and cleaning guidelines․ This preparatory action is fundamental for a successful and safe self-cleaning operation․
Ensuring the Oven is Completely Empty
After removing the oven racks‚ it is absolutely critical to double-check that the GE oven is completely empty of any other items before initiating a self-clean cycle․ This includes oven thermometers‚ aluminum foil‚ baking pans‚ broiler pans‚ or any other cookware or utensils that might have been left inside․ The extreme high temperatures reached during the self-cleaning process‚ designed to incinerate food soils‚ are far too intense for most kitchen items․ Leaving anything in the oven can cause severe damage to the items themselves‚ potentially melting plastics‚ warping metal‚ or even creating hazardous fumes or a fire risk․ It’s not just about obvious large items; even small pieces of foil or forgotten spatulas can pose a problem․ Take a moment to thoroughly inspect the oven cavity‚ ensuring every shelf‚ corner‚ and the bottom is clear․ A truly empty oven is essential for the safe and effective operation of the self-clean feature‚ safeguarding both your appliance and your kitchen from potential damage․
Wiping Up Heavy Soil on Oven Bottom
Before initiating the GE self-clean cycle‚ it is highly recommended to wipe up any heavy soil or substantial spills accumulated on the oven bottom․ While the self-cleaning feature is incredibly effective at incinerating food residue‚ excessively large spills‚ thick layers of grease‚ or significant charred debris can lead to an abundance of smoke and strong odors during the high-temperature cycle․ This crucial pre-emptive step significantly mitigates the amount of smoke produced‚ making the entire process more manageable and pleasant‚ especially if household ventilation is a concern․ Use a damp cloth‚ a sponge‚ or a plastic scraper to carefully remove any substantial loose debris‚ charred food particles‚ or thick grease spots that are easily accessible․ It is important to avoid using harsh chemical oven cleaners at this stage‚ as any residue left behind could react negatively or create undesirable fumes during the extreme heat of the self-clean cycle․ Focus solely on the visible‚ heavy accumulation‚ as the self-clean function is perfectly designed to handle the finer‚ baked-on grime․ This simple‚ yet effective‚ preparation ensures a more efficient and notably less smoky cleaning experience‚ contributing to better overall results for your GE oven’s interior․
Properly Closing the Oven Door
For the GE self-clean cycle to operate safely and effectively‚ the oven door must be securely closed․ As emphasized‚ “The oven door must be closed and all controls set correctly for the cycle to work properly․” The self-cleaning process generates extremely high temperatures‚ and a properly latched door is vital for containing this intense heat within the oven cavity․ An unsecured door poses a significant burn hazard‚ potentially damaging adjacent cabinetry or surfaces․ Furthermore‚ if the door is not fully sealed‚ the oven may fail to reach optimal temperatures for the pyrolytic process to efficiently burn food residue into ash․ An improperly closed door can lead to the cycle not starting‚ prematurely shutting down‚ or yielding an incomplete clean․ Always ensure you firmly push the oven door until it latches securely‚ confirming a tight seal before activating the self-clean feature․ This simple verification guarantees both the safety and the thoroughness of your GE self-cleaning operation‚ ensuring optimal cleaning results․

Running the GE Self-Clean Cycle
Running your GE oven’s self-clean cycle involves setting controls correctly and activating the feature․ This removes stuck-on messes with the touch of a button‚ allowing the oven to clean itself effectively and easily․
Setting Oven Controls Correctly
Initiating the self-clean cycle on your GE oven requires precise control settings to ensure proper operation․ First‚ confirm the oven door is securely closed; this is a critical safety and functional requirement for the high-temperature cleaning process․ Access the oven’s control panel‚ typically located on the front of the appliance․ Locate the “Self Clean” or “Clean” button․ Depending on your specific GE model‚ you might need to press this button and then select a cleaning duration‚ such as 3‚ 4‚ or 5 hours․ Some advanced models may offer different cleaning options‚ like “Self-clean with Steam Clean‚” which would be selected through the same control interface․ Always refer to your owner’s manual for model-specific instructions on navigating the control panel and confirming the correct settings․ Once the desired cycle time and option are chosen‚ press “Start” or “Enter” to begin․ Ensuring all controls are set accurately is paramount for the self-clean feature to function effectively and safely‚ transforming baked-on messes into easily removable ash․
Activating the Self-Clean Feature
Once your GE oven controls are correctly set for the desired cleaning duration and option‚ such as “Self-clean” or “Self-clean with Steam Clean‚” the next vital step is to activate the feature․ This typically involves a simple press of the “Start” or “Enter” button on your oven’s control panel‚ confirming your selections․ Upon activation‚ the oven door will automatically lock to ensure safety during the high-temperature cycle․ The oven then begins to gradually heat up to extreme temperatures‚ often exceeding 800-900 degrees Fahrenheit‚ which is essential for burning away stubborn food spills and baked-on grease effectively․ This process converts food residue into a fine ash that is easy to wipe away later․ Proper ventilation in your kitchen is crucial as the cycle begins‚ as some smoke or odors may be emitted․ Activating the self-clean feature transforms the challenging task of oven cleaning into a simple push of a button‚ letting the appliance do the hard work for you․
Monitoring the Cycle Operation
Once the self-clean cycle is activated‚ monitoring its operation involves understanding what to expect and ensuring safety․ As the oven heats to extremely high temperatures to incinerate food soils‚ it’s common to notice some smoke and a distinct odor․ This is a normal part of the process‚ indicating that food residues are being carbonized into ash․ For this reason‚ maintaining proper ventilation in your kitchen is highly recommended throughout the cycle’s duration‚ perhaps by opening windows‚ especially in cooler weather․ The oven door will remain securely locked for safety‚ preventing accidental opening while temperatures are dangerously high․ It is crucial to avoid interrupting the cycle once it has begun‚ as premature termination can hinder complete cleaning and may require restarting․ Observe the oven from a distance‚ allowing the pre-set cleaning time to fully elapse․ The objective is for all baked-on messes to be reduced to a fine‚ powdery ash‚ which signals a successful operation․ This allows the oven to perform its function without intervention․
Importance of Proper Ventilation
Proper ventilation is crucial when running a GE self-clean cycle․ The high temperatures required to incinerate food soils inevitably produce smoke and strong odors․ While these are normal byproducts of the cleaning process‚ they can be irritating and unpleasant if not adequately vented from your kitchen․ To maintain a comfortable and safe kitchen environment‚ it is highly recommended to open windows‚ especially during cooler months or if in a hot area‚ and activate your kitchen’s exhaust fan․ This proactive measure effectively dissipates any fumes generated‚ preventing them from accumulating indoors where they might cause respiratory discomfort‚ trigger allergies‚ or leave a lingering‚ acrid scent throughout your living space‚ to protect indoor air quality․ Adequate airflow ensures that the air is cleared‚ making the entire experience less intrusive and more comfortable for all household members․ Always prioritize proper ventilation before initiating the self-clean feature to manage these emissions effectively and ensure a more pleasant and healthy cleaning process for everyone․

Post-Cycle Cleanup for GE Self-Clean Ovens
Once the self-clean cycle finishes‚ allow the oven to cool completely․ Then‚ wipe out the interior ash and residue․ A mild soapy water solution can be used if needed․ Ensure the interior is thoroughly dry before next use․
Allowing Oven to Cool Down
Once the intense self-cleaning cycle concludes‚ it is absolutely critical to allow your GE oven to cool down completely before attempting any further steps․ The high temperatures reached during the cleaning process‚ often exceeding 800-900 degrees Fahrenheit‚ mean the oven retains a significant amount of heat for an extended period․ Rushing this crucial cooling phase can pose severe safety risks‚ including burns from hot surfaces or residual heat․ The oven door will likely remain locked until a safe internal temperature is reached‚ a built-in safety feature designed to protect users․ Even after the lock disengages‚ surfaces can still be very warm․ It is imperative to exercise patience and ensure the oven is cool to the touch‚ both inside and out‚ before proceeding with the next stage of post-cycle cleanup․ This allows components to contract naturally and ensures a safe environment for handling the interior․ Do not force the door open or touch any internal parts while the oven is still hot․ Ultimately‚ this waiting period is essential for your safety and the longevity of the appliance․
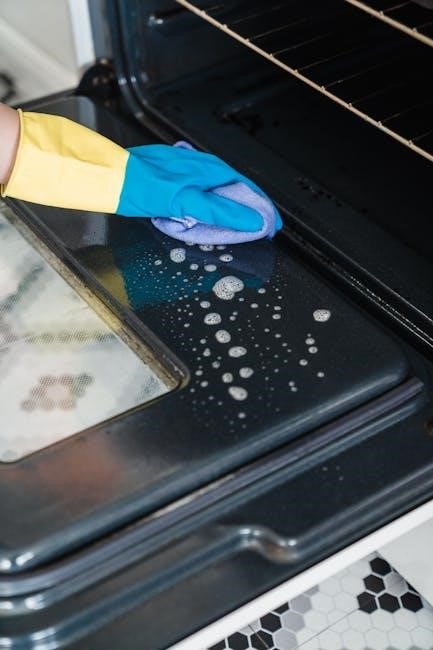
Cleaning Out Interior Residue
Once your GE oven has completely cooled after the self-clean cycle‚ the next crucial step is to remove the accumulated interior residue․ The high temperatures generated by the self-cleaning feature effectively burn away food spills and baked-on grease‚ converting them into a fine‚ powdery ash․ This ash will typically be found at the bottom of the oven cavity and possibly on the sides․ To clean this out‚ simply use a damp cloth‚ sponge‚ or paper towel․ Avoid using harsh chemical cleaners or abrasive scrubbers‚ as these are unnecessary and could potentially damage the oven’s enamel finish․ Gently wipe away all visible ash from the oven interior‚ working methodically to ensure all loose debris is collected․ This step is usually quick and easy‚ as the self-clean process has already done the hard work of breaking down the messes into manageable particles․ Ensure all traces of ash are thoroughly removed before proceeding․
Using Mild Soapy Water Solution
After you have removed the loose ash and residue from your GE self-cleaning oven‚ you might find that a slight film or a few stubborn spots remain․ For these instances‚ a mild soapy water solution is recommended to ensure a truly sparkling finish․ Prepare this solution by mixing a small amount of dish soap with warm water in a bowl or spray bottle․ Dampen a soft cloth or sponge with the solution‚ ensuring it’s not dripping wet‚ and gently wipe down the interior surfaces of the oven․ This helps to lift any lingering grease or residue that the initial dry wipe might have missed․ Be aware that processes may vary slightly for different models․ A generic owners manual‚ often found at appliance parts stores‚ can confirm specific recommendations․ This step ensures a thorough clean without resorting to harsh chemicals‚ which are unnecessary and can damage the oven’s specialized lining․ Always wipe the surfaces gently․
Ensuring Interior is Dry
After using a mild soapy water solution‚ completely drying your GE oven’s interior is paramount for proper appliance care․ Residual moisture causes unsightly streaks‚ water spots‚ or mildew‚ impacting hygiene and its overall appearance․ To dry thoroughly‚ use a clean‚ dry cloth to meticulously wipe all internal surfaces․ Focus on corners and crevices‚ absorbing all dampness; multiple dry cloths may be needed for a truly spotless finish․ For optimal drying‚ leave the oven door slightly ajar after wiping․ This encourages air circulation‚ helping remaining moisture evaporate naturally and completely․ A fully dry interior prevents future problems and ensures your oven remains pristine and always ready․ Always consult your GE model’s owner’s manual for drying procedure variations‚ as specific methods differ․
General Considerations for GE Self-Cleaning
Processes and methods vary slightly across GE oven models․ Always consult your specific owner’s manual for detailed instructions and model-specific nuances‚ ensuring proper and safe self-cleaning operation for your appliance․
Model-Specific Variations
It is crucial to understand that while general GE self-cleaning instructions are often similar‚ processes‚ methods‚ and specific procedures can vary significantly between different makes and models of GE ovens․ For instance‚ some newer models might offer a “Self-clean with Steam Clean” option‚ providing distinct cleaning cycles for varying soil levels․ Older or more basic models might only feature a standard high-heat self-clean․ The steps for activating the cycle‚ the duration options‚ and even the post-cycle cleanup recommendations can differ․ For example‚ the GE Profile JGSP48WHWW manual outlines particular steps that may not apply to a different series like the JGB635REK․ Always remember that features like remote control via Google Nest for Cync (C by GE) devices are only applicable to smart models․ Therefore‚ relying solely on generic advice might lead to suboptimal results or even damage․ A visit to an appliance parts store might provide a generic manual‚ but acquiring the specific owner’s manual for your exact GE oven model is paramount to ensure you follow the correct‚ manufacturer-recommended procedures for effective and safe self-cleaning․
Consulting the Owner’s Manual
Consulting your GE oven’s owner’s manual is paramount for proper self-cleaning․ While general instructions are widely available‚ the manual provides crucial model-specific guidance‚ clarifying unique features and operational nuances for your appliance․ It precisely details setting oven controls correctly and activating the self-clean feature‚ ensuring the cycle works as intended․ For instance‚ specific instructions for models like the JGB635REK 30 Inch Free Standing Gas Range are explicitly outlined within its user manual‚ detailing essential initial steps such as removing all items․ The manual clarifies unique procedures‚ recommended durations‚ and any critical pre- or post-cycle requirements for your exact oven․ Since processes and methods vary significantly between different GE makes and models‚ adhering to its manufacturer’s precise recommendations is vital․ This prevents potential issues and optimizes cleaning performance․ If your original manual is lost‚ a visit to almost any local appliance parts store will likely have a generic owner’s manual or the specific one for that oven‚ an essential acquisition․