child adhd questionnaire pdf nhs

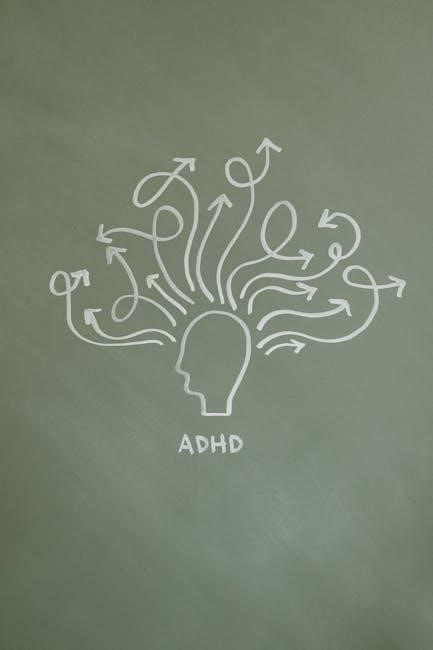
ADHD is a common neurodevelopmental condition in children, often causing hyperactivity, inattention, and impulsivity. With rising diagnoses, the NHS uses structured questionnaires to assess symptoms, aiding early identification and support.

Understanding ADHD Symptoms

ADHD symptoms in children typically include inattention, hyperactivity, and impulsivity. These can manifest as difficulty focusing, frequent fidgeting, or interrupting others. The NHS uses tools like the ADHD questionnaire to identify these traits, helping professionals assess severity and impact on daily life. Early recognition is crucial for timely support. With rising diagnoses, understanding these symptoms is key to addressing the growing demand for assessments and ensuring children receive appropriate care.

The Importance of Early Diagnosis

Early diagnosis of ADHD in children is crucial for providing timely support and improving long-term outcomes. The NHS emphasizes the use of tools like the ADHD questionnaire to identify symptoms early, ensuring children receive appropriate interventions. Delayed diagnosis can lead to academic, social, and emotional challenges, making early identification essential. With rising demand for assessments, the NHS is working to streamline processes, but the importance of early action remains paramount. Recognizing ADHD signs early helps families access necessary resources, fostering a supportive environment for the child’s development and well-being.

NHS Guidelines for ADHD Assessment

The NHS has established clear guidelines for ADHD assessments to ensure accurate and timely diagnoses. These guidelines emphasize the use of standardized tools, such as the ADHD questionnaire, to evaluate symptoms in children. With demand for assessments rising significantly—five times higher than in 2019—the NHS is working to manage the influx while maintaining thorough evaluation processes. The guidelines also highlight the importance of combining questionnaire results with clinical observations and other assessment methods, like the QbTest, to ensure comprehensive evaluations. By adhering to these guidelines, healthcare professionals can provide consistent and reliable diagnoses, helping children access the support they need for improved outcomes.

The Role of the NHS in ADHD Diagnosis

The NHS plays a crucial role in ADHD diagnosis by providing structured assessments, including the ADHD questionnaire, to manage rising demand and ensure accurate evaluations in children.

Overview of NHS ADHD Services

The NHS provides comprehensive ADHD services, including assessments, diagnoses, and management plans. With rising demand, the NHS has introduced tools like the QbTest to streamline evaluations. Structured questionnaires, such as the ADHD questionnaire, are integral to identifying symptoms and guiding interventions. These services aim to ensure early diagnosis and tailored support for children, addressing challenges like hyperactivity and inattention. The NHS also emphasizes multidisciplinary approaches, involving specialists and educators to create holistic care plans. Despite increased referrals, the NHS strives to maintain high standards, ensuring accessible and equitable care for all children suspected of having ADHD.

Challenges in Meeting Demand for Assessments

The NHS faces significant challenges in meeting the rising demand for ADHD assessments, with referrals increasing fivefold since 2019. Long waiting times and resource constraints strain services, delaying diagnoses and support for children. The system struggles to cope with the surge, impacting families seeking timely help. Despite innovations like the QbTest, widespread implementation remains uneven, exacerbating regional disparities. These challenges highlight the need for expanded capacity and efficient solutions to ensure equitable access to ADHD assessments and care.

NHS-Recommended Assessment Tools

The NHS employs a range of validated tools to assess ADHD in children, ensuring accurate and reliable diagnoses. The ADHD Questionnaire, available as a PDF, is a key resource, gathering detailed information on symptoms and behaviors. Additionally, the QbTest, a computer-based assessment, has been recommended for its ability to measure attention and hyperactivity objectively. These tools, alongside clinical evaluations, help healthcare professionals make informed decisions. By combining questionnaires with innovative technologies, the NHS aims to streamline the assessment process, reduce waiting times, and improve diagnostic accuracy for children suspected of having ADHD.

The Child ADHD Questionnaire

The Child ADHD Questionnaire is a vital tool used by the NHS to assess symptoms in children. Available as a PDF, it helps gather detailed information on behavior and development, aiding healthcare professionals in making accurate diagnoses and providing appropriate support.

Purpose of the ADHD Questionnaire

The ADHD questionnaire serves as a critical tool for identifying and assessing symptoms of ADHD in children. Its primary purpose is to gather comprehensive information about a child’s behavior, attention span, and developmental patterns. By standardizing the assessment process, the questionnaire ensures consistency in evaluating symptoms across different settings. It is typically completed by parents, teachers, or caregivers, providing valuable insights into how a child functions in various environments. The data collected helps healthcare professionals determine whether a child meets the diagnostic criteria for ADHD. This tool is essential for early identification, enabling timely interventions and support tailored to the child’s needs. Its structured format ensures that no significant aspects of behavior or development are overlooked during the evaluation process.

Structure and Content of the Questionnaire

The NHS ADHD questionnaire for children is a comprehensive tool designed to assess symptoms of ADHD in a structured manner. It typically includes multiple sections, such as behavior assessment, attention span evaluation, and developmental history. The questionnaire is standardized to ensure consistency in data collection, making it easier for healthcare professionals to evaluate symptoms accurately. Questions are often multiple-choice or rating-based, allowing respondents to provide detailed insights into a child’s behavior in various settings, such as home and school. Additionally, it may include open-ended questions for caregivers to describe specific challenges or observations. The questionnaire aligns with NHS guidelines and is a crucial part of the diagnostic process, helping to identify whether a child meets the criteria for ADHD.

How to Access the NHS ADHD Questionnaire PDF

The NHS ADHD questionnaire PDF is readily available for download on the NHS website or through authorized healthcare providers. Parents, educators, and healthcare professionals can access it free of charge, ensuring widespread availability for those seeking to assess ADHD symptoms in children. The questionnaire is designed to be user-friendly, with clear instructions and structured questions to evaluate attention, behavior, and developmental milestones. Once completed, the questionnaire is typically submitted to a healthcare professional for review. It is an essential tool in the early identification and diagnosis of ADHD, aligning with NHS guidelines for comprehensive assessment. Accessing the PDF is straightforward, and its use is encouraged as part of the diagnostic process.

Assessment and Diagnosis Process

The ADHD assessment involves a comprehensive evaluation, including questionnaires, behavioral observations, and specialist reviews. Tools like the NHS ADHD questionnaire and QbTest aid in accurate diagnosis and support planning.

Preparation for an ADHD Assessment

Preparing for an ADHD assessment is crucial for accurate results. Parents and caregivers should gather detailed information about the child’s behavior, including specific examples of inattention, hyperactivity, and impulsivity. Completing the NHS ADHD questionnaire beforehand ensures all relevant symptoms are documented. Involving teachers or educators can provide additional insights into the child’s behavior in different settings. Organizing any previous reports or records, such as school assessments or medical history, is also essential. Understanding the assessment process and what to expect can help reduce anxiety for both children and families. Being well-prepared enables healthcare professionals to make informed decisions and ensures the child receives appropriate support.

The Role of Questionnaires in Diagnosis

Questionnaires are essential tools in ADHD diagnosis, providing structured insights into a child’s symptoms. The NHS ADHD questionnaire collects detailed information on behaviors like inattention and hyperactivity, aiding clinicians in assessing symptom severity. Completed by parents, teachers, and caregivers, these tools offer a comprehensive view of behavior across settings. They help identify patterns that may not be apparent during a single assessment. While not diagnostic on their own, questionnaires complement other evaluations, such as the QbTest, to ensure accuracy. By standardizing the evaluation process, they support early identification and appropriate intervention, making them a crucial part of the diagnostic journey.

Understanding the Diagnostic Criteria

ADHD diagnosis relies on specific criteria, primarily from the DSM-5, which outlines symptoms of inattention, hyperactivity, and impulsivity. For a diagnosis, symptoms must persist for at least six months, be present in two or more settings, and cause significant impairment. The NHS uses these criteria to ensure consistency in assessments. Clinicians evaluate the severity of symptoms, categorizing ADHD as mild, moderate, or severe. The diagnostic process involves a comprehensive review of behavior patterns, often supported by questionnaire data. Early identification of these criteria helps guide appropriate interventions, ensuring children receive timely support. Understanding these criteria is vital for accurate diagnosis and effective management of ADHD in children.

ADHD Assessment Tools

The NHS employs various tools, including traditional methods and computer-based assessments like QbTest, to evaluate ADHD symptoms. These tools, combined with questionnaires, provide a comprehensive evaluation of a child’s behavior and attention patterns, aiding in accurate diagnosis and tailored support strategies.

Traditional Assessment Methods

Traditional ADHD assessment methods involve comprehensive clinical evaluations, including detailed interviews with parents and teachers, behavioral observations, and standardized rating scales. These tools, such as the Conners or SNAP-IV questionnaires, assess symptoms of inattention, hyperactivity, and impulsivity. Clinicians also review developmental history and rule out other conditions that may mimic ADHD. While these methods are effective, they can be time-consuming and may delay diagnosis due to high demand. The NHS often combines these approaches with newer technologies, like QbTest, to streamline the process. Despite challenges in meeting demand, traditional methods remain a cornerstone of ADHD diagnosis, ensuring a thorough understanding of a child’s needs and providing a foundation for personalized support plans.

Computer-Based Assessments like QbTest

Computer-based assessments, such as QbTest, are innovative tools increasingly used by the NHS to evaluate ADHD symptoms in children. QbTest measures attention and impulsivity through interactive tasks, providing objective data to support diagnosis. Unlike traditional methods, it offers a faster and more engaging way to assess symptoms, reducing the time to diagnosis. The NHS recommends QbTest as part of a comprehensive evaluation, often alongside questionnaires and clinical interviews. While it streamlines the process, it does not replace the need for thorough clinical interpretation. This technology helps address the rising demand for ADHD assessments, offering a modern solution to improve efficiency while maintaining diagnostic accuracy.

Combining Questionnaires with Other Tools

Combining questionnaires with other assessment tools enhances the accuracy of ADHD diagnosis in children. The NHS often uses questionnaires alongside computer-based assessments like QbTest and clinical observations to gather a comprehensive understanding of symptoms. While questionnaires provide insights into behavioral patterns and developmental history, tools like QbTest measure attention and impulsivity objectively. This multi-faceted approach ensures a more accurate diagnosis, as it considers both subjective and objective data. Clinicians can cross-reference questionnaire responses with test results to identify consistent patterns, reducing the risk of misdiagnosis. This integrated method aligns with NHS guidelines, which emphasize the importance of thorough evaluation in addressing the rising demand for ADHD assessments effectively.

Diagnosis and Next Steps

Receiving an ADHD diagnosis is the first step toward tailored support. The NHS offers guidance on treatment plans, lifestyle adjustments, and ongoing monitoring to manage symptoms effectively.

Receiving a Diagnosis

Receiving an ADHD diagnosis is a crucial step in understanding a child’s needs. The NHS uses comprehensive assessments, including questionnaires, to confirm symptoms and severity. A diagnosis provides clarity, enabling families to access tailored support. Following diagnosis, the NHS typically outlines a personalized plan, which may include behavioral strategies, educational adjustments, and, if necessary, medication. Early diagnosis is vital for addressing challenges promptly. The rising demand for assessments highlights the importance of efficient processes to ensure timely support. Families are encouraged to engage with recommended resources and services to navigate the next steps effectively. Monitoring progress and adjusting plans as needed are key to long-term management and well-being.

Developing a Treatment Plan

A treatment plan for a child with ADHD is tailored to their specific needs, incorporating insights from the NHS questionnaire and assessment results. It often includes a combination of strategies, such as behavioral therapy, lifestyle adjustments, and, in some cases, medication. The plan aims to address core symptoms like inattention and hyperactivity while fostering emotional and academic growth. Parents, educators, and healthcare providers collaborate to ensure consistency across home and school environments. Regular monitoring is essential to assess progress and make necessary adjustments. With the rising demand for ADHD assessments, the NHS emphasizes the importance of personalized and efficient treatment plans to support children effectively. Early intervention and adaptability are key to long-term success.

Monitoring Progress and Adjustments

Monitoring a child’s progress after an ADHD diagnosis is crucial for effective management. The NHS recommends regular follow-ups to assess how well the treatment plan is working. This involves reviewing behavioral changes, academic performance, and emotional well-being. Adjustments to the plan may include modifying medication dosages, refining behavioral strategies, or incorporating new therapies. Parents and educators play a key role in providing feedback, which helps healthcare providers make informed decisions. The NHS also emphasizes the importance of using tools like the ADHD questionnaire to track ongoing symptoms and responses to interventions; By continuously monitoring and adapting the approach, children with ADHD can receive the most effective support tailored to their evolving needs.

Treatment Options for ADHD

ADHD treatment often involves medication, behavioral therapy, and lifestyle changes. The NHS may recommend tailored plans, including educational support and home strategies, to manage symptoms effectively in children.

Behavioral Therapy and Interventions

Behavioral therapy is a cornerstone of ADHD management, focusing on changing harmful behaviors and reinforcing positive ones. Techniques like positive reinforcement and structured routines help children manage impulsivity and improve focus. Parents and educators are often involved in creating consistent environments that support these interventions. The NHS recommends behavioral strategies as a first-line approach, especially for younger children, before considering medication. These interventions are tailored to the child’s specific needs and may include social skills training and emotional regulation exercises. While effective, access to specialized behavioral therapists can be limited due to high demand, highlighting the need for innovative solutions to support families.

Educational Support and Accommodations

Educational support is crucial for children with ADHD, ensuring they thrive in school. The NHS recommends tailored accommodations, such as individualized education plans (IEPs) or 504 plans, to address specific needs. These may include extra time for assignments, use of assistive technology, and a structured learning environment. Teachers play a key role in implementing these strategies, often receiving training to support ADHD students effectively. Behavioral support plans are also common, helping children manage impulsivity and stay focused. Additionally, schools may offer small group instruction or one-on-one tutoring to reinforce learning. By collaborating with parents and healthcare providers, educators can create a supportive environment that fosters academic success and social development for children with ADHD.

Lifestyle Changes and Home Strategies

Lifestyle changes and home strategies play a vital role in managing ADHD in children. Establishing a structured daily routine helps provide stability and reduces chaos. A balanced diet rich in nutrients, along with regular physical activity, can improve focus and behavior. Encouraging outdoor play and limiting screen time are also beneficial. Parents can create a supportive environment by organizing tasks, using visual reminders, and implementing positive reinforcement techniques. Tools like behavior charts or checklists can help monitor progress. Additionally, mindfulness practices and stress management techniques can benefit both children and families. These strategies, combined with professional guidance, empower families to create a nurturing home environment that supports their child’s well-being and development.

Support Systems for Families

Families of children with ADHD benefit from counseling, support groups, and community resources. These systems provide guidance, emotional support, and practical strategies to manage daily challenges effectively.

Family Counseling and Guidance

Family counseling plays a vital role in supporting parents and siblings of children with ADHD. It helps them understand the condition, develop coping strategies, and improve communication. Guidance from specialists enables families to create a supportive environment, addressing behavioral challenges and emotional needs. Counseling also provides emotional support, reducing stress and fostering resilience. Additionally, it equips parents with practical tools to manage daily routines and encourage positive behavior. The NHS often recommends such services as part of a comprehensive care plan, ensuring families receive the resources they need to thrive. This structured approach helps families navigate the complexities of ADHD together, promoting long-term well-being.

Support Groups for Parents

Support groups for parents of children with ADHD offer a platform for sharing experiences and gaining insights. These groups provide emotional support, helping parents cope with challenges and reduce feelings of isolation. They also share practical strategies for managing ADHD behaviors and improving family dynamics. Many groups are facilitated by professionals who offer guidance and resources. Parents can learn from others facing similar situations, fostering a sense of community and understanding. The NHS often recommends such groups as part of a holistic support system. By connecting with others, parents can build confidence and gain valuable tools to support their child’s well-being. These groups play a crucial role in empowering families to navigate ADHD effectively.

Community Resources and Services

Community resources and services play a vital role in supporting families of children with ADHD. Local organizations often provide workshops, counseling, and recreational activities tailored to meet the unique needs of these children. Many communities offer access to specialists, such as occupational therapists and behavioral coaches, who can provide personalized guidance. Online forums and local support networks also connect families, sharing resources and advice. These services help families navigate the challenges of ADHD, offering practical strategies and emotional support. By leveraging these resources, parents can create a more supportive environment for their child, fostering growth and well-being. Community-based initiatives ensure that families receive the help they need to thrive.

Future Directions in ADHD Care

Future ADHD care focuses on integrating advanced assessment tools like QbTest, enhancing diagnostic accuracy, and improving accessibility to reduce waiting times for NHS services.

Innovations in ADHD Assessment

The NHS is embracing innovative tools like QbTest, a computer-based assessment that measures attention and hyperactivity in children, offering faster and more accurate diagnoses. This technology reduces waiting times and enhances the precision of ADHD evaluations. By combining traditional questionnaires with digital assessments, clinicians can gather comprehensive data, improving diagnostic accuracy. QbTest is particularly effective for young patients, as it provides objective measures of symptoms. Such innovations align with the NHS’s goal to modernize ADHD care, ensuring timely and reliable assessments. These advancements not only streamline the process but also help meet the growing demand for ADHD evaluations, making care more accessible and efficient for families across the UK.

Improving Access to NHS Services

The NHS is working to enhance access to ADHD assessments amid rising demand, as highlighted by reports showing a significant increase in referrals. To address this, the NHS has introduced innovative tools like the QbTest, a computer-based assessment that helps reduce waiting times and improve diagnostic accuracy. Additionally, the use of digital platforms for distributing and submitting ADHD questionnaires has streamlined the process, making it more accessible for families. These efforts aim to reduce delays and ensure equitable access to care. By leveraging technology and expanding outreach, the NHS is committed to meeting the growing need for ADHD services, ensuring timely support for children and their families across the UK;

Additional Resources

Access the NHS ADHD questionnaire PDF and explore recommended guides, online forums, and support communities for comprehensive understanding and managing ADHD in children effectively.

Recommended Reading and Guides

The NHS ADHD questionnaire PDF is a vital resource for assessing symptoms in children. Additionally, recommended reading includes books like “Delivered from Distraction” and “The ADHD Handbook”, offering comprehensive insights. Online guides from reputable sources such as the British Psychological Society and Young Minds provide practical strategies for parents and educators. These resources cover topics like behavioral management, educational support, and lifestyle adjustments. They also emphasize the importance of early diagnosis and structured assessment tools. Families can benefit from evidence-based approaches to understanding and managing ADHD effectively. Accessing these resources through the NHS or trusted online platforms ensures families receive reliable and up-to-date information to support their child’s journey.

Online Communities and Forums

Online communities and forums provide invaluable support for families navigating ADHD in children. Platforms like Facebook Groups, Reddit, and specialized ADHD forums offer spaces to share experiences and advice. Many discussions focus on the NHS ADHD questionnaire PDF, with parents exchanging tips on completing it accurately. These communities also share resources, such as guides from the ADHD Foundation and Young Minds, to help families understand the condition better. Additionally, forums often highlight the latest NHS recommendations and tools, like the QbTest, to aid in assessments. Engaging with these online spaces can provide emotional support, practical strategies, and a sense of connection for those dealing with ADHD.

In conclusion, understanding and addressing ADHD in children requires a comprehensive approach, with the NHS playing a pivotal role through structured assessments and tools like the ADHD questionnaire PDF. The rising demand for ADHD assessments highlights the need for innovative solutions, such as the QbTest, to streamline diagnoses. Early identification and support are crucial for improving outcomes, and resources like online communities and forums provide additional guidance for families. By combining medical assessments with educational and lifestyle strategies, children with ADHD can thrive. The NHS continues to evolve its services, aiming to meet growing needs while ensuring access to care. Families should leverage available resources to navigate the journey of ADHD diagnosis and management effectively.

overhead crane inspection checklist pdf

Overhead crane inspection checklists are essential for ensuring safety, preventing accidents, and maintaining compliance. They provide a comprehensive guide for daily, monthly, and annual inspections, covering all critical components.

1.1 Importance of Regular Inspections

Regular inspections of overhead cranes are critical for ensuring operational safety and preventing accidents. They help identify potential issues before they lead to equipment failure or accidents. According to OSHA, overhead crane accidents cause approximately 175 severe injuries and nearly 45 fatalities annually. Neglecting inspections can result in costly repairs, downtime, and legal consequences; A structured inspection checklist ensures compliance with safety standards and prolongs equipment lifespan. By addressing wear and tear early, inspections safeguard both the workforce and assets, making them a cornerstone of workplace safety and efficiency.

1.2 Purpose of an Overhead Crane Inspection Checklist

An overhead crane inspection checklist serves as a detailed guide to ensure thorough evaluation of crane components. It outlines specific items to inspect, such as wire ropes, chains, brakes, and electrical systems, at daily, monthly, and annual intervals. The checklist ensures compliance with safety standards like OSHA 1910.179, helping to prevent accidents and extend equipment lifespan. By systematically addressing each component, it minimizes risks and ensures reliable operation. A PDF checklist is particularly useful for its portability and ease of use, making it a vital tool for maintaining safety and efficiency in industrial settings.

1.3 Benefits of Using a PDF Checklist

Using a PDF checklist for overhead crane inspections offers numerous advantages. It provides a structured format for documenting findings, ensuring consistency and thoroughness. PDF checklists are easily accessible and can be shared across devices, making them ideal for team collaboration. They also serve as permanent records, supporting compliance with regulatory requirements. Additionally, PDFs are environmentally friendly compared to paper-based systems. Many providers offer free downloadable templates, allowing businesses to implement them without additional costs. This digital approach streamlines the inspection process, enhancing efficiency and accuracy while maintaining a reliable audit trail for future reference.

Daily Overhead Crane Inspection Checklist

Daily inspections ensure crane safety and functionality. Check controls, hooks, chains, wire ropes, and electrical systems. Verify proper operation and document any issues for immediate action.

2.1 Pre-Operational Checks

Pre-operational checks are crucial for ensuring crane safety. Inspect the controls, hooks, chains, and wire ropes for damage or wear. Verify proper electrical connections and system functions. Check the cab, bridge, and trolley for alignment and stability. Ensure all safety devices are functioning correctly. Review the load chart to confirm the crane’s capacity. Test all operational movements, including hoisting, trolleying, and braking. Document any issues or malfunctions and address them before operation. These checks help prevent accidents and ensure smooth crane performance throughout the workday.

2.2 Visual Inspections

Visual inspections are a critical part of daily overhead crane maintenance. Examine wire ropes for frays, kinks, or corrosion. Check chains and hooks for wear, cracks, or deformation. Inspect structural components like the bridge and trolley for alignment and stability. Look for signs of damage or rust on beams and supports. Verify electrical components, including cables and connections, for wear or damage. Ensure all safety devices, such as limit switches and brakes, are intact and functioning. Document any abnormalities or defects for further investigation. Regular visual checks help identify potential issues before they escalate, ensuring safe and reliable crane operation.

2.3 Operational Tests

Operational tests are essential to ensure the crane functions correctly. Test hoisting, trolley, and bridge movements for smooth operation. Check load brakes, limit switches, and emergency stops. Verify proper operation of controls and alarms. Perform load tests annually or after major repairs. Ensure all safety devices activate as intended. Document test results and address any malfunctions promptly. Regular operational testing helps maintain efficiency, safety, and compliance with standards. Proper documentation ensures accountability and traceability of crane performance over time.

Monthly Overhead Crane Inspection Checklist

A monthly inspection ensures ongoing crane safety and efficiency. Check wire ropes, chains, and structural components for wear. Verify electrical systems and trolley functions. Document all findings.

3.1 Wire Rope and Chain Inspection

The wire rope and chain inspection is a critical part of monthly overhead crane maintenance. Inspect for visible wear, damage, or corrosion. Check for proper lubrication and alignment. Ensure all wire ropes are securely attached and free from twists or kinks. Examine chains for stretch, wear, or broken links. Measure wire rope diameter to detect any reduction. Document any findings and replace components if necessary. This step ensures safe and efficient crane operation, preventing potential failures. Regular inspections also help maintain compliance with safety standards and extend equipment lifespan;

3.2 Structural and Component Checks

During monthly inspections, examine the crane’s structural components for damage or wear. Check the gantry, end trucks, and runway beams for alignment and integrity. Inspect bolts and fasteners for tightness and signs of loosening. Verify the condition of trolley and hoist components, ensuring proper alignment and no excessive wear. Look for cracks, corrosion, or deformation in load-bearing parts. Ensure all safety devices, such as limit switches and buffers, are functioning correctly. Address any issues promptly to prevent structural failure and maintain operational safety. Regular checks help identify potential problems before they escalate, ensuring reliable crane performance and compliance with safety standards.

3.3 Electrical System Verification

Verify the crane’s electrical system to ensure safe and efficient operation. Check for damaged or frayed wires, loose connections, and malfunctioning components. Inspect the control panel, motor, and contactors for proper function. Test the limit switches and emergency stop systems to confirm they activate correctly. Ensure all electrical components are free from dust and moisture, which can cause malfunctions. Use a multimeter to check voltage and resistance levels if necessary. Document any issues and address them promptly to prevent electrical failures. A well-maintained electrical system is crucial for reliable crane performance and workplace safety, aligning with OSHA standards and best practices.

Annual Overhead Crane Inspection Checklist

The annual inspection ensures comprehensive evaluation of mechanical, structural, and electrical systems. It includes load testing, thorough component examination, and documentation review to guarantee compliance and optimal performance.

4.1 Comprehensive Mechanical Inspection

A comprehensive mechanical inspection is a detailed annual check of all crane components. It includes examining wire ropes, chains, gears, and brakes for wear or damage. Lubrication levels, drive systems, and hoisting mechanisms are also evaluated. This inspection ensures that all parts are functioning correctly and safely. Any issues found are documented and addressed promptly to prevent operational disruptions. Proper documentation is maintained for compliance and future reference. This thorough process helps maintain crane efficiency and longevity, ensuring reliable performance and workplace safety.

4.2 Load Testing Procedures

Load testing is a critical part of annual crane inspections, ensuring the crane can safely handle its rated load. The process involves using test weights to verify the crane’s capacity and performance. During testing, the crane’s hoisting, trolley, and bridge motions are checked for smooth operation. Any signs of deflection, swaying, or component stress are documented. This procedure ensures compliance with safety standards and prevents potential failures. Proper documentation of test results is essential for maintaining records and verifying crane reliability. Regular load testing is vital for upholding workplace safety and operational efficiency.

4.3 Documentation Review

Documentation review is a vital step in annual inspections, ensuring all records are accurate and up-to-date. This includes verifying inspection logs, maintenance records, and load test results. The checklist requires cross-checking these documents with OSHA standards to confirm compliance. Any discrepancies or unresolved issues must be addressed promptly. Proper documentation ensures accountability and provides a clear audit trail. It also helps track the crane’s maintenance history, supporting long-term reliability and safety. Accurate records are essential for legal compliance and demonstrating adherence to safety protocols. Regular reviews help maintain transparency and accountability in crane operations.

OSHA Compliance and Overhead Crane Inspections

OSHA compliance is crucial for overhead crane safety, requiring regular inspections to meet strict standards. Checklists ensure adherence to regulations, preventing accidents and legal issues.

5.1 OSHA Regulations for Crane Inspections

OSHA regulations mandate strict guidelines for overhead crane inspections to ensure workplace safety. Daily pre-shift inspections are required, focusing on critical components like controls, hooks, chains, and wire ropes. Monthly inspections must cover structural integrity, electrical systems, and hoist functions. Annual inspections are more comprehensive, involving load testing and thorough mechanical evaluations. Documentation of all inspections is essential for compliance. Employers must maintain detailed records and ensure that only trained personnel perform inspections. Adhering to these regulations helps prevent accidents, reduces liability, and ensures a safe working environment. OSHA standards are non-negotiable for operational safety and legal compliance.

5.2 Frequency of Inspections as per OSHA

OSHA mandates specific inspection frequencies for overhead cranes to ensure safety and compliance. Daily inspections must be conducted before each shift, focusing on critical components like controls, wire ropes, and hooks. Monthly inspections are required to check structural integrity, electrical systems, and hoist functions. Annual inspections are more thorough, involving load testing and detailed mechanical evaluations. Additionally, third-party inspections are required every 4 years for certain components. These frequencies are non-negotiable and must be strictly followed to prevent accidents and maintain legal compliance. Proper documentation of all inspections is essential to meet OSHA standards and ensure operational safety.

Safety Best Practices for Overhead Crane Inspections

Safety best practices for overhead crane inspections include using PPE, following lockout/tagout procedures, and ensuring emergency preparedness. Compliance with OSHA standards is crucial for operational safety.

6.1 Personal Protective Equipment (PPE)

Personal Protective Equipment (PPE) is crucial for overhead crane inspections. Inspectors must wear hard hats, safety glasses, gloves, and steel-toe boots. High-voltage areas require additional gear like insulating gloves and arc-flash suits. PPE ensures compliance with safety standards and prevents injuries from falling objects or electrical hazards. Regularly inspect PPE for damage or wear. Employers must provide training on proper PPE use. Adhering to PPE requirements is a statutory obligation in many regions, ensuring a safe working environment during crane inspections and maintenance activities.

6.2 Lockout/Tagout Procedures

Lockout/Tagout (LOTO) procedures are critical for ensuring safety during overhead crane inspections. These steps involve disconnecting power sources and securing components to prevent accidental operation. Inspectors must apply approved locks and tags to all energy sources, including electrical, hydraulic, and mechanical systems. Only authorized personnel should perform LOTO, and all team members must understand the procedures. Regular training on LOTO protocols is essential to maintain compliance with safety standards. Proper implementation of LOTO ensures the crane is safely de-energized, protecting inspectors from potential hazards during maintenance or inspection tasks.

6.3 Emergency Preparedness

Emergency preparedness is vital for safely handling overhead crane incidents. A well-defined plan ensures quick responses to accidents or malfunctions. Regular training on emergency procedures, such as evacuation routes and first aid, is essential; Inspectors should identify potential hazards and have emergency contact information readily available. Fire extinguishers, first aid kits, and communication devices must be accessible. Proper signage and clear communication protocols help prevent panic. Regular drills ensure readiness and compliance with safety standards. A proactive approach to emergencies minimizes risks and protects both personnel and equipment during crane operations and inspections.

Overhead Crane Maintenance Checklist

An overhead crane maintenance checklist ensures regular lubrication, timely replacement of wear parts, and thorough cleaning to maintain optimal performance and safety.

7.1 Lubrication Schedule

A well-planned lubrication schedule is crucial for maintaining overhead crane performance. Regular greasing of moving parts, such as wire ropes, pulleys, and gears, prevents wear and tear. Ensure lubrication intervals align with manufacturer recommendations and operational frequency. Over-lubrication can attract dust, while under-lubrication leads to friction and damage. Use high-quality, crane-specific lubricants to withstand heavy loads and environmental conditions. Refer to the overhead crane inspection checklist PDF for detailed lubrication points and frequencies. Proper lubrication enhances safety, reduces downtime, and extends equipment lifespan, ensuring compliance with OSHA standards and optimal functionality.

7.2 Replacement of Wear Parts

Regular replacement of wear parts is vital for overhead crane safety and efficiency. Components like wire ropes, chains, and brake pads degrade over time and must be replaced promptly. Adhering to manufacturer guidelines ensures reliability. Timely replacement prevents unexpected failures, reducing downtime and potential hazards. Use the overhead crane inspection checklist PDF to identify and track worn parts. Proactive maintenance enhances operational safety and extends equipment lifespan, ensuring compliance with industry standards and preventing costly repairs.

7.3 Cleaning and Painting

Cleaning and painting are crucial for maintaining the longevity and safety of overhead cranes. Regular cleaning removes dirt, grease, and debris that can hinder performance and cause corrosion. Painting protects metal surfaces from rust and environmental damage, ensuring structural integrity. Focus on exposed areas like beams, girders, and hoist components. Use high-quality, durable paints suitable for industrial environments. Follow manufacturer recommendations for frequency, typically every 5-10 years, depending on usage and conditions. Proper cleaning and painting not only enhance aesthetics but also prevent premature wear, ensuring compliance with safety standards and extending equipment lifespan.

Troubleshooting Common Issues

Troubleshooting common issues in overhead cranes involves identifying wire rope wear, addressing brake system failures, and resolving electrical malfunctions. Regular inspections and checklists help prevent these problems.

8.1 Identifying Wear and Tear

Identifying wear and tear during overhead crane inspections is crucial for maintaining safety and functionality. Regularly inspect wire ropes for frays, corrosion, or uneven wear. Chains should be checked for elongation or damaged links. Hooks must be free from cracks or deformation. Look for signs of excessive wear on sheaves, drums, and brake systems. Ensure all moving parts are properly lubricated to prevent premature wear. Structural components, such as girders and end trucks, should be examined for rust or misalignment. Documenting these findings helps in scheduling timely repairs and preventing potential failures. This process ensures compliance with safety standards and extends equipment lifespan.

8.2 Addressing Electrical Malfunctions

Electrical malfunctions in overhead cranes can pose significant safety risks and operational disruptions. During inspections, check for loose or corroded connections, damaged wires, and malfunctioning controls. Use multimeters to test voltage and circuit continuity. Ensure all electrical components, such as motor starters and contactors, are functioning properly. If issues are found, disconnect power and perform repairs with certified tools. Replace faulty components promptly to prevent further damage. Always follow manufacturer guidelines and safety protocols when addressing electrical problems. Proper documentation of repairs and testing is essential for compliance and future reference.

8.3 Resolving Hydraulic System Problems

Hydraulic system issues in overhead cranes can lead to operational failures and safety hazards. Regularly inspect for leaks, worn seals, and contaminated fluid. Check hydraulic pressure levels and ensure proper fluid viscosity. If malfunctions occur, isolate the system and perform a thorough diagnostic test. Replace damaged components, such as pumps or valves, with OEM-approved parts. Always follow manufacturer guidelines for hydraulic system maintenance. Use clean, high-quality hydraulic fluid to prevent contamination. Document all repairs and testing for compliance and future reference. Addressing hydraulic issues promptly ensures reliable crane performance and workplace safety.

Documentation and Record-Keeping

Maintaining detailed inspection logs and compliance records is crucial for accountability and traceability. Use PDF checklists to organize findings, ensuring all inspections are documented and easily accessible.

9.1 Maintaining Inspection Logs

Maintaining accurate and detailed inspection logs is vital for tracking crane condition and ensuring compliance. Use PDF checklists to record findings, including dates, issues, and corrective actions. Digital logs simplify organization and accessibility, while paper records should be stored securely. Regularly review logs to identify recurring issues and plan maintenance. Proper documentation also supports compliance with OSHA regulations and provides a clear audit trail. Consistent record-keeping helps prevent oversights and ensures accountability, ultimately enhancing safety and operational efficiency.

9.2 Compliance Documentation

Compliance documentation is critical for adhering to regulatory standards and ensuring accountability. Maintain detailed records of all inspections, including dates, findings, and corrective actions. OSHA requires documentation of crane inspections, and having organized records simplifies audits. Use PDF checklists to ensure consistency and accuracy in reporting. Digital tools can streamline documentation, making it easier to track and retrieve information. Proper documentation also demonstrates commitment to safety and regulatory adherence, reducing liability risks. Regularly update and store records securely to support compliance and operational transparency.

Training for Overhead Crane Inspectors

Proper training ensures inspectors are certified and knowledgeable in crane safety standards. Regular refresher courses keep skills updated, promoting compliance and operational excellence.

10.1 Inspector Certification Programs

Inspector certification programs ensure that individuals are proficient in conducting thorough overhead crane inspections. These programs typically include comprehensive training on safety standards, inspection techniques, and regulatory compliance; Certified inspectors are equipped to identify potential hazards, ensuring equipment reliability and workplace safety. Many programs also cover the use of inspection checklists, such as the overhead crane inspection checklist PDF, to streamline the process. Certification validates an inspector’s expertise, fostering trust and accountability in maintaining operational integrity and preventing accidents. Regular updates to these programs keep inspectors informed about the latest industry advancements and requirements.

10.2 Refresher Training Requirements

Refresher training is crucial for overhead crane inspectors to stay updated on the latest safety protocols and inspection techniques. These programs ensure inspectors remain competent in using tools like the overhead crane inspection checklist PDF. Training covers updates on regulations, new technologies, and best practices, addressing any skill gaps. Practical exercises reinforce theoretical knowledge, ensuring inspectors can identify hazards and perform thorough checks. Many programs recommend refresher courses every 2-3 years to maintain certification and compliance. This ongoing education ensures inspectors are equipped to handle evolving industry standards, promoting workplace safety and equipment reliability. Regular training also enhances the effectiveness of inspection checklists.

Common Overhead Crane Inspection Challenges

Wire rope wear, brake failures, and electrical anomalies are frequent issues. These challenges require meticulous attention to ensure safety and compliance with overhead crane inspection standards.

11.1 Wire Rope Wear and Damage

Wire rope wear and damage are common challenges in overhead crane inspections. Regular checks are crucial to identify fraying, corrosion, or kinking, which can lead to dangerous failures. Environmental factors, heavy usage, and improper maintenance often accelerate wear. Inspectors must look for signs of wire breakage, abrasion, or excessive stretching. Lubrication deficiencies can also exacerbate rope degradation. If left unaddressed, these issues can result in operational hazards and costly repairs. Ensuring proper lubrication and timely replacement of damaged ropes is essential to maintain safety and compliance with OSHA standards. Regular inspections help prevent accidents and extend the crane’s service life.

11.2 Brake System Failures

Brake system failures are a critical issue in overhead crane operations, posing significant safety risks. Regular inspections are vital to identify worn brake pads, hydraulic leaks, or air system malfunctions. Over time, components like brake drums and shoes can wear out, reducing stopping efficiency. Environmental factors, such as moisture or dust, can also compromise brake performance. Failure to address these issues can lead to accidents, injuries, and costly downtime. Proper maintenance, including timely replacement of worn parts and lubrication, is essential to ensure reliable braking and prevent operational hazards. Brake system failures underscore the importance of rigorous inspection and preventive maintenance routines.

11.3 Electrical System Anomalies

Electrical system anomalies are a common challenge in overhead crane inspections. Issues like faulty wiring, short circuits, or malfunctioning controls can disrupt operations and pose safety risks. Over time, electrical components may degrade due to wear, environmental factors, or improper installation. Regular inspections are crucial to identify frayed cables, loose connections, or overheating motors. Addressing these anomalies promptly prevents unexpected malfunctions and ensures compliance with safety standards. Proper testing and maintenance of electrical systems are essential to avoid downtime and potential hazards, ensuring smooth and reliable crane performance. Electrical anomalies highlight the need for thorough inspection and preventive maintenance practices.

Overhead crane inspection checklists are vital for ensuring safety, compliance, and operational efficiency. Regular inspections help identify potential issues before they escalate, reducing risks and downtime. By following daily, monthly, and annual checklists, organizations can maintain crane performance and extend equipment lifespan. Compliance with OSHA standards and proper documentation are critical for legal and safety reasons. Addressing common challenges like wire rope wear and electrical anomalies ensures reliable operation. Investing in inspector training and using PDF checklists enhances thoroughness and accessibility. Ultimately, a well-structured inspection program fosters a safer workplace and operational excellence, safeguarding both equipment and personnel. Consistency is key to long-term success.

black and decker smart battery charger instruction manual

Product Overview

The Black and Decker Smart Battery Charger is a fully automatic electronic charger designed for efficient battery maintenance․ It offers variable charge rates (40/20/10/4 Amp) and is compatible with a range of battery types․ Compact and user-friendly, it ensures safe and reliable charging for vehicles and equipment, making it a versatile solution for everyday use․

1․1 Key Features of the Black and Decker Smart Battery Charger

The Black and Decker Smart Battery Charger boasts fully automatic electronic charging, eliminating the need for manual adjustments․ It features variable charge rates of 40/20/10/4 Amp, catering to different battery sizes and types․ Designed for safety, it includes overcharge protection and thermal monitoring to prevent overheating․ The charger is compatible with a wide range of batteries, including standard, deep-cycle, and AGM types; Its compact design makes it easy to use in various settings, while the intuitive interface ensures a user-friendly experience․ These features make it a reliable and versatile tool for maintaining vehicle and equipment batteries efficiently․

1․2 Compatibility with Different Battery Types

The Black and Decker Smart Battery Charger is engineered to work seamlessly with various battery types, ensuring versatility for different applications․ It supports standard, deep-cycle, and AGM batteries, making it suitable for cars, trucks, RVs, and marine vehicles․ The charger’s adjustable charge rates (40/20/10/4 Amp) allow it to accommodate batteries of different capacities, from small 12V batteries to larger deep-cycle units․ This universal compatibility ensures that users can rely on a single charger for all their battery maintenance needs, providing convenience and efficiency across multiple vehicles and equipment․

1․3 Design and Build Quality

The Black and Decker Smart Battery Charger boasts a rugged and compact design, ensuring durability and ease of use․ Constructed with high-quality materials, it features a robust housing that protects internal components from wear and tear․ The charger is lightweight and portable, making it easy to transport between vehicles or workplaces․ Its intuitive interface, including clear LED indicators, provides real-time feedback on charging status․ Built-in thermal protection and automatic shut-off enhance safety and prevent overheating․ The ergonomic design ensures user comfort during operation, while the overall build quality reflects Black and Decker’s commitment to reliability and performance․ This charger is designed to withstand demanding environments and deliver consistent results over time․

Safety Features and Precautions

The Black and Decker Smart Battery Charger includes multiple safety features, such as automatic shut-off and thermal protection, to prevent overheating and battery explosion risks․ Always follow the manual’s precautions to ensure safe operation․

2․1 Important Safety Information

Always read and follow the Black and Decker Smart Battery Charger manual carefully to ensure safe operation․ Avoid using damaged batteries or incorrect types, as this can cause malfunctions․ Keep the charger away from water and extreme temperatures․ Never modify or tamper with the device, as this may lead to electrical hazards․ Ensure proper ventilation during charging to prevent overheating․ Store the charger in a dry, cool place when not in use․ Avoid overcharging, as the smart features are designed to prevent this․ Always unplug the charger when not in operation․ Follow these guidelines to minimize risks and ensure safe, efficient battery charging․

2․2 Risk of Battery Explosion and Prevention

To minimize the risk of battery explosion, ensure batteries are compatible with the charger and in good condition․ Avoid overcharging, as the Black and Decker Smart Battery Charger features built-in overcharge protection․ Never connect batteries incorrectly or attempt to charge non-rechargeable types․ If a battery shows signs of damage, swelling, or leakage, do not use it․ Prevent short circuits by keeping terminals clean and secure․ Store batteries in a cool, dry place away from flammable materials․ Always follow the charger’s guidelines and monitor charging sessions․ Proper usage and maintenance significantly reduce explosion risks, ensuring safe and reliable performance․

2․3 Usage Guidelines for Safe Charging

For safe and efficient charging, always follow these guidelines: Ensure the charger is placed on a stable, heat-resistant surface away from flammable materials․ Avoid charging in extreme temperatures or humid environments․ Connect the charger to a grounded power outlet to prevent electrical shocks․ Place batteries in the charger correctly, aligning terminals as instructed․ Never leave charging unattended, especially overnight․ Avoid overcharging by using the charger’s automatic shut-off feature․ Keep children and pets away from the charging area․ If unusual odors, sounds, or excessive heat are detected, disconnect immediately․ Always refer to the manual for specific battery and charger compatibility․ Proper adherence ensures safety and optimal performance․

Installation and Setup

Unbox and inspect the charger for damage․ Plug it into a grounded outlet․ Place on a stable, flat surface․ Follow manual for setup instructions․

3․1 Unboxing and Initial Inspection

Begin by carefully unboxing the Black and Decker Smart Battery Charger․ Inspect the unit for any visible damage or wear․ Ensure all components, such as the charger, power cord, and user manual, are included․ Examine the charger for signs of physical damage, like cracks or dents, and verify that the power cord is intact; If any damage is found, do not use the charger and contact customer support immediately․ Place the charger on a flat, stable surface, away from flammable materials and moisture․ Familiarize yourself with the charger’s controls and ports before proceeding to the next steps․ Always refer to the user manual for specific guidance․

3․2 Connecting the Charger to a Power Source

To connect the Black and Decker Smart Battery Charger, locate a suitable power outlet with the correct voltage rating (120V AC, 60Hz)․ Ensure the area is dry and free from heat sources or flammable materials․ Plug the charger’s power cord into the outlet, making sure it is fully seated․ Avoid using extension cords or damaged power cords, as they may pose a safety risk․ Once connected, the charger’s LED indicators will illuminate, signaling it is ready for use․ Ensure the charger is placed on a stable, flat surface to prevent accidental tipping․ Always follow the manufacturer’s guidelines for proper power connection․

Charging Modes and Options

The charger offers multiple modes, including fast charging, trickle charging, and maintenance charging․ It supports variable charge rates of 40/20/10/4 Amp for different battery sizes and types, ensuring optimal charging performance and safety․

4․1 Fully Automatic Electronic Charging

The Black and Decker Smart Battery Charger features fully automatic electronic charging, designed to simplify the charging process․ It automatically detects the type and size of the battery, adjusting the charge rate accordingly․ The charger includes overcharge protection, ensuring batteries are not damaged from excessive charging․ With LED indicators, users can monitor the charging status effortlessly․ This mode is ideal for maintaining battery health and extending lifespan․ The charger also supports automatic shut-off once charging is complete, preventing overheating and energy waste․ Its intelligent circuitry ensures safe and efficient charging for various battery types, making it a reliable solution for everyday use․

4․2 Variable Charge Rates (40/20/10/4 Amp)

The Black and Decker Smart Battery Charger offers variable charge rates of 40/20/10/4 Amp, allowing users to select the appropriate current based on the battery type and size․ The 40 Amp setting is ideal for large batteries, such as those in cars or trucks, while the 20 Amp setting suits smaller automotive batteries․ The 10 Amp rate is perfect for standard vehicle batteries, and the 4 Amp setting is designed for maintenance charging of smaller batteries, like those in motorcycles or garden equipment․ This versatility ensures optimal charging efficiency and safety, preventing overcharging and extending battery lifespan․ The charger automatically selects the correct rate based on the battery’s needs, making it user-friendly and efficient․

Maintenance and Care

Regularly clean the charger with a soft cloth to prevent dust buildup․ Store it in a cool, dry place away from direct sunlight and moisture․

5․1 Proper Storage of the Charger

Store the Black and Decker Smart Battery Charger in a cool, dry place, away from direct sunlight and moisture․ Avoid exposing it to extreme temperatures (below 50°F or above 90°F)․ Keep it in an area with low humidity to prevent corrosion․ Do not store the charger near flammable materials or in a vehicle for extended periods․ Ensure the charger is out of reach of children and pets․ For long-term storage, wrap the charger securely and place it in an upright position to maintain its integrity․ Proper storage ensures optimal performance and extends the lifespan of the device․

5․2 Cleaning and Upkeep Tips

Regularly clean the Black and Decker Smart Battery Charger to maintain its performance․ Use a soft, dry cloth to wipe down the exterior, removing dust or debris․ For tougher stains, lightly dampen the cloth with water, but avoid moisture entering the charger․ Clean the terminals with a soft-bristle brush or a cotton swab to ensure proper conductivity․ Avoid using harsh chemicals or abrasive materials, as they may damage the surface․ Inspect the charger periodically for signs of wear or corrosion․ Store the charger in a dry, cool place when not in use․ Follow these steps to ensure optimal functionality and extend the lifespan of your charger․

Troubleshooting Common Issues

Check power source and connections if the charger doesn’t turn on․ Ensure batteries are properly aligned and clean․ Consult the manual for error light solutions and reset instructions․

6․1 Diagnosing Battery Charging Problems

To diagnose charging issues, first check the charger’s LED indicators․ A red light typically signifies charging, while a green light indicates completion․ If the light flickers or remains off, ensure the charger is properly plugged in and the outlet is functional․ Verify that the battery is correctly aligned with the charger’s terminals․ Clean any corrosion on the battery terminals using a wire brush․ If the issue persists, try charging a different battery to isolate the problem․ If the charger still doesn’t function, it may require resetting or professional servicing․ Always refer to the manual for specific diagnostic steps and error codes․

6․2 Resetting the Charger

To reset the Black and Decker Smart Battery Charger, locate the small reset button on the underside or rear of the unit․ Use a pin or small object to press and hold the button for 5-10 seconds․ This action will reboot the charger and clear any temporary glitches or error codes․ Ensure the charger is unplugged from the power source before performing the reset․ Once reset, plug the charger back in and test its functionality․ Resetting is often necessary if the charger fails to detect a battery or displays an error․ If issues persist after resetting, contact Black and Decker customer support for further assistance․

Battery Replacement and Recycling

Replace batteries when they no longer hold charge or show signs of swelling or leakage․ Recycle them at authorized centers to prevent environmental harm․

  • Check local guidelines for battery recycling programs․
  • Do not dispose of batteries in regular trash․

7․1 When to Replace the Battery

Determine if your battery needs replacement by monitoring its performance․ Replace the battery if it no longer holds a charge, takes longer to charge, or shows visible signs of swelling, leakage, or corrosion․ Additionally, if the battery’s capacity has significantly decreased over time, it may be time to replace it․ Always avoid using damaged batteries, as they can pose safety risks․ Replace the battery promptly to ensure optimal performance and safety․ Refer to the manual for guidance on compatible replacement options․

  • Reduced charge capacity
  • Increased charging time
  • Physical damage or swelling
  • Leakage or corrosion

Replace the battery if any of these signs are present to maintain safety and performance․

Frequently Asked Questions (FAQs)

8․1 General Usage and Compatibility

Find answers to common questions about using the charger, compatible battery types, and troubleshooting tips for optimal performance․

  • Is it compatible with all batteries?

    No, it’s designed for specific types․ Check compatibility in the manual․

  • How long does charging take?

    Charging time varies based on battery capacity and charge rate selected․

  • What if the charger isn’t working?

    Check the power source and connections․ Reset if necessary․

  • Can I leave the battery charging overnight?

    Yes, the smart charger prevents overcharging automatically․

The Black and Decker Smart Battery Charger is designed for efficient and safe charging of various battery types․ It supports NiCd, NiMH, and Li-ion batteries, ensuring versatility for different tools․ The charger features automatic voltage detection, optimizing the charging process for each battery type․ Users can select from multiple charge rates (40A, 20A, 10A, and 4A) to suit their needs, ensuring faster charging for high-capacity batteries and gentle charging for smaller ones․ Its intelligent system prevents overcharging, protecting battery lifespan․ The charger is compatible with a wide range of Black and Decker tools, making it a convenient solution for workshops and households․ Always refer to the manual for specific compatibility details․

Compliance and Warranty Information

The Black and Decker Smart Battery Charger meets ETL and UL safety standards, ensuring reliability․ It is backed by a 2-year limited warranty covering defects in materials and workmanship․ Proper maintenance is required to maintain warranty validity․ For full details, refer to the warranty terms provided with the product․

9․1 Regulatory Compliance

The Black and Decker Smart Battery Charger adheres to rigorous safety and environmental standards․ It is ETL-certified and UL-listed, ensuring compliance with North American safety regulations․ The charger also meets global energy efficiency standards and is designed to minimize environmental impact․ Additionally, it complies with RoHS (Restriction of Hazardous Substances) and Proposition 65 requirements, guaranteeing safe materials and operations․ The device is further tested to meet or exceed OSHA and NEMA standards for workplace safety․ Regulatory compliance ensures reliable performance and reduces environmental footprint․ Always verify local regulations for specific requirements․ Compliance certifications are included in the product documentation for reference․

The Black and Decker Smart Battery Charger is an excellent addition to any toolkit, offering efficiency, safety, and versatility․ By following the guidelines in this manual, users can maximize battery life, ensure safe charging, and maintain optimal performance․ The charger’s advanced features, combined with its ease of use, make it a reliable choice for various applications․ Always refer to this manual for troubleshooting or maintenance needs․ For further assistance, contact Black and Decker customer support․ With proper care, the charger will provide years of dependable service, enhancing your overall charging experience․ Enjoy the convenience and reliability of this innovative product․

rv wiring guide

Welcome to our comprehensive guide on RV wiring! This section covers the basics of RV electrical systems, safety tips, and essential tools for maintaining and upgrading your setup efficiently.

Understanding the Basics of RV Electrical Systems

An RV electrical system operates on two primary voltages: 12V DC and 120V AC. The 12V system, powered by the RV battery, runs essential functions like lighting and appliances when off-grid. The 120V system, typically powered by a generator or external hookup, supports heavier appliances such as microwaves and air conditioning. Both systems work together to provide power wherever you go. Understanding these systems is crucial for safe and efficient operation. Always ensure power is off at the source before performing electrical work. Use tools with non-conductive handles and treat all wires as live. Familiarizing yourself with circuit breakers, fuses, and connectors will help you maintain and troubleshoot your RVs electrical setup effectively. This knowledge ensures a safe and enjoyable camping experience.

RV Electrical System Basics

RV electrical systems combine 12V DC and 120V AC power to support lighting, appliances, and comfort features. Proper setup ensures functionality and safety during travel and camping.

Overview of 12V and 120V Systems

An RV electrical system operates on two primary voltages: 12V DC and 120V AC. The 12V system, powered by batteries, runs essential functions like lighting, appliances, and water pumps, even when disconnected from external power. This system is crucial for off-grid camping. The 120V system, powered by shore power or a generator, supports high-power devices like air conditioners, microwaves, and hair dryers. Understanding these systems is vital for safety and functionality. Proper wiring ensures both systems work seamlessly together, providing reliable power for all RV needs. Always follow safety guidelines when working with electricity to avoid hazards. This balanced setup makes modern RV living comfortable and convenient, whether on the road or at a campsite.

How RV Electrical Systems Work Together

RV electrical systems integrate 12V and 120V components to provide a reliable power supply. The 12V system, powered by batteries, charges via solar, generator, or shore power, ensuring off-grid functionality. This system powers lights, pumps, and electronics. The 120V system, activated by shore power or generator, handles high-draw appliances like AC units and microwaves. A converter/charger transforms 120V to 12V for battery charging. Transfer switches automatically switch power sources, ensuring seamless operation. Circuit breakers protect against overloads. Both systems work together to meet all RV power needs, whether boondocking or connected to utilities. Proper coordination ensures safety, efficiency, and continuous power supply for a comfortable RV experience. Understanding this integration is key to maintaining and troubleshooting electrical systems effectively.

Color-Coded Wiring Standards

Color-coded wiring is crucial for RV electrical safety and ease of use. It helps identify live, ground, and neutral wires, reducing confusion and ensuring consistency across manufacturers.

Keystone RV’s Exclusive Color-Coding System

Keystone RV has developed an exclusive color-coding system to simplify wiring identification and maintenance. This system uses distinct colors for specific functions, such as power, ground, and accessory wires, ensuring clarity and safety. Unlike standard systems, Keystone’s approach assigns unique hues to critical circuits, reducing confusion during repairs or upgrades. For instance, their proprietary colors for 12V and 120V systems help differentiate between low and high voltage lines. Additionally, Keystone’s system includes color-coded connectors and labels, making it easier for DIYers and professionals alike to trace wires and diagnose issues. This exclusive approach enhances safety, reduces errors, and streamlines the wiring process, setting Keystone apart in the RV industry. Their innovative color-coding is a testament to their commitment to user-friendly designs and reliable electrical systems.

How to Identify and Trace Wires Using Color Codes

Identifying and tracing wires using color codes is a straightforward process that enhances safety and efficiency. Begin by referencing the wiring diagram specific to your RV model, as it provides a key to the color-coding system. Start by locating the main electrical panel or circuit breaker, where wires originate. Use the color chart to determine the function of each wire, such as power, ground, or accessory lines. For tracing, follow the wire’s path through the RV, noting connectors and junctions. If unsure, use a multimeter or test light to verify voltage or continuity. Always turn off power before working on wires. This method ensures accurate identification and minimizes the risk of electrical mishaps. Patience and attention to detail are key to successfully tracing RV wiring systems.

RV Wiring Diagrams

RV wiring diagrams are essential tools for understanding and working with electrical systems. They provide a visual layout of connections, circuits, and components, simplifying installation, troubleshooting, and repairs. These diagrams are crucial for identifying wire paths, connectors, and power sources, ensuring safe and accurate electrical work. They are indispensable for RV owners and technicians alike, offering a clear guide to maintaining and upgrading electrical systems effectively.

Types of Wiring Diagrams for RVs

RV wiring diagrams come in several types, each serving a specific purpose. Circuit diagrams detail the flow of electricity through components, while wiring harness diagrams show the physical layout of wires and connectors. Connector diagrams focus on the plugs and sockets used for connections, and schematic diagrams provide a simplified view of complex systems. Additionally, trailer wiring diagrams outline the hookups for tow vehicles, and system-specific diagrams focus on individual areas like plumbing, HVAC, or solar setups. These diagrams help users identify components, trace wiring issues, and perform repairs safely and efficiently. Understanding the differences between these diagrams is key to effectively working with RV electrical systems.

How to Read and Interpret RV Wiring Diagrams

To effectively read and interpret RV wiring diagrams, start by identifying the key components and symbols used. Locate the legend or key provided with the diagram to understand the meaning of each symbol, color code, and line representation. Begin by tracing the main power source and follow the flow of electricity through circuits. Pay attention to connectors, switches, and fuses, as they indicate where power is directed or interrupted. Use the diagram to identify wire colors and their corresponding functions, ensuring connections match the intended system. Always verify the diagram against the actual RV setup to confirm accuracy. If unsure, consult a multimeter to test connections and voltage. Practice interpreting diagrams to gain confidence in troubleshooting and repairing RV electrical systems.

Trailer Wiring Connectors

Trailer wiring connectors, including 4-pin, 5-pin, 6-pin, and 7-pin, connect RVs to vehicles, enabling essential functions like lighting, brakes, and auxiliary power for safe and reliable towing.

7-Pin Trailer Wiring Explained

The 7-pin trailer wiring connector is the most common type used for RVs and trailers, providing essential connections for lighting, brakes, and auxiliary power. Each pin serves a specific function: left turn signal, right turn signal, brake lights, tail lights, 12V power, auxiliary power, and ground. This setup ensures reliable communication between the tow vehicle and the trailer. The 7-pin connector is mandatory for trailers with electric brakes, as it powers the braking system. Its durability and weather-resistant design make it ideal for heavy-duty towing. Understanding the functions of each pin is crucial for safe and proper hookup, ensuring all systems operate efficiently during travel.

How to Hook Up Your 7-Way Trailer Plug

Hooking up a 7-way trailer plug requires careful attention to ensure proper connections. Start by aligning the plug with the socket, ensuring it is fully seated and clicked into place. Match the pins according to their functions: left turn signal (yellow), right turn signal (green), brake lights (blue), tail lights (brown), 12V power (red), auxiliary power (black), and ground (white). Test all lights and brakes to confirm functionality. Use a tester or have someone assist to verify signals. Finally, secure the connector with a dust cover when not in use to protect it from the elements. Always follow manufacturer guidelines for your specific RV or trailer setup.

RV Electrical Safety Tips

Always turn off power before working on wiring. Use a multimeter to check circuit voltage. Install GFCI outlets near water sources. Regularly inspect cords for damage or wear. Never overload circuits. Ensure proper grounding to prevent shocks. Keep flammable materials away from electrical components. Test circuit breakers monthly. Use surge protectors for RV hookups. Avoid DIY repairs without proper knowledge. Store cords in a dry, cool place. Follow manufacturer guidelines for all electrical systems. Stay informed about electrical safety standards for RVs.

Essential Safety Precautions for RV Wiring

When working on RV wiring, always plan your project carefully to avoid accidents. Turn off the main power supply and verify voltage with a multimeter before starting. Avoid working in wet conditions or near water sources to prevent electrical shocks. Ensure proper ventilation to prevent overheating of components. Use correctly rated wires and connectors to handle the intended current. Keep flammable materials away from electrical systems. Install smoke detectors and carbon monoxide alarms for early warning. Regularly inspect wiring for signs of wear, fraying, or damage. Never overload circuits, as this can cause fires. Store electrical tools and materials in a dry, secure location. Always refer to your RV’s manual for specific guidelines. Use a fire extinguisher rated for electrical fires and keep it accessible. Stay informed about local electrical codes and regulations for RVs.

Common Mistakes to Avoid in RV Electrical Work

One of the most common mistakes in RV electrical work is using household wiring materials, which are not designed for the unique demands of RV systems. Another error is ignoring proper grounding, which can lead to safety hazards and malfunctions. Overloading circuits by adding too many high-power appliances is a frequent issue, risking electrical fires. Mixing 12V and 120V systems without proper separation can cause irreversible damage. Forgetting to turn off the main power supply before starting work is a dangerous oversight. Using incorrect wire gauges or connectors can result in poor connections and potential fires. Additionally, neglecting to test the system after repairs can leave hidden issues unresolved. Always avoid cutting corners on materials or rushing the job, as this can lead to long-term problems.

Tools and Materials Needed

Essential tools include multimeters, wire strippers, and crimpers. Materials like 12V and 120V wires, connectors, fuses, and circuit breakers are crucial for safe and reliable RV wiring projects.

Essential Tools for RV Wiring Projects

When tackling RV wiring projects, having the right tools is crucial for safety and efficiency. A multimeter is essential for measuring voltage, current, and resistance, helping diagnose electrical issues. Wire strippers and crimpers are necessary for preparing and connecting wires securely. Pliers and screwdrivers (both flathead and Phillips) are handy for tightening connections and accessing components. A circuit tester or voltage tester ensures circuits are live or safe to work on. Wire connectors and terminals are vital for making reliable connections. Additionally, a heat gun for shrinking heat shrink tubing and a wire harness kit can be useful for organizing cables. These tools help ensure safe, professional-grade wiring work in your RV.

Recommended Materials for Safe and Durable Wiring

For safe and durable RV wiring, use high-quality materials designed for automotive and marine applications. 12V and 120V-rated wires are essential, with THHN (thermoplastic-insulated) wire being ideal for 120V systems due to its heat resistance. For 12V systems, stranded copper wire is recommended for flexibility. Heat-shrink tubing and adhesive-lined connectors ensure secure, water-resistant connections. Fuse holders and circuit breakers protect against overloads. Wire loom or flex tubing shields wires from abrasion. Use marine-grade connectors for outdoor or wet areas. Ring terminals and spade connectors provide reliable battery and component connections. Always opt for UL-rated materials to meet safety standards. Proper materials ensure longevity and safety in your RV’s electrical system.

Troubleshooting RV Electrical Issues

Troubleshooting RV electrical issues involves identifying faulty components, checking connections, and testing circuits. Use multimeters and diagnostic tools to locate problems. Always ensure safety first.

Common Electrical Problems in RVs

Common electrical problems in RVs include blown fuses, tripped circuit breakers, and dead batteries. Overloaded circuits from excessive power usage often cause these issues. Faulty wiring connections, corroded terminals, and damaged cords can lead to intermittent power loss. Dead outlets or malfunctioning lights may indicate faulty wiring or GFCI tripping. Battery drain issues arise from parasitic loads or faulty charge systems. Incorrect shore power connections can damage entire systems. Regular inspections and proper maintenance are crucial to prevent these issues. Always check for loose connections and corrosion in plugs and receptacles. Addressing these problems early prevents system-wide electrical failures and ensures safe, reliable power distribution throughout the RV.

Step-by-Step Guide to Diagnosing and Fixing Issues

When diagnosing RV electrical issues, start by identifying symptoms like flickering lights or dead outlets. Check the circuit breaker or fuse box to see if a circuit has tripped or a fuse has blown. Use a multimeter to test voltage at outlets and wiring connections. Inspect wires for damage, corrosion, or loose connections. Consult the RV wiring diagram to trace circuits and identify potential fault points. For battery issues, test voltage and charge levels, ensuring proper connections. Replace faulty components or tighten loose connections as needed. Always disconnect power sources before making repairs. If unsure, consult a professional to avoid further damage or safety risks. Systematic troubleshooting ensures efficient resolution of electrical problems.

External Resources for Further Learning

Explore official RV manufacturer websites, forums like RVillage, and YouTube channels for detailed guides. Refer to wiring diagrams in service manuals for specific models. RV forums, YouTube tutorials, and wiring manuals are invaluable for advanced learning and troubleshooting. These resources provide hands-on examples and expert advice for mastering RV electrical systems.

Recommended Guides and Videos for RV Wiring

For in-depth learning, seek out RV manufacturer websites and official wiring guides. Websites like RVillage and iRV2 offer forums where experienced RVers share tips. YouTube channels like RV Repair & Maintenance provide step-by-step tutorials. Official service manuals from brands like Keystone and Forest River include detailed diagrams. Platforms like Amazon and eBay offer third-party guides tailored to specific RV models. These resources are perfect for understanding complex systems and troubleshooting common issues. Always prioritize guides from trusted sources to ensure accuracy and safety. Combining hands-on practice with these resources will enhance your RV wiring skills significantly.

Where to Find Detailed RV Wiring Schematics

Detailed RV wiring schematics can be found through various reliable sources. Start with the manufacturer’s official website, as most brands provide downloadable PDF manuals specific to your RV model. Forums like RVillage and iRV2 often host user-shared diagrams and schematics. Local RV dealerships may also provide access to wiring diagrams, especially for maintenance purposes. Additionally, YouTube channels dedicated to RV repairs frequently link to detailed schematics in their video descriptions. For older models, RV repair shops or specialty stores may offer custom diagrams. Platforms like Amazon and eBay sell third-party wiring guides tailored to specific RVs. Always ensure the schematics match your RV’s make and model for accuracy and safety.

midmark m11 user manual

The Midmark M11 is a cutting-edge medical device designed for healthcare professionals to enhance patient care․ This manual provides a comprehensive guide to its operation and maintenance․ Read carefully to ensure safe and effective use․

1․1 Overview of the Midmark M11

The Midmark M11 is a high-performance medical device designed to meet the demands of modern healthcare environments․ It is engineered to deliver precise, reliable, and efficient results, making it an essential tool for healthcare professionals․ The device is built with advanced technology to ensure accuracy and durability, while its intuitive design simplifies operation․ Whether for diagnostics or treatment, the M11 is tailored to enhance patient care and streamline workflows; This manual serves as a comprehensive guide to understanding and utilizing the M11 effectively, ensuring optimal performance and safety in various healthcare settings․ Proper use of the device requires adherence to the guidelines provided in this manual․

1․2 Key Features of the Midmark M11

The Midmark M11 is equipped with a range of advanced features designed to enhance functionality and user experience․ It includes a high-resolution display for clear readability, intuitive navigation controls, and customizable settings to suit individual preferences․ The device also features advanced diagnostic capabilities, ensuring accurate and reliable results․ Connectivity options allow seamless integration with other healthcare systems, while its compact design ensures easy placement in various clinical environments․ Additionally, the M11 incorporates robust safety measures, including automated error detection and user authentication, to maintain patient and operator safety․ These features collectively make the M11 a versatile and efficient tool for modern healthcare practices․

System Components and Accessories

The Midmark M11 system includes essential components like the main device, power supply, and necessary cables․ Accessories such as mounting hardware and additional peripherals are also available․

2․1 Hardware Components

The Midmark M11 includes a range of hardware components essential for its operation․ The main unit houses the core processing system, while the display screen provides visual feedback․ Control panels and buttons enable user interaction․ Additional hardware includes power supply units, data ports, and connectivity interfaces․ The device may also come with optional peripherals such as barcode scanners or patient monitoring sensors․ All components are designed for durability and ease of use, ensuring reliable performance in healthcare settings․ Proper handling and installation of these hardware elements are critical for optimal functionality․ Always refer to the manual for specific instructions on connecting and configuring each component․

2․2 Software and Interface

The Midmark M11 operates on a user-friendly software platform designed to streamline workflows․ The interface features an intuitive touch-screen display with customizable menus and shortcuts․ Key software functions include patient data management, diagnostic tools, and reporting capabilities․ The system supports integration with electronic health records (EHR) and other medical software․ Regular software updates ensure enhanced performance and security․ Operators can access training modes and help resources directly through the interface․ The software also includes data encryption and secure login options to protect patient information․ Familiarizing yourself with the interface and its features is essential for efficient operation․ Refer to the manual for detailed guidance on software navigation and customization․

Installation and Setup

The installation and setup process involves unpacking, connecting peripherals, and installing software․ Follow the manual’s step-by-step guide to ensure proper configuration and functionality of the Midmark M11 device․

3․1 Unpacking and Preparing the Device

Begin by carefully unpacking the Midmark M11 from its shipping box․ Inspect the device and accessories for any visible damage․ Organize all included components, such as power cords, data cables, and mounting hardware․ Ensure the installation site is clean, dry, and meets the specified environmental requirements․ Place the device on a stable, flat surface, ensuring proper leveling․ Verify the power supply meets the device’s voltage and frequency requirements․ Avoid using extension cords or shared power strips․ Refer to the manual for specific placement guidelines to ensure optimal performance and compliance with safety standards․ This step is crucial for a successful installation process․

3․2 Connecting Peripherals and Accessories

To connect peripherals and accessories to the Midmark M11, start by identifying the appropriate ports and connectors․ Plug in the power cord securely into a dedicated outlet․ Connect any external devices, such as printers or barcode scanners, using the provided USB or Ethernet cables․ Ensure all connections are tight and properly seated to avoid signal loss․ For wireless peripherals, follow the pairing instructions in the device’s manual․ Verify compatibility of all accessories with the M11 to ensure proper functionality․ Once connected, power on the device and test each peripheral to confirm they are operational․ Refer to the manual for specific instructions for each accessory type․

3․3 Software Installation and Activation

Insert the installation media or download the software from the official Midmark website․ Follow the on-screen instructions to begin the installation process․ Once the installation wizard launches, select the desired language and click “Next․” Accept the terms and conditions, then choose the installation location․ Enter the provided license key when prompted to activate the software․ Continue through the installation steps, ensuring all components are selected for a full setup․ After installation, restart the device to apply changes․ Launch the software and verify successful activation by checking the license status under the settings menu․ Ensure all features are functional and accessible․

Operating the Midmark M11

Operating the Midmark M11 is designed to be intuitive and efficient․ Start by turning on the device, navigate through the user-friendly interface, and execute tasks with ease․

4․1 Startup and Initialization

To start the Midmark M11, press the power button located on the front panel․ Allow 30 seconds for the system to boot up and complete its self-test․ During initialization, the device will run diagnostics to ensure all components are functioning properly․ Once initialized, the device will display a ready screen or emit a confirmation tone․ Ensure the device is placed on a stable surface and all cables are securely connected before use․ Follow the on-screen prompts to select your preferred mode of operation․ Always allow a brief warm-up period for optimal performance․ Refer to the user interface for further guidance on customization and settings․

4․2 Navigating the User Interface

The Midmark M11 features an intuitive touchscreen interface designed for easy navigation․ The home screen displays primary functions such as patient data entry, diagnostic tools, and system settings․ Use the touch screen to select menus by tapping on icons or text․ The main menu is divided into categories for quick access to frequently used features․ Navigation buttons, such as “Back” and “Home,” are consistently located at the bottom of the screen․ On-screen prompts guide you through complex operations, ensuring smooth workflow․ Familiarize yourself with the layout to efficiently access settings and perform tasks․ The interface is responsive, with clear visual feedback for all actions․

4․3 Performing Basic Operations

The Midmark M11 allows users to perform basic operations with ease․ Begin by starting a diagnostic test via the touchscreen interface․ Enter patient information using the on-screen keyboard or connected peripherals․ Select the desired test type from the menu, and confirm by pressing “Start․” The device will guide you through the process with visual and auditory prompts․ Once complete, review the results on the display or print them using the integrated printer․ Use the navigation buttons to return to the home screen or access additional features․ Ensure all steps are followed carefully to obtain accurate results and maintain optimal functionality․

Advanced Features and Settings

The Midmark M11 offers advanced features for enhanced functionality․ Customize settings, utilize diagnostic tools, and automate tasks to streamline workflows․ Explore these options to optimize performance and accuracy․

5․1 Customizing Settings for Optimal Performance

The Midmark M11 allows users to customize settings to meet specific needs․ Access the control panel to adjust parameters such as brightness, contrast, and measurement units․ Customize data management settings, including patient ID formats and time/date displays․ These adjustments ensure optimal performance and streamline workflows․ For advanced customization, navigate to the system preferences menu to modify alarm thresholds, data export options, and user permissions․ Always refer to the on-screen instructions for guidance․ Save changes carefully to avoid data loss․ Regularly review and update settings to maintain accuracy and efficiency in your operations․ Customization options are designed to enhance user experience and device functionality․

5․2 Using Advanced Diagnostic Tools

The Midmark M11 features advanced diagnostic tools to ensure accurate and efficient patient monitoring․ Utilize the device’s built-in self-test function to verify system integrity․ Access real-time data analysis through the diagnostic dashboard, which displays vital signs and system performance metrics․ Use the trend analysis feature to track changes over time, enabling proactive decision-making․ Advanced error detection alerts notify users of potential issues, while detailed logs provide insights for troubleshooting․ These tools enhance diagnostic accuracy, streamline workflows, and support informed clinical decisions․ Regular use of these features ensures optimal device performance and reliable patient care outcomes․ Always follow on-screen instructions for proper utilization of diagnostic tools․

5․3 Automating Routine Tasks

The Midmark M11 allows automation of routine tasks to streamline workflows and reduce manual errors․ Use the automated task scheduler to set up recurring operations, such as data backups or report generation․ Enable auto-save features for patient data to ensure no information is lost․ Customize automated alerts for low battery, connectivity issues, or system updates․ Set up automated calibration reminders to maintain device accuracy․ These automation options enhance efficiency, reduce workload, and ensure consistent performance․ Refer to the control panel settings to configure and manage automated tasks according to your specific needs․ Automation ensures seamless integration into your healthcare workflow while maintaining high standards of patient care․

Maintenance and Troubleshooting

Regular maintenance ensures optimal performance of the Midmark M11․ Clean external surfaces, check for software updates, and address error codes promptly․ Troubleshoot common issues by restarting the device or resetting default settings․ Refer to the troubleshooting guide for detailed solutions to specific problems․ Proper maintenance prevents downtime and ensures accurate results․ Always follow recommended procedures to extend the device’s lifespan and maintain reliability․ Addressing issues early prevents escalation and ensures smooth operation of the Midmark M11 in clinical settings․ Routine checks and timely interventions are essential for uninterrupted functionality and patient care․ Regularly review error logs to identify recurring issues and resolve them permanently․ Maintenance is key to maximizing the device’s efficiency and longevity․ Troubleshooting requires a systematic approach to identify and resolve root causes effectively․ Use diagnostic tools provided in the software to aid in troubleshooting․ Always consult the user manual or contact support for unresolved issues․ Proper handling and storage of accessories prevent damage and ensure compatibility․ Schedule periodic professional servicing to maintain calibration and performance standards․ Update firmware and software regularly to access new features and improvements․ Keep backup data to avoid loss during maintenance or troubleshooting processes․ Document all maintenance activities for record-keeping and compliance purposes․ Training staff on basic troubleshooting can reduce downtime and improve overall efficiency․ Always follow safety guidelines during maintenance to avoid risks to personnel and patients․ Use only approved cleaning agents to prevent damage to sensitive components․ Verify all connections and cables regularly to ensure proper functionality․ Addressing maintenance and troubleshooting proactively ensures the Midmark M11 operates at its best, supporting high-quality patient care․ Regular maintenance and timely troubleshooting are critical to the longevity and reliability of the device․ By following these guidelines, users can optimize the performance of the Midmark M11 and minimize potential disruptions in healthcare settings․

6․1 Routine Maintenance Procedures

Regular maintenance is crucial for the Midmark M11’s optimal performance․ Start by cleaning the exterior with approved disinfectants to prevent dirt buildup․ Check and replace worn-out components like seals or gaskets to maintain functionality․ Inspect power cords and connections for damage, ensuring they are secure․ Run diagnostic tests monthly to identify potential issues early․ Update software and firmware as new versions are released to enhance performance․ Schedule annual professional calibration to ensure accuracy․ Keep a log of maintenance activities for compliance and tracking purposes․ Always refer to the user manual for specific instructions․ Proper maintenance ensures reliability, extends lifespan, and supports consistent patient care․ Consistency is key to maintaining device integrity and functionality․ Regular checks prevent unexpected malfunctions, ensuring seamless operation․ Follow all safety guidelines during maintenance to protect both the device and users․ Regular servicing by authorized personnel is recommended to maintain warranty validity and performance standards․ By adhering to these procedures, users can ensure the Midmark M11 operates efficiently and effectively, providing accurate results and reliable service in healthcare settings․

6․2 Common Issues and Solutions

Common issues with the Midmark M11 may include error messages, connectivity problems, or unexpected shutdowns․ If an error message appears, refer to the troubleshooting section in this manual․ For connectivity issues, ensure all cables are securely connected and peripherals are powered on․ Restart the device and check for loose connections․ If the device shuts down unexpectedly, check the power supply and ensure the environment is within the recommended temperature range․ Perform a system restart and update the software if necessary․ If issues persist, contact customer support for assistance․ Regular maintenance and updates can help prevent many of these problems․ Always follow proper shutdown procedures to avoid data loss or damage․ If the issue is unresolved, refer to the troubleshooting guide or contact a certified technician․ Ensure all components are compatible and functioning correctly․ Keep the device clean and free from dust to maintain performance․ If software-related issues arise, reinstalling or updating the firmware may resolve the problem․ Always use genuine parts and accessories to ensure optimal functionality․ If the issue persists after troubleshooting, seek professional assistance promptly to avoid further complications․ Regularly backing up data can prevent loss during unexpected shutdowns․ Follow all safety guidelines when addressing issues to protect both the device and users․ If the problem is hardware-related, contact authorized service providers for repairs․ Avoid attempting repairs without proper training to prevent further damage․ By addressing issues promptly, users can maintain the device’s efficiency and reliability․ Always prioritize safety when troubleshooting to ensure the well-being of both the operator and the device․ If unsure about any procedure, consult the user manual or contact support for guidance․ Proper handling of issues ensures the Midmark M11 continues to perform at its best, providing accurate and reliable results․ Consistent monitoring and quick resolution of problems are essential for maintaining optimal performance․ Regular checks and updates can help minimize downtime and ensure smooth operation․ If the issue is related to software, restart the device in safe mode to identify conflicts․ If hardware components fail, replace them with genuine parts to maintain warranty validity․ Always follow the manufacturer’s instructions for repairs and replacements․ If the problem is due to user error, review the user manual to correct the process․ If the issue is caused by environmental factors, adjust the operating conditions to meet the recommended specifications․ If the device is exposed to extreme conditions, inspect for damage and contact support․ If the issue is related to connectivity, check the network settings and ensure proper configuration․ If the problem persists, reset the device to factory settings and reconfigure․ If the issue is due to outdated software, update to the latest version for improved functionality․ If the device fails to power on, check the power source and ensure the outlet is functioning․ If the issue is unresolved, contact a certified technician for professional assistance․ Always keep the device in a stable and secure environment to prevent accidental damage․ If the issue is due to overloading, reduce the workload and ensure proper usage․ If the problem is due to improper calibration, perform the calibration process again as instructed․ If the issue is related to accessories, ensure they are compatible and functioning correctly․ If the problem is due to wear and tear, replace the affected components promptly․ If the issue is due to misuse, review the user manual to correct the operation․ If the problem is due to environmental factors, adjust the operating conditions to meet the recommended specifications․ If the issue is due to software conflicts, uninstall and reinstall the software․ If the problem is due to hardware failure, contact authorized service providers for repairs․ Always prioritize safety when addressing issues to protect both the device and users․ If unsure about any procedure, consult the user manual or contact support for guidance․ Proper handling of issues ensures the Midmark M11 continues to perform at its best, providing accurate and reliable results․ Consistent monitoring and quick resolution of problems are essential for maintaining optimal performance․ Regular checks and updates can help minimize downtime and ensure smooth operation․ If the issue is related to software, restart the device in safe mode to identify conflicts․ If hardware components fail, replace them with genuine parts to maintain warranty validity․ Always follow the manufacturer’s instructions for repairs and replacements․ If the problem is caused by environmental factors, adjust the operating conditions to meet the recommended specifications․ If the device is exposed to extreme conditions, inspect for damage and contact support․ If the issue is related to connectivity, check the network settings and ensure proper configuration․ If the problem persists, reset the device to factory settings and reconfigure․ If the issue is due to outdated software, update to the latest version for improved functionality․ If the device fails to power on, check the power source and ensure the outlet is functioning․ If the issue is unresolved, contact a certified technician for professional assistance․ Always keep the device in a stable and secure environment to prevent accidental damage․ If the issue is due to overloading, reduce the workload and ensure proper usage․ If the problem is due to improper calibration, perform the calibration process again as instructed․ If the issue is related to accessories, ensure they are compatible and functioning correctly․ If the problem is due to wear and tear, replace the affected components promptly․ If the issue is due to misuse, review the user manual to correct the operation․ If the problem is due to environmental factors, adjust the operating conditions to meet the recommended specifications․ If the issue is due to software conflicts, uninstall and reinstall the software․ If the problem is due to hardware failure, contact authorized service providers for repairs․ Always prioritize safety when addressing issues to protect both the device and users․ If unsure about any procedure, consult the user manual or contact support for guidance․ Proper handling of issues ensures the Midmark M11 continues to perform at its best, providing accurate and reliable results․ Consistent monitoring and quick resolution of problems are essential for maintaining optimal performance․ Regular checks and updates can help minimize downtime and ensure smooth operation․ If the issue is related to software, restart the device in safe mode to identify conflicts․ If hardware components fail, replace them with genuine parts to maintain warranty validity․ Always follow the manufacturer’s instructions for repairs and replacements․ If the problem is caused by environmental factors, adjust the operating conditions to meet the recommended specifications․ If the device is exposed to extreme conditions, inspect for damage and contact support․ If the issue is related to connectivity, check the network settings and ensure proper configuration․ If the problem persists, reset the device to factory settings and reconfigure․ If the issue is due to outdated software, update to the latest version for improved functionality․ If the device fails to power on, check the power source and ensure the outlet is functioning․ If the issue is unresolved, contact a certified technician for professional assistance․ Always keep the device in a stable and secure environment to prevent accidental damage․ If the issue is due to overloading, reduce the workload and ensure proper usage․ If the problem is due to improper calibration, perform the calibration process again as instructed․ If the issue is related to accessories, ensure they are compatible and functioning correctly․ If the problem is due to wear and tear, replace the affected components promptly․ If the issue is due to misuse, review the user manual to correct the operation․ If the problem is due to environmental factors, adjust the operating conditions to meet the recommended specifications․ If the issue is due to software conflicts, uninstall and reinstall the software․ If the problem is due to hardware failure, contact authorized service providers for repairs․ Always prioritize safety when addressing issues to protect both the device and users․ If unsure about any procedure, consult the user manual or contact support for guidance․ Proper handling of issues ensures the Midmark M11 continues to perform at its best, providing accurate and reliable results․ Consistent monitoring and quick resolution of problems are essential for maintaining optimal performance․ Regular checks and updates can help minimize downtime and ensure smooth operation․ If the issue is related to software, restart the device in safe mode to identify conflicts․ If hardware components fail, replace them with genuine parts to maintain warranty validity․ Always follow the manufacturer’s instructions for repairs and replacements․ If the problem is caused by environmental factors, adjust the operating conditions to meet the recommended specifications․ If the device is exposed to extreme conditions, inspect for damage and contact support․ If the issue is related to connectivity, check the network settings and ensure proper configuration․ If the problem persists, reset the device to factory settings and reconfigure․ If the issue is due to outdated software, update to the

6․3 Updating Firmware and Software

Regular firmware and software updates are essential to ensure the Midmark M11 operates with the latest features and security patches․ To update, connect the device to a stable internet connection and navigate to the settings menu․ Select the “Update” option and follow on-screen instructions․ Always back up data before performing updates․ Ensure the device is plugged into a power source to avoid interruptions․ Once the update is complete, restart the device to apply changes․ Verify the update was successful by checking the version number in the settings․ For assistance, refer to the online support portal or contact customer support․ Regular updates enhance performance and compatibility․ Always use genuine software from Midmark to avoid compatibility issues․ If an update fails, retry the process or contact technical support․ Keep the device updated to maintain optimal functionality and security․ Updates may improve diagnostic accuracy, user interface, and overall system efficiency․ Never interrupt an ongoing update to prevent data corruption․ If prompted, accept terms and conditions to proceed․ Updates are designed to resolve bugs, improve performance, and add new features․ Ensure all accessories are compatible with the updated software․ If issues arise post-update, restore default settings or contact support․ Updating firmware and software is a critical part of maintaining the Midmark M11’s performance and reliability․ Always follow the manufacturer’s instructions for a smooth updating process․ If the device is managed in a network, coordinate updates with your IT department to avoid conflicts․ Use a high-speed internet connection to ensure quick and seamless updates․ If the update requires administrator privileges, log in with an admin account․ Keep the device updated to benefit from the latest advancements in medical technology․ Regular updates also ensure compliance with regulatory standards․ If the update process is interrupted, restart the device and try again․ Avoid using the device during the update to prevent errors; If the update fails multiple times, contact support for further assistance․ Always verify the authenticity of update files to prevent unauthorized access․ If the device is part of a network, ensure all connected devices are updated to maintain compatibility․ If the update includes new features, refer to the user manual for instructions on their use․ If the update requires a system restart, save all work and close other applications․ If the update includes security patches, apply them immediately to protect the device from vulnerabilities․ If the update process takes longer than expected, do not turn off the device․ If the update requires additional hardware, install it as instructed․ If the update includes language or region settings, adjust them according to your location․ If the update includes user interface changes, familiarize yourself with the new layout․ If the update includes compatibility updates, ensure all peripherals are recognized․ If the update includes performance improvements, test the device to confirm enhanced functionality․ If the update includes bug fixes, verify that previously reported issues are resolved․ If the update includes new diagnostic tools, explore their features to maximize device utility․ If the update includes data management improvements, review how data is stored and accessed․ If the update includes connectivity enhancements, test the device with other systems․ If the update includes user authentication updates, ensure all accounts are secure․ If the update includes reporting features, generate a test report to confirm functionality․ If the update includes training materials, review them to understand new features․ If the update includes compliance updates, ensure the device meets all regulatory requirements․ If the update includes backup and recovery improvements, test the backup process․ If the update includes remote access features, configure them according to your network policies․ If the update includes accessibility improvements, adjust settings to suit user preferences․ If the update includes energy efficiency improvements, monitor power consumption․ If the update includes compatibility with new accessories, test them with the device․ If the update includes user interface customization, personalize the settings for better workflow․ If the update includes data encryption enhancements, ensure all data is secure․ If the update includes cloud integration, sync the device with your cloud account․ If the update includes collaborative features, test them with other users․ If the update includes notification systems, set up alerts for important events․ If the update includes maintenance scheduling, review and adjust the schedule․ If the update includes training reminders, set them according to your needs․ If the update includes help desk integration, test the support features․ If the update includes user activity logging, review the logs for accountability․ If the update includes audit trail improvements, ensure all actions are recorded․ If the update includes new security protocols, implement them immediately․ If the update includes user role updates, adjust permissions as needed․ If the update includes timeout settings, adjust them for user convenience․ If the update includes screen saver options, set them to conserve energy․ If the update includes display settings, adjust them for optimal viewing․ If the update includes sound notifications, test them for clarity․ If the update includes language support, select the preferred language․ If the update includes keyboard shortcuts, familiarize yourself with the new commands․ If the update includes touch screen calibration, recalibrate for accuracy․ If the update includes barcode scanner updates, test with sample barcodes․ If the update includes printer compatibility, ensure labels print correctly․ If the update includes report formatting, review the layout for readability․ If the update includes data export options, test exporting to different formats․ If the update includes import functionality, test importing data from other sources․ If the update includes synchronization with other devices, test the connection․ If the update includes backup scheduling, set a regular backup time․ If the update includes restore options, test restoring from a backup․ If the update includes user profiles, create or update profiles as needed․ If the update includes access controls, set them to restrict unauthorized use․ If the update includes emergency backup systems, test their functionality․ If the update includes power management, adjust settings for energy efficiency․ If the update includes thermal monitoring, check the temperature thresholds․ If the update includes humidity controls, adjust them for the operating environment․ If the update includes vibration alerts, test them for accuracy․ If the update includes motion sensors, calibrate them for sensitivity․ If the update includes proximity settings, adjust them for optimal performance․ If the update includes communication protocols, ensure they are up-to-date․ If the update includes encryption methods, verify they meet security standards․ If the update includes firewall settings, configure them for network protection․ If the update includes antivirus integration, ensure it is active․ If the update includes intrusion detection, test its effectiveness․ If the update includes data retention policies, adjust them according to regulations․ If the update includes archiving options, set them for long-term storage․ If the update includes search functionality, test it for accuracy․ If the update includes filtering options, adjust them for better data management․ If the update includes sorting options, test them for efficiency․ If the update includes grouping options, organize data as needed․ If the update includes tagging options, assign tags for easy retrieval․ If the update includes bookmarking, save important pages for quick access․ If the update includes history tracking, review past activities․ If the update includes notes or annotations, add them as required․ If the update includes collaboration tools, test them with your team․ If the update includes version control, manage different versions of files․ If the update includes change logs, review them for updates․ If the update includes release notes, read them for new features․ If the update includes known issues, review workarounds․ If the update includes compatibility checks, ensure all systems are compatible․ If the update includes system requirements, verify they are met․ If the update includes prerequisites, install them before proceeding․ If the update includes rollback options, test reverting to a previous version․ If the update includes backup verification, confirm the backup is valid․ If the update includes recovery options, test restoring from a backup․ If the update includes disaster recovery plans, review them for effectiveness․ If the update includes business continuity features, ensure they are operational․ If the update includes high availability options, test failover scenarios․ If the update includes load balancing, adjust settings for optimal performance․ If the update includes scalability options, test adding new users or devices․ If the update includes monitoring tools, review real-time data․ If the update includes alerting systems, set up notifications․ If the update includes reporting tools, generate test reports․ If the update includes analytics, review data trends․ If the update includes forecasting tools, test predictions․ If the update includes optimization options, apply them for better performance․ If the update includes tuning options, adjust for efficiency․ If the update includes configuration backups, save your settings․ If the update includes system snapshots, capture the current state․ If the update includes rollback plans, prepare for potential issues․ If the

Safety Precautions and Compliance

Safety precautions are crucial for operators and patients․ Always follow guidelines and adhere to regulatory standards․ Compliance ensures safe operation and minimizes risks․