Overhead crane inspection checklists are essential for ensuring safety, preventing accidents, and maintaining compliance. They provide a comprehensive guide for daily, monthly, and annual inspections, covering all critical components.
1.1 Importance of Regular Inspections
Regular inspections of overhead cranes are critical for ensuring operational safety and preventing accidents. They help identify potential issues before they lead to equipment failure or accidents. According to OSHA, overhead crane accidents cause approximately 175 severe injuries and nearly 45 fatalities annually. Neglecting inspections can result in costly repairs, downtime, and legal consequences; A structured inspection checklist ensures compliance with safety standards and prolongs equipment lifespan. By addressing wear and tear early, inspections safeguard both the workforce and assets, making them a cornerstone of workplace safety and efficiency.
1.2 Purpose of an Overhead Crane Inspection Checklist
An overhead crane inspection checklist serves as a detailed guide to ensure thorough evaluation of crane components. It outlines specific items to inspect, such as wire ropes, chains, brakes, and electrical systems, at daily, monthly, and annual intervals. The checklist ensures compliance with safety standards like OSHA 1910.179, helping to prevent accidents and extend equipment lifespan. By systematically addressing each component, it minimizes risks and ensures reliable operation. A PDF checklist is particularly useful for its portability and ease of use, making it a vital tool for maintaining safety and efficiency in industrial settings.
1.3 Benefits of Using a PDF Checklist
Using a PDF checklist for overhead crane inspections offers numerous advantages. It provides a structured format for documenting findings, ensuring consistency and thoroughness. PDF checklists are easily accessible and can be shared across devices, making them ideal for team collaboration. They also serve as permanent records, supporting compliance with regulatory requirements. Additionally, PDFs are environmentally friendly compared to paper-based systems. Many providers offer free downloadable templates, allowing businesses to implement them without additional costs. This digital approach streamlines the inspection process, enhancing efficiency and accuracy while maintaining a reliable audit trail for future reference.

Daily Overhead Crane Inspection Checklist
Daily inspections ensure crane safety and functionality. Check controls, hooks, chains, wire ropes, and electrical systems. Verify proper operation and document any issues for immediate action.
2.1 Pre-Operational Checks
Pre-operational checks are crucial for ensuring crane safety. Inspect the controls, hooks, chains, and wire ropes for damage or wear. Verify proper electrical connections and system functions. Check the cab, bridge, and trolley for alignment and stability. Ensure all safety devices are functioning correctly. Review the load chart to confirm the crane’s capacity. Test all operational movements, including hoisting, trolleying, and braking. Document any issues or malfunctions and address them before operation. These checks help prevent accidents and ensure smooth crane performance throughout the workday.
2.2 Visual Inspections
Visual inspections are a critical part of daily overhead crane maintenance. Examine wire ropes for frays, kinks, or corrosion. Check chains and hooks for wear, cracks, or deformation. Inspect structural components like the bridge and trolley for alignment and stability. Look for signs of damage or rust on beams and supports. Verify electrical components, including cables and connections, for wear or damage. Ensure all safety devices, such as limit switches and brakes, are intact and functioning. Document any abnormalities or defects for further investigation. Regular visual checks help identify potential issues before they escalate, ensuring safe and reliable crane operation.
2.3 Operational Tests
Operational tests are essential to ensure the crane functions correctly. Test hoisting, trolley, and bridge movements for smooth operation. Check load brakes, limit switches, and emergency stops. Verify proper operation of controls and alarms. Perform load tests annually or after major repairs. Ensure all safety devices activate as intended. Document test results and address any malfunctions promptly. Regular operational testing helps maintain efficiency, safety, and compliance with standards. Proper documentation ensures accountability and traceability of crane performance over time.

Monthly Overhead Crane Inspection Checklist
A monthly inspection ensures ongoing crane safety and efficiency. Check wire ropes, chains, and structural components for wear. Verify electrical systems and trolley functions. Document all findings.
3.1 Wire Rope and Chain Inspection
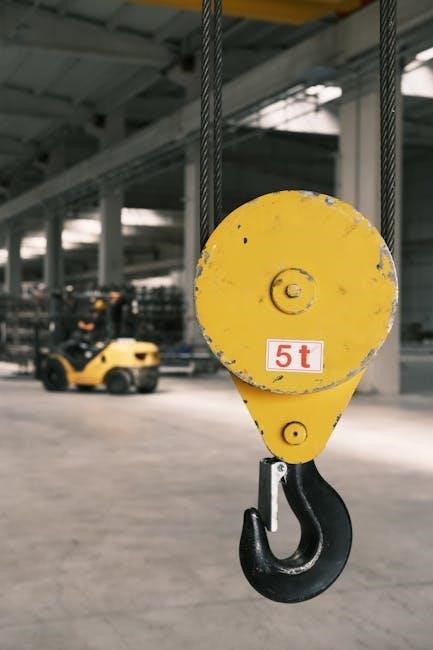
The wire rope and chain inspection is a critical part of monthly overhead crane maintenance. Inspect for visible wear, damage, or corrosion. Check for proper lubrication and alignment. Ensure all wire ropes are securely attached and free from twists or kinks. Examine chains for stretch, wear, or broken links. Measure wire rope diameter to detect any reduction. Document any findings and replace components if necessary. This step ensures safe and efficient crane operation, preventing potential failures. Regular inspections also help maintain compliance with safety standards and extend equipment lifespan;
3.2 Structural and Component Checks
During monthly inspections, examine the crane’s structural components for damage or wear. Check the gantry, end trucks, and runway beams for alignment and integrity. Inspect bolts and fasteners for tightness and signs of loosening. Verify the condition of trolley and hoist components, ensuring proper alignment and no excessive wear. Look for cracks, corrosion, or deformation in load-bearing parts. Ensure all safety devices, such as limit switches and buffers, are functioning correctly. Address any issues promptly to prevent structural failure and maintain operational safety. Regular checks help identify potential problems before they escalate, ensuring reliable crane performance and compliance with safety standards.
3.3 Electrical System Verification
Verify the crane’s electrical system to ensure safe and efficient operation. Check for damaged or frayed wires, loose connections, and malfunctioning components. Inspect the control panel, motor, and contactors for proper function. Test the limit switches and emergency stop systems to confirm they activate correctly. Ensure all electrical components are free from dust and moisture, which can cause malfunctions. Use a multimeter to check voltage and resistance levels if necessary. Document any issues and address them promptly to prevent electrical failures. A well-maintained electrical system is crucial for reliable crane performance and workplace safety, aligning with OSHA standards and best practices.

Annual Overhead Crane Inspection Checklist
The annual inspection ensures comprehensive evaluation of mechanical, structural, and electrical systems. It includes load testing, thorough component examination, and documentation review to guarantee compliance and optimal performance.
4.1 Comprehensive Mechanical Inspection
A comprehensive mechanical inspection is a detailed annual check of all crane components. It includes examining wire ropes, chains, gears, and brakes for wear or damage. Lubrication levels, drive systems, and hoisting mechanisms are also evaluated. This inspection ensures that all parts are functioning correctly and safely. Any issues found are documented and addressed promptly to prevent operational disruptions. Proper documentation is maintained for compliance and future reference. This thorough process helps maintain crane efficiency and longevity, ensuring reliable performance and workplace safety.
4.2 Load Testing Procedures
Load testing is a critical part of annual crane inspections, ensuring the crane can safely handle its rated load. The process involves using test weights to verify the crane’s capacity and performance. During testing, the crane’s hoisting, trolley, and bridge motions are checked for smooth operation. Any signs of deflection, swaying, or component stress are documented. This procedure ensures compliance with safety standards and prevents potential failures. Proper documentation of test results is essential for maintaining records and verifying crane reliability. Regular load testing is vital for upholding workplace safety and operational efficiency.
4.3 Documentation Review
Documentation review is a vital step in annual inspections, ensuring all records are accurate and up-to-date. This includes verifying inspection logs, maintenance records, and load test results. The checklist requires cross-checking these documents with OSHA standards to confirm compliance. Any discrepancies or unresolved issues must be addressed promptly. Proper documentation ensures accountability and provides a clear audit trail. It also helps track the crane’s maintenance history, supporting long-term reliability and safety. Accurate records are essential for legal compliance and demonstrating adherence to safety protocols. Regular reviews help maintain transparency and accountability in crane operations.
OSHA Compliance and Overhead Crane Inspections
OSHA compliance is crucial for overhead crane safety, requiring regular inspections to meet strict standards. Checklists ensure adherence to regulations, preventing accidents and legal issues.
5.1 OSHA Regulations for Crane Inspections
OSHA regulations mandate strict guidelines for overhead crane inspections to ensure workplace safety. Daily pre-shift inspections are required, focusing on critical components like controls, hooks, chains, and wire ropes. Monthly inspections must cover structural integrity, electrical systems, and hoist functions. Annual inspections are more comprehensive, involving load testing and thorough mechanical evaluations. Documentation of all inspections is essential for compliance. Employers must maintain detailed records and ensure that only trained personnel perform inspections. Adhering to these regulations helps prevent accidents, reduces liability, and ensures a safe working environment. OSHA standards are non-negotiable for operational safety and legal compliance.
5.2 Frequency of Inspections as per OSHA
OSHA mandates specific inspection frequencies for overhead cranes to ensure safety and compliance. Daily inspections must be conducted before each shift, focusing on critical components like controls, wire ropes, and hooks. Monthly inspections are required to check structural integrity, electrical systems, and hoist functions. Annual inspections are more thorough, involving load testing and detailed mechanical evaluations. Additionally, third-party inspections are required every 4 years for certain components. These frequencies are non-negotiable and must be strictly followed to prevent accidents and maintain legal compliance. Proper documentation of all inspections is essential to meet OSHA standards and ensure operational safety.
Safety Best Practices for Overhead Crane Inspections
Safety best practices for overhead crane inspections include using PPE, following lockout/tagout procedures, and ensuring emergency preparedness. Compliance with OSHA standards is crucial for operational safety.
6.1 Personal Protective Equipment (PPE)
Personal Protective Equipment (PPE) is crucial for overhead crane inspections. Inspectors must wear hard hats, safety glasses, gloves, and steel-toe boots. High-voltage areas require additional gear like insulating gloves and arc-flash suits. PPE ensures compliance with safety standards and prevents injuries from falling objects or electrical hazards. Regularly inspect PPE for damage or wear. Employers must provide training on proper PPE use. Adhering to PPE requirements is a statutory obligation in many regions, ensuring a safe working environment during crane inspections and maintenance activities.
6.2 Lockout/Tagout Procedures
Lockout/Tagout (LOTO) procedures are critical for ensuring safety during overhead crane inspections. These steps involve disconnecting power sources and securing components to prevent accidental operation. Inspectors must apply approved locks and tags to all energy sources, including electrical, hydraulic, and mechanical systems. Only authorized personnel should perform LOTO, and all team members must understand the procedures. Regular training on LOTO protocols is essential to maintain compliance with safety standards. Proper implementation of LOTO ensures the crane is safely de-energized, protecting inspectors from potential hazards during maintenance or inspection tasks.
6.3 Emergency Preparedness
Emergency preparedness is vital for safely handling overhead crane incidents. A well-defined plan ensures quick responses to accidents or malfunctions. Regular training on emergency procedures, such as evacuation routes and first aid, is essential; Inspectors should identify potential hazards and have emergency contact information readily available. Fire extinguishers, first aid kits, and communication devices must be accessible. Proper signage and clear communication protocols help prevent panic. Regular drills ensure readiness and compliance with safety standards. A proactive approach to emergencies minimizes risks and protects both personnel and equipment during crane operations and inspections.

Overhead Crane Maintenance Checklist
An overhead crane maintenance checklist ensures regular lubrication, timely replacement of wear parts, and thorough cleaning to maintain optimal performance and safety.
7.1 Lubrication Schedule
A well-planned lubrication schedule is crucial for maintaining overhead crane performance. Regular greasing of moving parts, such as wire ropes, pulleys, and gears, prevents wear and tear. Ensure lubrication intervals align with manufacturer recommendations and operational frequency. Over-lubrication can attract dust, while under-lubrication leads to friction and damage. Use high-quality, crane-specific lubricants to withstand heavy loads and environmental conditions. Refer to the overhead crane inspection checklist PDF for detailed lubrication points and frequencies. Proper lubrication enhances safety, reduces downtime, and extends equipment lifespan, ensuring compliance with OSHA standards and optimal functionality.
7.2 Replacement of Wear Parts
Regular replacement of wear parts is vital for overhead crane safety and efficiency. Components like wire ropes, chains, and brake pads degrade over time and must be replaced promptly. Adhering to manufacturer guidelines ensures reliability. Timely replacement prevents unexpected failures, reducing downtime and potential hazards. Use the overhead crane inspection checklist PDF to identify and track worn parts. Proactive maintenance enhances operational safety and extends equipment lifespan, ensuring compliance with industry standards and preventing costly repairs.
7.3 Cleaning and Painting
Cleaning and painting are crucial for maintaining the longevity and safety of overhead cranes. Regular cleaning removes dirt, grease, and debris that can hinder performance and cause corrosion. Painting protects metal surfaces from rust and environmental damage, ensuring structural integrity. Focus on exposed areas like beams, girders, and hoist components. Use high-quality, durable paints suitable for industrial environments. Follow manufacturer recommendations for frequency, typically every 5-10 years, depending on usage and conditions. Proper cleaning and painting not only enhance aesthetics but also prevent premature wear, ensuring compliance with safety standards and extending equipment lifespan.
Troubleshooting Common Issues
Troubleshooting common issues in overhead cranes involves identifying wire rope wear, addressing brake system failures, and resolving electrical malfunctions. Regular inspections and checklists help prevent these problems.
8.1 Identifying Wear and Tear
Identifying wear and tear during overhead crane inspections is crucial for maintaining safety and functionality. Regularly inspect wire ropes for frays, corrosion, or uneven wear. Chains should be checked for elongation or damaged links. Hooks must be free from cracks or deformation. Look for signs of excessive wear on sheaves, drums, and brake systems. Ensure all moving parts are properly lubricated to prevent premature wear. Structural components, such as girders and end trucks, should be examined for rust or misalignment. Documenting these findings helps in scheduling timely repairs and preventing potential failures. This process ensures compliance with safety standards and extends equipment lifespan.
8.2 Addressing Electrical Malfunctions
Electrical malfunctions in overhead cranes can pose significant safety risks and operational disruptions. During inspections, check for loose or corroded connections, damaged wires, and malfunctioning controls. Use multimeters to test voltage and circuit continuity. Ensure all electrical components, such as motor starters and contactors, are functioning properly. If issues are found, disconnect power and perform repairs with certified tools. Replace faulty components promptly to prevent further damage. Always follow manufacturer guidelines and safety protocols when addressing electrical problems. Proper documentation of repairs and testing is essential for compliance and future reference.
8.3 Resolving Hydraulic System Problems
Hydraulic system issues in overhead cranes can lead to operational failures and safety hazards. Regularly inspect for leaks, worn seals, and contaminated fluid. Check hydraulic pressure levels and ensure proper fluid viscosity. If malfunctions occur, isolate the system and perform a thorough diagnostic test. Replace damaged components, such as pumps or valves, with OEM-approved parts. Always follow manufacturer guidelines for hydraulic system maintenance. Use clean, high-quality hydraulic fluid to prevent contamination. Document all repairs and testing for compliance and future reference. Addressing hydraulic issues promptly ensures reliable crane performance and workplace safety.
Documentation and Record-Keeping
Maintaining detailed inspection logs and compliance records is crucial for accountability and traceability. Use PDF checklists to organize findings, ensuring all inspections are documented and easily accessible.
9.1 Maintaining Inspection Logs
Maintaining accurate and detailed inspection logs is vital for tracking crane condition and ensuring compliance. Use PDF checklists to record findings, including dates, issues, and corrective actions. Digital logs simplify organization and accessibility, while paper records should be stored securely. Regularly review logs to identify recurring issues and plan maintenance. Proper documentation also supports compliance with OSHA regulations and provides a clear audit trail. Consistent record-keeping helps prevent oversights and ensures accountability, ultimately enhancing safety and operational efficiency.
9.2 Compliance Documentation
Compliance documentation is critical for adhering to regulatory standards and ensuring accountability. Maintain detailed records of all inspections, including dates, findings, and corrective actions. OSHA requires documentation of crane inspections, and having organized records simplifies audits. Use PDF checklists to ensure consistency and accuracy in reporting. Digital tools can streamline documentation, making it easier to track and retrieve information. Proper documentation also demonstrates commitment to safety and regulatory adherence, reducing liability risks. Regularly update and store records securely to support compliance and operational transparency.
Training for Overhead Crane Inspectors
Proper training ensures inspectors are certified and knowledgeable in crane safety standards. Regular refresher courses keep skills updated, promoting compliance and operational excellence.
10.1 Inspector Certification Programs
Inspector certification programs ensure that individuals are proficient in conducting thorough overhead crane inspections. These programs typically include comprehensive training on safety standards, inspection techniques, and regulatory compliance; Certified inspectors are equipped to identify potential hazards, ensuring equipment reliability and workplace safety. Many programs also cover the use of inspection checklists, such as the overhead crane inspection checklist PDF, to streamline the process. Certification validates an inspector’s expertise, fostering trust and accountability in maintaining operational integrity and preventing accidents. Regular updates to these programs keep inspectors informed about the latest industry advancements and requirements.
10.2 Refresher Training Requirements
Refresher training is crucial for overhead crane inspectors to stay updated on the latest safety protocols and inspection techniques. These programs ensure inspectors remain competent in using tools like the overhead crane inspection checklist PDF. Training covers updates on regulations, new technologies, and best practices, addressing any skill gaps. Practical exercises reinforce theoretical knowledge, ensuring inspectors can identify hazards and perform thorough checks. Many programs recommend refresher courses every 2-3 years to maintain certification and compliance. This ongoing education ensures inspectors are equipped to handle evolving industry standards, promoting workplace safety and equipment reliability. Regular training also enhances the effectiveness of inspection checklists.
Common Overhead Crane Inspection Challenges
Wire rope wear, brake failures, and electrical anomalies are frequent issues. These challenges require meticulous attention to ensure safety and compliance with overhead crane inspection standards.
11.1 Wire Rope Wear and Damage
Wire rope wear and damage are common challenges in overhead crane inspections. Regular checks are crucial to identify fraying, corrosion, or kinking, which can lead to dangerous failures. Environmental factors, heavy usage, and improper maintenance often accelerate wear. Inspectors must look for signs of wire breakage, abrasion, or excessive stretching. Lubrication deficiencies can also exacerbate rope degradation. If left unaddressed, these issues can result in operational hazards and costly repairs. Ensuring proper lubrication and timely replacement of damaged ropes is essential to maintain safety and compliance with OSHA standards. Regular inspections help prevent accidents and extend the crane’s service life.
11.2 Brake System Failures
Brake system failures are a critical issue in overhead crane operations, posing significant safety risks. Regular inspections are vital to identify worn brake pads, hydraulic leaks, or air system malfunctions. Over time, components like brake drums and shoes can wear out, reducing stopping efficiency. Environmental factors, such as moisture or dust, can also compromise brake performance. Failure to address these issues can lead to accidents, injuries, and costly downtime. Proper maintenance, including timely replacement of worn parts and lubrication, is essential to ensure reliable braking and prevent operational hazards. Brake system failures underscore the importance of rigorous inspection and preventive maintenance routines.
11.3 Electrical System Anomalies
Electrical system anomalies are a common challenge in overhead crane inspections. Issues like faulty wiring, short circuits, or malfunctioning controls can disrupt operations and pose safety risks. Over time, electrical components may degrade due to wear, environmental factors, or improper installation. Regular inspections are crucial to identify frayed cables, loose connections, or overheating motors. Addressing these anomalies promptly prevents unexpected malfunctions and ensures compliance with safety standards. Proper testing and maintenance of electrical systems are essential to avoid downtime and potential hazards, ensuring smooth and reliable crane performance. Electrical anomalies highlight the need for thorough inspection and preventive maintenance practices.
Overhead crane inspection checklists are vital for ensuring safety, compliance, and operational efficiency. Regular inspections help identify potential issues before they escalate, reducing risks and downtime. By following daily, monthly, and annual checklists, organizations can maintain crane performance and extend equipment lifespan. Compliance with OSHA standards and proper documentation are critical for legal and safety reasons. Addressing common challenges like wire rope wear and electrical anomalies ensures reliable operation. Investing in inspector training and using PDF checklists enhances thoroughness and accessibility. Ultimately, a well-structured inspection program fosters a safer workplace and operational excellence, safeguarding both equipment and personnel. Consistency is key to long-term success.