The Bunn VP17 manual is a comprehensive guide for operating, maintaining, and troubleshooting your coffee maker. It includes detailed instructions, diagrams, and safety precautions to ensure optimal performance. Available for free download, this manual is essential for users to understand features, installation, and care routines. Visit the official Bunn website for the latest version.
Installation and Setup
Proper installation ensures safe and efficient operation. Position the brewer on a sturdy, flat surface away from heat sources. Plug into a grounded 120V outlet. Follow setup instructions carefully.
2.1. Electrical Requirements
To ensure safe operation, the Bunn VP17 requires a 2-wire grounded electrical service rated at 120 volts AC, 15 amps, single phase, and 60 Hz. Properly position the brewer on a sturdy, flat surface away from heat sources and water exposure to prevent damage. Always use a grounded outlet and avoid extension cords to maintain safety and performance. Following these electrical guidelines is crucial for the longevity and efficient functioning of your coffee maker.
2.2. Initial Setup and Preparation
Before first use, thoroughly wash all removable parts, including the brew funnel and dispenser, with warm, soapy water. Rinse and dry them to ensure no residue remains. Plug in the brewer and allow it to preheat for 15-30 minutes. Next, perform a priming cycle by running a brew cycle without coffee grounds to flush the system. This step ensures the machine is ready for brewing and removes any manufacturing residues. After setup, your Bunn VP17 is prepared to deliver high-quality coffee consistently. Always refer to the manual for specific priming instructions to avoid any issues during initial use.
Operating Instructions
Insert a Bunn filter, add coffee grounds, and pour fresh water. Turn on the switch to start brewing. Follow the manual for optimal performance and safety.
3.1. Coffee Brewing Process
The Bunn VP17 brews a half-gallon batch of coffee into an awaiting dispenser. Begin by inserting a Bunn filter into the funnel and adding fresh coffee grounds. Pour water into the reservoir, ensuring it reaches the recommended level. Turn on the power switch to initiate the brewing cycle. The machine will heat the water to the ideal temperature and distribute it evenly over the coffee grounds for optimal extraction. Once the cycle is complete, the coffee will be ready to serve. Regularly following these steps ensures consistent flavor and performance. Adjust the amount of coffee and water to suit your preference for the perfect brew.
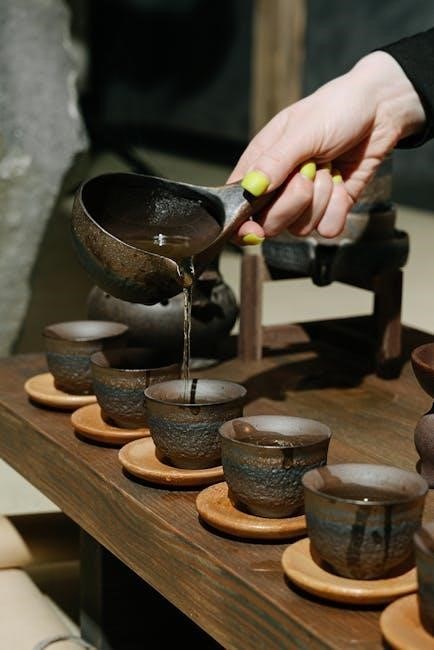
3.2. Using the Water Dispenser
The Bunn VP17 features a convenient water dispenser for hot water. To use it, ensure the reservoir is filled with fresh water. Locate the dispenser lever, typically found on the front or side of the machine. Pull or press the lever to release hot water into your cup or container. For safety, avoid touching the dispenser nozzle with your hands or placing flammable materials nearby. Always allow the machine to heat the water to the optimal temperature before dispensing. Regular cleaning of the dispenser is recommended to prevent mineral buildup and ensure hygiene. Follow the manual’s maintenance tips to keep the water dispenser functioning efficiently over time.
Maintenance and Cleaning
Regular maintenance is crucial for optimal performance. Follow daily cleaning routines and descale as recommended to prevent mineral buildup. Refer to the manual for detailed guidelines.
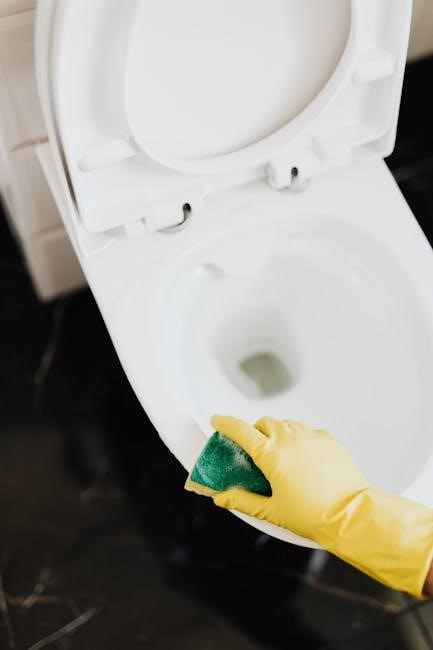
4.1. Daily Cleaning Routine
Regular cleaning ensures your Bunn VP17 performs optimally. Start by turning off and unplugging the machine. Drain the water tank and wipe down all surfaces with a damp cloth. Clean the brew head and funnel after each use to prevent residue buildup. Insert a Bunn filter into the funnel, pour fresh water into the tank, and brew a cycle without coffee grounds to rinse the system. Repeat this process daily to maintain hygiene and prevent mineral deposits. For tougher stains, mix equal parts water and white vinegar, pour into the tank, and brew. Rinse thoroughly with fresh water afterward. Consistent cleaning prevents scaling and ensures great-tasting coffee every time.
4.2. Descaling the Machine
Descaling the Bunn VP17 is essential to remove mineral buildup and maintain performance. Start by turning off and unplugging the machine. Mix a descaling solution, such as equal parts water and white vinegar, or use a commercial descaler. Pour the solution into the water tank and run multiple brew cycles until the tank is empty. Repeat if necessary to ensure all internal components are cleaned. After descaling, rinse thoroughly by brewing several cycles with fresh water to remove any solution residue. Regular descaling every 3-6 months prevents scaling, ensures proper water flow, and extends the machine’s lifespan. Always refer to the manual for specific descaling recommendations.
Troubleshooting Common Issues
Troubleshooting common issues with the Bunn VP17 involves identifying error codes, checking water flow, and ensuring proper electrical connections. Regular maintenance can prevent many problems.
5.1. Common Problems and Solutions
Common issues with the Bunn VP17 include the machine not turning on, improper water flow, or inconsistent brewing temperatures. If the brewer doesn’t power on, check the electrical connections and ensure it’s properly plugged in. For water flow issues, descale the machine and clean the spray head. Temperature problems may require adjusting the thermostat. If the machine leaks, inspect the water tank and connections for damage; Regular maintenance, such as cleaning and descaling, can prevent many of these issues. Refer to the troubleshooting guide in the manual for detailed solutions and error code explanations to restore optimal performance.
5.2. Diagnostic Guides and Error Codes
The Bunn VP17 manual includes a diagnostic guide to help identify and resolve issues quickly. Error codes like “E1” or “E2” indicate specific problems, such as temperature malfunctions or sensor issues. The manual provides a detailed list of error codes, their meanings, and step-by-step solutions. Users can refer to the diagnostic section to troubleshoot common faults, ensuring minimal downtime. For complex issues, the guide advises consulting the troubleshooting section or contacting Bunn’s technical support. Regularly reviewing the diagnostic guide helps users maintain their machine’s performance and address problems before they escalate.
Replacement Parts and Accessories
Find genuine Bunn VP17 replacement parts and accessories through authorized dealers or Bunn’s official website. These ensure compatibility and optimal performance. Consult the manual for part numbers and installation guidance.
6.1. Finding Genuine OEM Parts
To ensure compatibility and performance, purchase genuine Bunn VP17 parts from authorized dealers or Bunn’s official website. Visit www.bunn.com for the latest catalog and manual updates. For quick access, refer to the Illustrated Parts Catalog within the manual. Genuine parts guarantee optimal functionality and maintain warranty coverage.
Authorized distributors like Parts Town also offer genuine Bunn VP17 replacement parts. Use the model number (e.g., VP17, VP17B) when searching to ensure accuracy. This ensures you receive components designed specifically for your machine, avoiding compatibility issues and maintaining performance standards. Always verify the seller’s authenticity to avoid counterfeit products.
6.2. Installing Replacement Parts
Installing replacement parts on your Bunn VP17 requires careful attention to ensure proper functionality. Always turn off and unplug the machine before starting. Refer to the Bunn VP17 service manual for specific instructions tailored to your model. Align the new part correctly with existing components and secure it using the provided hardware. Tighten all connections firmly but avoid overtightening. After installation, test the machine to ensure it operates correctly. If unsure, consult a professional technician. Genuine parts are designed to fit seamlessly, so always use OEM components. Proper installation maintains performance and safety standards, ensuring your coffee maker continues to function optimally.

Warranty Information
Bunn VP17 is backed by a comprehensive warranty covering parts and labor. Visit Bunn’s official website or contact customer service for details on warranty claims and coverage.
7.1. Warranty Policy and Coverage
The Bunn VP17 warranty offers coverage for parts and labor under normal use. It ensures defects in materials and workmanship are addressed. The warranty period varies by component, with most parts covered for one year. Electrical components and brewer elements may have extended coverage. For details, refer to the official manual or contact Bunn’s customer service. Proper maintenance and adherence to guidelines are essential for warranty validity. Any unauthorized modifications or misuse may void coverage. Bunn’s dedicated support team assists with claims and provides guidance on warranty-related matters. Always verify the latest terms on Bunn’s website for accurate information.
7.2. How to Claim Warranty Service
To claim warranty service for your Bunn VP17, start by reviewing the warranty policy to confirm coverage. Contact Bunn’s customer service at 1-800-286-6070 or visit their official website. Provide proof of purchase and a detailed description of the issue. A service representative will guide you through the process, which may include shipping the unit to an authorized service center. Ensure all necessary documentation is included to avoid delays. Bunn aims to resolve warranty claims promptly, ensuring minimal disruption to your coffee service. Keep records of correspondence for reference. Note that improper packaging or missing parts may delay processing. Follow all instructions carefully to ensure a smooth warranty claim experience.
The Bunn VP17 manual provides essential guidance for users, ensuring optimal performance and longevity of the coffee maker. By following the installation, operation, and maintenance instructions, users can enjoy high-quality coffee while minimizing potential issues. The troubleshooting section and warranty information offer additional support, making the VP17 a reliable choice for coffee enthusiasts. Regularly reviewing the manual helps users stay informed about best practices and maintenance routines. With its comprehensive coverage, the Bunn VP17 manual is a valuable resource for anyone seeking to maximize their coffee-making experience. Refer to the official Bunn website for the latest updates and support. Proper care ensures years of satisfying service. Always follow safety guidelines to prevent accidents. Explore additional resources for enhanced functionality. The VP17 remains a top choice for home and office use. Consider upgrading to newer models for advanced features. Keep the manual handy for quick reference. Enjoy brewing with confidence and ease. The Bunn VP17 manual is your key to unlocking the full potential of your coffee maker. Utilize it to maintain peak performance and troubleshoot any challenges. Happy brewing!