manual for craftsman pressure washer

Welcome to the Craftsman Pressure Washer Manual! This guide provides essential information for safe and effective operation of your pressure washer‚ covering models like CMXGWAS021021 and 3000 MAX PSI. Read about safety precautions‚ assembly‚ maintenance‚ and troubleshooting to ensure optimal performance and longevity of your unit.

Safety Guidelines and Precautions

Always read the Operators Manual and follow safety rules to ensure safe operation. Wear protective gear‚ avoid spraying near power sources‚ and prevent slippery surfaces. Do not lift or tilt surface cleaners while pressurized. Keep children away and ensure proper hose connections to avoid kickback risks.

Understanding Safety Warnings

Safety warnings in the manual highlight critical risks‚ such as spraying near power sources or creating slippery surfaces. Failure to follow precautions can result in injury or damage. Always wear protective gear and ensure proper footing. Never lift or tilt pressurized surface cleaners. These warnings emphasize the importance of caution to prevent accidents and ensure safe operation of your Craftsman pressure washer.

Precautions Before Use

Before using your Craftsman pressure washer‚ ensure all connections are secure and free from damage. Read the manual thoroughly to understand proper setup and operation. Check for leaks in hoses and connections. Keep the area clear of debris and flammable materials. Always operate on a level surface to prevent tipping. Never spray near open flames or electrical sources‚ and ensure the power cord is protected from water exposure.

Operating in Safe Conditions

Always operate your Craftsman pressure washer on a stable‚ level surface to prevent tipping. Avoid spraying near open flames‚ electrical outlets‚ or power sources. Keep the area well-ventilated and free from flammable materials. Wear protective gear‚ including safety goggles and sturdy footwear. Never spray in the direction of people or pets‚ and ensure the surface is clear of debris. Stop immediately if you notice any malfunctions or unsafe conditions.

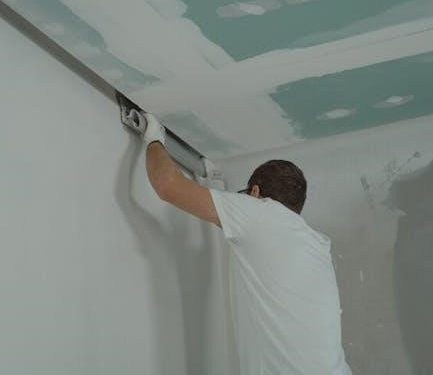
Assembly and Initial Setup

Unpack and inventory all components carefully. Connect the high-pressure hose to the pump and spray gun. Attach the garden hose securely‚ ensuring all connections are tight. Inspect for any damage before use.

Unpacking and Inventory

Begin by carefully unpacking your Craftsman pressure washer. Check all components against the provided inventory list. Inspect for any damage or missing parts. Ensure the high-pressure hose‚ spray gun‚ and garden hose adapters are included. Review the manual to familiarize yourself with each part. If any items are damaged or missing‚ contact customer support immediately. Proper inventory ensures a smooth assembly process.

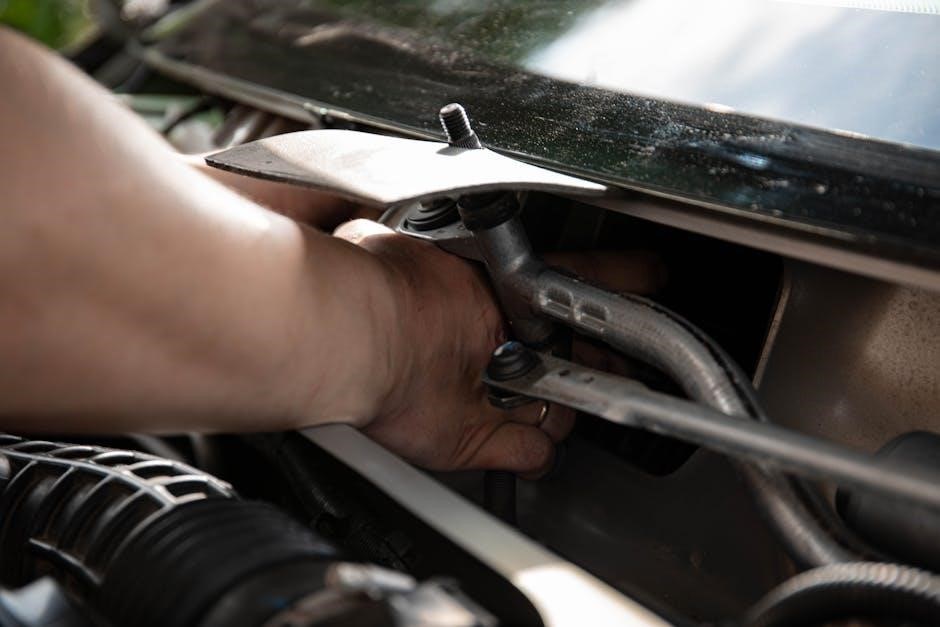
Connecting the High-Pressure Hose

To connect the high-pressure hose‚ attach one end to the quick connect outlet on the pressure washer. Ensure the connection is secure and tightened properly. The other end connects to the spray gun or surface cleaner. Avoid kinking or twisting the hose to prevent damage. Always follow the manual for specific models like CMXGWAS021021 or 3000 MAX PSI. Ensure the hose is rated for your unit’s pressure and flow rate to maintain performance and safety.

Attaching the Garden Hose

To attach the garden hose‚ securely connect one end to the water inlet on the pressure washer. Ensure the connection is tight and leak-free. Use the provided adapter if necessary. Turn on the water supply and check for leaks before starting the engine. Ensure the garden hose is rated for the pressure washer’s specifications to maintain proper water flow and prevent damage to the unit. Always follow the manual for specific model instructions;

Operating Your Craftsman Pressure Washer

Refer to the manual for models like CMXGWAS021021 or 3000 MAX PSI. Follow guidelines for starting the engine‚ applying detergent‚ and using nozzle tips for efficient cleaning.

Starting the Engine

To start your Craftsman pressure washer’s engine‚ ensure oil and fuel levels are adequate. Prime the pump if necessary. Pull the recoil slowly until resistance is felt‚ then pull sharply. Allow the engine to warm up briefly before use. Always wear protective gear and ensure the area is clear of obstructions. Refer to your specific model’s manual for detailed instructions‚ such as for models like CMXGWAS021021 or 3000 MAX PSI.

Applying Detergent

For effective cleaning‚ fill the detergent tank with a recommended pressure washer cleaner. Do not use household chemicals. Attach the black low-pressure tip to the spray gun. Squeeze the trigger to draw detergent onto the surface. Avoid using high-pressure settings for detergent application. Refer to your model-specific manual‚ such as the CMXGWAS021021 or 3000 MAX PSI‚ for detailed instructions on detergent use and compatibility.

Using Different Nozzle Tips

Interchange nozzles based on cleaning tasks. The 0° nozzle is for heavy-duty cleaning‚ while the 25° and 40° nozzles are for lighter tasks. Always use the correct tip to avoid surface damage. For tough stains‚ use the turbo nozzle. Refer to your Craftsman model‚ like CMXGWAS021021‚ for specific nozzle recommendations. Replace nozzles if worn to maintain optimal pressure and efficiency.

Maintenance and Care

Regularly inspect hoses‚ nozzles‚ and filters. Replace worn parts promptly. Store the unit in a dry place during winter. Follow winterizing steps in your manual to prevent damage. Refer to models like CMXGWAS021021 for specific care instructions. Proper maintenance ensures longevity and performance of your Craftsman pressure washer. Always use genuine replacement parts for reliability.

Regular Maintenance Checks

Perform routine checks on your Craftsman pressure washer to ensure optimal performance. Inspect hoses for cracks‚ clean the filter regularly‚ and check oil levels. Replace worn nozzles and seals promptly. Lubricate moving parts as recommended. Drain fuel before storage. Follow the winterizing guide in your manual to prevent damage. Regular maintenance extends the life of your unit and ensures reliable operation. Always refer to your specific model’s manual for detailed instructions‚ such as for CMXGWAS021021 or 3000 MAX PSI models. This helps maintain warranty coverage and prevent costly repairs. Keep your pressure washer in prime condition with consistent upkeep.

Winterizing the Unit

Winterizing your Craftsman pressure washer is crucial to prevent damage from freezing temperatures. Drain all fuel and water from the system. Disconnect hoses and store them in a dry place. Protect the pump with a winterizing kit or antifreeze solution. Follow the manual’s specific instructions for your model‚ such as CMXGWAS021021 or 3000 MAX PSI. Proper winterization ensures your pressure washer is ready for use in the next season. Always consult your manual for detailed steps to safeguard your unit.

Troubleshooting Common Issues

Troubleshoot common problems like low pressure or engine issues by checking hoses for blockages and ensuring proper fuel levels. Refer to your manual for model-specific solutions‚ such as for CMXGWAS021021‚ to resolve issues effectively and maintain performance.

Low Pressure Problems

Low pressure issues in your Craftsman pressure washer can be caused by blockages in the hose‚ incorrect nozzle size‚ or pump malfunctions. Check for kinked or clogged hoses and ensure the nozzle is clean. Refer to your manual for model-specific troubleshooting‚ such as for CMXGWAS021021‚ and follow steps to resolve pressure loss. Regular maintenance‚ like cleaning filters‚ can also prevent such issues.

Engine Troubleshooting

Engine issues may arise due to improper fuel supply‚ faulty spark plugs‚ or clogged air filters. Check the oil level and ensure proper fuel flow. For models like CMXGWAS021021‚ refer to the manual for specific diagnostic steps. Address overheating by ensuring adequate cooling and clearing blockages. Regular maintenance‚ such as replacing worn parts‚ can prevent engine problems and ensure smooth operation. Always follow safety guidelines when servicing the engine.

Warranty Information

Craftsman pressure washers are backed by a comprehensive warranty covering defects in materials and workmanship. Refer to your manual for specific terms and conditions. Contact Sears for claims or questions regarding warranty coverage. Proper maintenance ensures warranty validity; details are outlined in the manual.

Understanding Warranty Coverage

Craftsman pressure washers are covered under a warranty that protects against defects in materials and workmanship. Models like CMXGWAS021021 and 3000 MAX PSI are included‚ with specific terms outlined in the manual; Sears handles warranty claims‚ ensuring repairs or replacements are done free of charge for eligible issues. Proper maintenance‚ as detailed in the manual‚ is required to maintain warranty validity. Refer to your manual for exact coverage details and conditions.

Filing a Warranty Claim

To file a warranty claim for your Craftsman pressure washer‚ contact Sears customer service with your product details and proof of purchase. Ensure the issue is covered under the warranty terms‚ as outlined in your manual. Sears will handle repairs or replacements free of charge for valid claims. Proper documentation and adherence to manual guidelines are essential for a smooth process. Visit Sears’ website or call their support for assistance.

Effective Cleaning Tips

For optimal cleaning‚ use the correct nozzle tip and maintain a 12-inch spray distance. Apply detergent as instructed and clean in sections to ensure thorough results.

Choosing the Right Nozzle

Selecting the correct nozzle tip is crucial for efficient cleaning. The 0° tip is ideal for tough stains‚ while the 15° tip handles heavy-duty cleaning. Use the 25° tip for general cleaning and the 40° tip for delicate surfaces. Always choose the right nozzle to avoid damage and ensure effective cleaning. Rinse with a wide-angle tip after detergent application for best results.

Using Detergent Effectively

For optimal cleaning‚ use a high-quality detergent designed for pressure washers. Fill the detergent tank according to the manual’s guidelines. Apply detergent using the low-pressure setting with the 25° or 40° tip. Allow the detergent to sit for 1-2 minutes before rinsing thoroughly with clean water. Avoid using household cleaners‚ as they can damage surfaces or the washer. Always rinse surfaces to prevent residue buildup.

Parts and Accessories

Explore essential accessories for your Craftsman pressure washer‚ including high-pressure hoses‚ spray guns‚ and detergent tanks. Visit Sears Parts Direct for genuine replacement parts and manuals.

Essential Accessories

Enhance your Craftsman pressure washer with essential accessories like high-pressure hoses‚ quick-connect spray guns‚ and detergent tanks. These tools optimize cleaning efficiency and versatility. For replacement parts‚ visit Sears Parts Direct‚ offering genuine components and detailed diagrams to ensure proper fitment. Accessories are designed to maintain peak performance and extend the life of your pressure washer. Always use original equipment for reliability and safety.
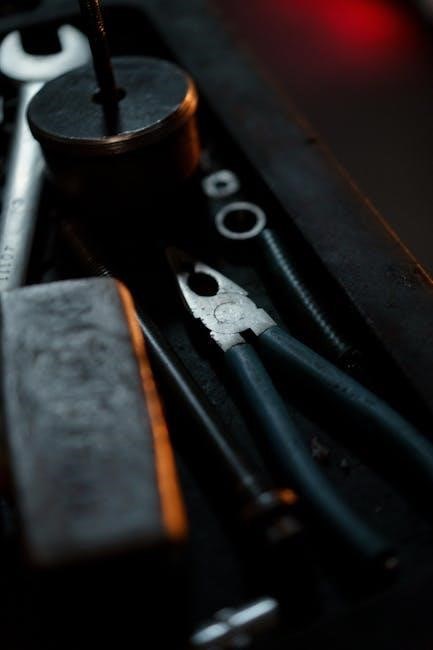
Replacement Parts

For optimal performance‚ use genuine Craftsman replacement parts available through Sears Parts Direct. Common replacements include high-pressure hoses‚ spray guns‚ and pump seals. Refer to your model-specific parts list or exploded diagrams for accurate identification. Ensure longevity and safety by choosing authentic components designed for your pressure washer. Visit the Craftsman website or authorized dealers to purchase reliable replacement parts and maintain peak functionality.

Common Mistakes to Avoid

Avoid incorrect hose connections and ignoring safety precautions‚ which can damage the machine or cause accidents. Always follow the manual for proper setup and operation to ensure safety and efficiency.

Incorrect Hose Connections

Incorrectly connecting the high-pressure hose or garden hose can lead to leakage‚ reduced performance‚ or even machine damage. Always ensure the high-pressure hose is securely attached to the pump and spray gun. For garden hose connections‚ verify compatibility and tighten fittings properly. Refer to the manual for specific instructions on connecting hoses for models like CMXGWAS021021 to avoid common issues and ensure safe operation.

Ignoring Safety Precautions

Ignoring safety precautions can result in serious injury or damage to the pressure washer. Always wear protective gear and ensure the area is clear of obstacles. Never operate the machine near open flames or sparks‚ and avoid spraying electrical components. Read and follow all safety guidelines in the manual to ensure safe and effective use of your Craftsman pressure washer.

goodman gsxc16 installation manual pdf

Installation Manual Overview

The Goodman GSXC16 installation manual provides detailed guidance for installing the split system, covering safety, compatibility, and technical specifications to ensure proper setup and efficiency.

The Goodman GSXC16 is a high-efficiency split-system air conditioner designed for residential use. It features a 16 SEER rating, R-410A refrigerant compatibility, and a variable-speed compressor for optimal performance. This model is part of a fully communicating system, ensuring advanced control and energy efficiency. With a 2-ton capacity, it offers reliable cooling solutions while maintaining low operational noise levels. The GSXC16 is built with durable materials and advanced technology to provide long-lasting comfort and efficiency for homeowners.

1.2 Key Features of the GSXC16 Split System

The GSXC16 split system offers a variable-speed compressor for precise temperature control and high efficiency. It operates as part of a fully communicating system, enabling advanced diagnostics and optimized performance. The unit features a 16 SEER rating, R-410A refrigerant compatibility, and quiet operation due to its aerodynamic fan design. It is designed for compatibility with modern thermostats, including the ComfortNet communicating system. The GSXC16 also includes a louvered coil guard and galvanized steel cabinet for durability and reliability, ensuring long-lasting performance and energy efficiency.

1.3 Safety Precautions and Warnings

This manual is intended for qualified HVAC technicians only. Proper safety precautions must be followed to avoid personal injury or equipment damage. Always handle refrigerants safely, ensuring compliance with environmental regulations. Improper electrical connections or refrigerant charging can lead to system failure or safety hazards. Follow all instructions carefully, and ensure proper airflow and refrigerant charge for optimal performance. Failure to comply may result in reduced efficiency, equipment damage, or void the warranty. Always refer to the safety symbols and labels provided in the manual for critical warnings and guidelines.

System Components and Requirements

The Goodman GSXC16 split system includes an outdoor condenser, indoor unit, and refrigerant R-410A. Ensure compatibility with specified electrical and airflow requirements for optimal performance.

2.1 Outdoor Unit Specifications

The Goodman GSXC16 outdoor unit features a variable-speed compressor, R-410A refrigerant compatibility, and a 2-ton capacity. It operates with a 16 SEER rating, ensuring energy efficiency. Proper installation requires adhering to specified airflow and electrical connections to maintain performance and warranty. The unit must be installed on a level surface and protected from direct sunlight and moisture to prevent damage. Refer to the manual for detailed sizing and placement guidelines.

2.2 Indoor Unit Compatibility

The Goodman GSXC16 must be paired with a compatible indoor unit, such as a variable-speed furnace or air handler, to ensure optimal performance. Compatibility is crucial for proper communication between components, as the system relies on advanced diagnostics and monitoring. The indoor unit must match the outdoor unit’s capacity and refrigerant type (R-410A) to maintain efficiency and warranty validity. Proper sizing and airflow compatibility are also essential for reliable operation and energy efficiency.

2.3 Refrigerant and Electrical Requirements

The Goodman GSXC16 requires R-410A refrigerant for operation and must be charged according to the manufacturer’s specifications. Electrical connections should be made to a 240V, single-phase power supply with a dedicated 20- or 30-amp circuit, depending on the unit’s capacity. A 24V control circuit is necessary for system communication. Proper refrigerant charging and electrical connections are critical for efficiency and safety; Always follow local electrical codes and manufacturer guidelines for installation.

Installation Process

The GSXC16 installation involves pre-installation checks, site preparation, mounting, and connecting refrigerant and electrical lines. Follow detailed steps to ensure compliance with safety and performance standards.

3.1 Pre-Installation Checks

Before installing the Goodman GSXC16, ensure the site is prepared. Verify compatibility with indoor units, check refrigerant levels, and confirm electrical requirements. Inspect the area for obstructions and ensure proper drainage. Validate the thermostat compatibility and system sizing to match the space. Review safety guidelines and manufacturer instructions to avoid potential issues. Proper preparation ensures efficient and safe installation, optimizing system performance and longevity.

3.2 Step-by-Step Installation Guide

Mount the outdoor unit on a level surface, ensuring proper drainage. Install the indoor coil, connecting it to the furnace or air handler. Run and connect refrigerant lines, vacuuming the system to remove moisture. Connect electrical wires between the indoor and outdoor units, following the wiring diagram. Install a thermostat and set up the system controls. Test the system for proper operation, checking airflow, refrigerant flow, and electrical connections. Ensure all safety guidelines are followed throughout the process.

3.3 Post-Installation Testing and Commissioning

After installation, test the system to ensure optimal performance. Check refrigerant levels, airflow, and electrical connections. Verify proper operation of the compressor, fan, and thermostat. Measure system pressure and temperature to confirm correct refrigerant charge. Perform a full-cycle test, monitoring cooling and heating modes. Ensure all safety features function correctly, such as emergency shutoff. Record performance data for future reference and provide the homeowner with system operation instructions. Ensure compliance with manufacturer guidelines for commissioning.

Technical Specifications

The Goodman GSXC16 features a 16 SEER rating, R-410A refrigerant compatibility, and a variable-speed compressor for efficient operation. Its 2-ton capacity ensures reliable cooling performance;

4.1 Performance Ratings and SEER

The Goodman GSXC16 achieves a high efficiency with a 16 SEER rating, ensuring energy savings and reliable cooling performance. Its advanced compressor technology optimizes energy use, reducing operational costs while maintaining consistent indoor comfort. The system’s design meets strict energy standards, making it an environmentally friendly choice for homeowners seeking efficient cooling solutions without compromising on performance or durability.

4.2 Electrical and Airflow Requirements

The Goodman GSXC16 requires specific electrical and airflow configurations to ensure optimal performance. The system operates on R-410A refrigerant and must be installed with proper voltage and circuit requirements as outlined in the manual. Airflow specifications are critical for efficiency, and incorrect setup may lead to reduced performance or equipment damage. Proper ducting and venting are essential to maintain consistent airflow and meet energy efficiency standards.

4.3 Compatibility with Other HVAC Systems

The Goodman GSXC16 is designed to integrate seamlessly with compatible HVAC components, including thermostats and air handlers. Proper system matching ensures optimal performance and efficiency. The manual emphasizes the importance of using specified TXV kits and compatible refrigerant lines to maintain functionality. Additionally, the GSXC16 works with communicating thermostats, enhancing system control and energy efficiency. Compatibility with other Goodman systems ensures a cohesive and reliable heating and cooling solution for various home configurations.

Troubleshooting and Maintenance

The manual provides diagnostic procedures and solutions for common issues, such as refrigerant leaks or airflow problems, ensuring efficient system performance and longevity through regular maintenance.

5.1 Common Issues and Solutions

The Goodman GSXC16 manual outlines common issues like refrigerant leaks, airflow restrictions, and sensor malfunctions. Solutions include checking refrigerant levels, ensuring proper duct sizing, and verifying sensor connections. It also advises resetting the system or replacing faulty components. Regular maintenance, such as cleaning filters and coils, is recommended to prevent issues. For complex problems, consulting a qualified HVAC technician is strongly advised to ensure safety and system efficiency. Always refer to the manual for detailed troubleshooting steps.

5.2 Diagnostic Procedures

The Goodman GSXC16 manual provides diagnostic procedures to identify system issues. Check LED status codes on the outdoor unit for error messages. Verify thermostat settings, power supply, and refrigerant levels. Ensure all electrical connections are secure and sensors are clean. Consult the manual for specific error code meanings and corrective actions. If issues persist, contact a certified technician for professional assistance to ensure safe and effective problem resolution. Always follow the manual’s guidelines for accurate diagnostics.

5.3 Regular Maintenance Recommendations

Regular maintenance is essential for optimal performance and longevity of the Goodman GSXC16 system. Clean or replace air filters monthly to ensure proper airflow. Inspect and clean the condenser coils seasonally to prevent dirt buildup. Check refrigerant levels annually and ensure all electrical connections are secure. Schedule professional inspections annually to identify potential issues early. Maintain proper clearance around outdoor units for efficient operation. Follow the manual’s guidelines for routine checks to ensure reliable, energy-efficient performance.

Additional Resources

Access the full Goodman GSXC16 PDF manual online. Visit www.goodmanmfg.com for support and contact details. Online guides and tutorials offer additional help for installation and troubleshooting.

6.1 Accessing the Full PDF Manual

The Goodman GSXC16 installation manual is available for download as a PDF from the official Goodman website. It can also be accessed through HVAC.com, ensuring easy access for technicians and homeowners. The manual includes detailed installation instructions, safety precautions, and technical specifications. Users can search for “Goodman GSXC16 Installation Manual” to find and download the document directly. This resource is essential for proper installation and maintenance of the unit.

6.2 Manufacturer Support and Contact Information

Goodman Manufacturing Company provides comprehensive support for the GSXC16 model. For assistance, visit their official website at www.goodmanmfg.com or contact their customer service at 1-888-593-9988. Additional resources, including product brochures and technical specifications, are available in their literature library. For specific inquiries, refer to the contact information provided in the installation manual or reach out through their website. Goodman ensures reliable support for technicians and homeowners alike.

6.3 Online Guides and Tutorials

Goodman offers extensive online resources, including PDF manuals and video guides, to assist with the GSXC16 installation. Visit www.goodmanmfg.com for detailed tutorials, troubleshooting tips, and wiring diagrams. These resources are designed to support technicians and homeowners in understanding and maintaining the system. Additional guides cover advanced features like ComfortNet communication and energy-efficient operation. Online tools ensure safe, correct, and efficient installation, optimizing system performance and longevity.

Warranty and Service Information

Goodman offers a comprehensive warranty program for the GSXC16, covering parts and labor. For service, contact their support team or refer to the manual for details.

7.1 Warranty Terms and Conditions

The Goodman GSXC16 warranty covers parts and labor for up to 10 years, depending on product registration. Proper installation by a certified technician is required. Damage from improper installation or maintenance is not covered. The warranty is non-transferable and applies only to the original purchaser. For details, refer to the official Goodman GSXC16 installation manual or contact their customer support team.

7.2 Service and Repair Options

Goodman offers authorized service providers for GSXC16 repairs, ensuring compliance with warranty terms. Contact their support team for certified technicians. Regular maintenance by professionals is recommended to prevent issues and maintain efficiency. The manual emphasizes the importance of using genuine parts for repairs. Customers can also access diagnostic guides and troubleshooting tips online for minor issues before seeking professional assistance. Always refer to the Goodman GSXC16 manual for specific repair and maintenance guidelines.

andersen 4000 series storm door installation manual

Welcome to the Andersen 4000 Series Storm Door installation guide. This manual provides step-by-step instructions for a successful, hassle-free installation. Ensure proper fit and functionality by following the detailed steps carefully.

Overview of the Andersen 4000 Series Storm Door

The Andersen 4000 Series Storm Door is a premium, full-view storm door designed for durability and ease of use. It features a pre-assembled frame and interchangeable glass and screen panels, allowing for quick transitions between seasons. With its 45-Minute Easy Install System, this door is designed to simplify installation while ensuring a secure fit. The series offers a sleek, modern design that complements various home styles and provides excellent weather protection. Manufactured with high-quality materials, it ensures long-lasting performance and energy efficiency. This storm door is a practical and stylish solution for homeowners seeking to enhance their entryway’s functionality and appearance.

Importance of Proper Installation

Proper installation of the Andersen 4000 Series Storm Door is crucial for ensuring optimal performance and longevity. A well-installed door provides a weather-tight seal, prevents air leaks, and maintains energy efficiency. Improper installation can lead to sagging, reduced durability, and compromised functionality. Follow the manufacturer’s guidelines carefully to ensure the door frame is level, securely fastened, and aligned correctly with the entryway. This attention to detail will guarantee smooth operation, minimize maintenance, and uphold the product’s warranty. Correct installation also enhances safety and security, making it essential to adhere to the provided instructions and recommendations. Properly installed, the storm door will serve as a reliable barrier against harsh weather conditions while maintaining a polished appearance.

Pre-Installation Checklist

Before starting the installation of your Andersen 4000 Series Storm Door, ensure the following steps are completed:
Verify the door opening measurements, including width and height, to confirm they match the storm door dimensions.
Gather all necessary tools and materials, such as a level, screwdrivers, and shims, as outlined in the installation guide.

Inspect the door opening for any damage or obstructions and make necessary repairs.
Ensure the mounting surface is level and secure to prevent future sagging or misalignment.
Double-check the storm door frame for proper assembly and alignment before proceeding.
Consult the manufacturer’s guide for specific requirements, such as hand orientation and optional accessories.
By completing this checklist, you’ll ensure a smooth and accurate installation process.

Preparation

Begin by measuring the door opening accurately to ensure proper fit. Gather all necessary tools and materials, then prepare the opening by clearing debris and leveling it.

Measuring the Door Opening

Accurate measurements are crucial for a proper fit. Measure the width at the top, middle, and bottom of the door opening to ensure consistency. Record the narrowest dimension. Next, measure the height from the sill to the top of the opening. Verify the mounting surface is level and plumb to avoid installation issues. Check for any obstructions that may affect the fit. Use these measurements to select the correct storm door size. Ensure the door opening meets the minimum requirements for the Andersen 4000 Series. Double-check all measurements for accuracy before proceeding with installation. Proper sizing ensures smooth operation and a weather-tight seal.

Tools and Materials Needed

To install the Andersen 4000 Series Storm Door, gather the necessary tools and materials. Essential tools include a tape measure, level, drill, screwdrivers (Phillips and flathead), wrench, and utility knife; Additional tools like a hammer, pliers, and pencil may also be useful. Materials required include shims, weatherstripping, silicone sealant, and fasteners (provided with the door). Ensure all components from the storm door kit are included, such as the frame, panel, and hardware. Refer to the manufacturer’s guide for specific hardware details. Having all tools and materials ready will streamline the installation process and ensure a professional result. Double-check the list to avoid delays. Proper preparation is key to a successful installation.

Preparing the Door Opening

Before installing the Andersen 4000 Series Storm Door, ensure the door opening is properly prepared. Clean the area around the opening to remove dirt, debris, or old sealants. Check that the opening is square and level, making adjustments if necessary. Verify that the mounting surface is secure and can support the weight of the storm door. Seal any gaps or cracks around the opening with weatherproof sealant to ensure a tight fit. If the door opening has rot or damage, repair it before proceeding. Proper preparation ensures a stable and weather-tight installation. Follow the manufacturer’s instructions for specific recommendations on preparing the door opening.

Installation

The Andersen 4000 Series Storm Door installation is straightforward with pre-assembled components and basic tools; Follow step-by-step guides for a secure and proper fit.

Mounting the Storm Door Frame

Mounting the Andersen 4000 Series Storm Door frame requires precise alignment and secure fastening. Begin by ensuring the door opening is properly prepared and measured. Place the frame into the opening, aligning it with the doorway. Use shims to level the frame and ensure it is plumb. Secure the frame to the surrounding structure using the provided screws, starting from the top and working down. Tighten all fasteners firmly to prevent any movement or sagging over time. Double-check the frame’s stability and alignment before proceeding to install the door panel. Proper mounting is crucial for smooth operation and long-term durability.

Installing the Door Panel

To install the door panel on your Andersen 4000 Series Storm Door, begin by attaching the hinges to the panel according to the manufacturer’s instructions. Carefully lift the panel and align it with the pre-mounted frame, ensuring proper alignment with the hinges. Secure the panel to the frame using the provided screws, starting from the top and working downward. Tighten all fasteners firmly to ensure a stable and even fit. Once installed, check the panel’s movement and alignment to ensure smooth operation. If necessary, adjust the hinges or shims to achieve proper alignment. Finally, test the door by opening and closing it to confirm it operates smoothly and evenly.

Securing the Door to the Frame

To secure the Andersen 4000 Series Storm Door to the frame, begin by aligning the pre-installed hinges on the door panel with those on the frame. Insert the hinge pins into their respective slots, ensuring they are fully seated. Use the provided screws to tighten the hinges firmly, starting from the top and working downward. Make sure the door is properly aligned and plumb before finalizing the screws. Once secured, test the door’s operation by opening and closing it to ensure smooth movement and proper alignment. If necessary, adjust the hinges or shims to achieve a flush fit and even operation. This step ensures the door remains stable and functions as intended.

Hardware and Features

The Andersen 4000 Series Storm Door includes durable hardware like handles, locks, and weatherstripping for secure closure and weather tightness, ensuring long-lasting performance and easy maintenance.

Installing the Handle and Lock

To install the handle and lock on your Andersen 4000 Series Storm Door, start by positioning the handle assembly on the door frame, aligning the screw holes. Use the provided screws to secure it tightly. Next, attach the strike plate to the doorframe, ensuring it aligns with the lock mechanism. Drill pilot holes if necessary to avoid damaging the material. Tighten all screws firmly to ensure proper function. Finally, test the handle and lock to confirm smooth operation and secure closure. Refer to the installation guide for specific torque settings and alignment tips to ensure a professional finish. Proper installation ensures long-lasting durability and reliable performance.

Adding Weatherstripping and Seals

Properly adding weatherstripping and seals to your Andersen 4000 Series Storm Door ensures airtight performance and energy efficiency. Begin by inspecting the door frame for any gaps or uneven surfaces. Cut the weatherstripping to the required length using a utility knife or scissors. Peel the backing and press the weatherstripping firmly along the doorframe edges, starting from the top and working your way down. Ensure a snug fit around the hinges and lock area for maximum sealing. For added protection, install door sweeps or threshold seals at the bottom of the door; Test the seals by closing the door to verify a tight fit. Regularly inspect and replace worn-out weatherstripping to maintain weather-tightness and prevent air leaks. This step is crucial for optimizing your storm door’s functionality and longevity.

Adjusting the Door Closer

Properly adjusting the door closer ensures smooth operation and optimal performance of your Andersen 4000 Series Storm Door. Begin by loosening the adjustment screws located on the door closer cylinder. Gently turn the cylinder to achieve the desired closing speed and alignment. Tighten the screws once the desired setting is reached. Test the door by opening and closing it to ensure it shuts securely without slamming. If the door closer feels too stiff or too loose, repeat the adjustment process. For fine-tuning, refer to the detailed instructions in the installation manual or online diagrams. Proper adjustment ensures longevity and reliable functionality of your storm door. Regular checks and minor tweaks will keep your door operating smoothly.

Final Checks and Maintenance

After installation, perform a final inspection to ensure all components function properly. Test the door’s operation, check for gaps, and verify weather tightness. Schedule regular maintenance to maintain performance and durability.

Testing Door Operation

After installation, thoroughly test the storm door’s operation to ensure smooth functionality. Open and close the door several times to check for proper alignment and movement; Verify that the door closer operates correctly, smoothly shutting the door without excessive force. Inspect the handle and lock mechanism to ensure they engage securely. Additionally, test the insect screen and glass panel transitions to confirm they move effortlessly. Check for any air leaks or gaps around the edges, and ensure weatherstripping is securely in place. Proper door operation ensures energy efficiency and long-lasting performance, so address any issues promptly. Regular testing helps maintain optimal function.

Sealing Gaps and Ensuring Weather Tightness

Properly sealing gaps and ensuring weather tightness is crucial for the Andersen 4000 Series Storm Door to perform optimally. Inspect the door frame and surrounding areas for any visible gaps or cracks. Apply weatherstripping around the door perimeter to create a tight seal, ensuring no air leaks or moisture penetration. Check the alignment of the door and frame to confirm they are flush and even. Use silicone-based sealants for any small gaps between the frame and the entryway. Test the door’s operation to ensure it closes securely, engaging the weatherstripping effectively. Regularly inspect and replace worn-out weatherstripping to maintain weather tightness and energy efficiency. This step ensures your storm door provides reliable protection against the elements.

Scheduled Maintenance

Regular maintenance ensures the longevity and optimal performance of your Andersen 4000 Series Storm Door. Inspect the door frame, hinges, and closer for any signs of wear or damage. Lubricate the hinges and door closer annually to maintain smooth operation. Clean the weatherstripping and door sweeps to ensure proper sealing. Replace any worn-out seals or sweeps promptly. Check the alignment of the door panel and frame, adjusting as needed. Inspect and tighten all fasteners to prevent loosening over time. Schedule a professional inspection every two years to address any issues before they become major problems. By following this maintenance routine, you can extend the life of your storm door and ensure it continues to provide reliable protection and energy efficiency.

commercial drivers license manual mississippi

The Mississippi CDL Manual is a crucial guide for aspiring commercial drivers, detailing state and federal regulations, safe driving practices, and the application process for obtaining a CDL.

Overview of the Mississippi CDL Manual

The Mississippi CDL Manual is a comprehensive guide detailing state and federal regulations for commercial drivers. It covers vehicle inspection procedures, traffic laws, and requirements for obtaining a CDL. The manual also provides insights into classes of licenses, endorsements, and restrictions. Designed to ensure safe and legal driving practices, it serves as an essential resource for both new and experienced commercial drivers in Mississippi.

Importance of the CDL Manual for Aspiring Commercial Drivers

The Mississippi CDL Manual is vital for aspiring commercial drivers as it provides detailed information on safety regulations, vehicle operations, and legal requirements. It ensures drivers understand state and federal laws, preparing them for exams and real-world scenarios. The manual is indispensable for mastering the skills and knowledge needed to obtain a CDL, making it a cornerstone of successful commercial driver preparation in Mississippi.

How to Obtain the Mississippi CDL Manual

The Mississippi CDL Manual can be downloaded for free from the Mississippi Department of Public Safety website or purchased as a physical copy for a small fee.

Downloading the Manual from the Mississippi Department of Public Safety

Downloading the Mississippi CDL Manual is convenient and free. Visit the Mississippi Department of Public Safety website and navigate to the CDL section. Click the provided link to access the PDF version. Ensure your device has a PDF reader installed to view the document. This method allows you to study the manual digitally at your own pace, making it ideal for modern learners. The manual is regularly updated to reflect current laws and regulations, ensuring you have the most accurate information for your CDL preparation.

Purchasing a Physical Copy of the Manual

A physical copy of the Mississippi CDL Manual can be purchased directly from the Mississippi Department of Public Safety. Each manual costs $3.00, with an additional $0.58 processing fee. You can buy one copy per transaction, ensuring you have a tangible resource for studying. This option is perfect for those who prefer traditional learning methods or need a backup for digital access. The manual is comprehensive and up-to-date, covering all necessary topics for CDL preparation.

Classes of Commercial Driver Licenses in Mississippi

Mississippi offers Class A, B, and C CDLs, each catering to different types of commercial vehicles and driving roles. The manual details requirements for each license class.

Class A, B, and C CDLs: Differences and Requirements

The Mississippi CDL Manual outlines three license classes: Class A, B, and C. Class A allows operation of vehicles with a GVWR of 26,001 lbs or more, towing a trailer over 10,001 lbs. Class B covers heavy straight trucks with a GVWR of 26,001 lbs or more. Class C is for small passenger vehicles or hazardous materials. Each class requires specific endorsements and meets federal and state standards for commercial driving. The manual details the unique requirements for each license type to ensure drivers are properly qualified.

Endorsements and Restrictions: What You Need to Know

Endorsements and restrictions are crucial components of a Mississippi CDL. Endorsements, such as H (hazardous materials) or N (tankers), expand driving privileges. Restrictions, like O (no tractor-trailer) or Z (no air brakes), limit operations. The manual explains how these are added or removed based on tests, certifications, or driving history, ensuring compliance with federal and state regulations for safe and legal commercial operations.

The CDL Application Process in Mississippi

The Mississippi CDL application process involves submitting required documents, paying fees, and completing necessary tests. Follow the step-by-step guide to ensure compliance.

Step-by-Step Guide to Applying for a CDL

  • Complete the CDL application form available on the Mississippi Department of Public Safety’s website.
  • Submit required documents, including proof of identity, residency, and medical certification.
  • Pass the vision test and written knowledge exams for the desired CDL class and endorsements.
  • Pay the applicable fees for the CDL application and testing.
  • Schedule and pass the skills tests, including the pre-trip inspection, basic vehicle control, and road test.

Required Documents and Fees for CDL Application

  • Provide proof of identity, Social Security number, and Mississippi residency.
  • Submit a valid medical examiner’s certificate and complete a vision test.
  • Pay the CDL application fee, which varies by class and endorsements.
  • Cover the cost of skills tests, including vehicle inspection and road test fees.
  • Additional fees may apply for endorsements like hazardous materials or passenger vehicles.

CDL Exams and Tests: What to Expect

The Mississippi CDL exams include written knowledge tests, vehicle inspection, basic control tests, and a road test. Prepare thoroughly using the official manual for success.

Written Knowledge Tests for CDL Applicants

The written knowledge tests for Mississippi CDL applicants cover essential topics like road safety, traffic laws, and vehicle operation. Candidates must pass these exams to proceed to the skills tests. The official manual provides detailed study materials to ensure readiness. Proper preparation is key to achieving a high score and advancing in the CDL application process.

Skills Tests: Vehicle Inspection, Basic Vehicle Control, and Road Test

The CDL skills tests in Mississippi include a vehicle inspection, basic vehicle control, and a road test. During the inspection, applicants must identify vehicle defects. The basic control test assesses ability to maneuver the vehicle safely. The road test evaluates driving skills in real traffic. These tests ensure applicants can operate a commercial vehicle safely and competently, adhering to federal and state standards.

Vehicle Inspection Requirements for CDL Holders

Vehicle inspection is mandatory for CDL holders to ensure safety. Drivers must check brakes, tires, and lights daily. Regular inspections prevent accidents and comply with regulations.

Pre-Trip and Post-Trip Inspection Procedures

Pre-trip inspections ensure vehicle safety before driving, covering brakes, tires, lights, and horn. Post-trip checks identify issues like leaks or damage, essential for maintenance and compliance with regulations.

Understanding Vehicle Parts and Safety Checks

Understanding vehicle parts is crucial for safe operation. Check brakes, tires, lights, and mirrors before driving. Ensure all safety features function properly. Regular maintenance, like oil checks and battery inspections, prevents breakdowns. Familiarize yourself with hydraulic, air brake, and suspension systems. Knowing how to identify and address issues ensures compliance with regulations and promotes road safety. This knowledge is essential for all CDL holders in Mississippi.

Mississippi Traffic Laws and Regulations for CDL Drivers

Mississippi enforces strict traffic laws for CDL drivers, including specific speed limits, weight restrictions, and hours-of-service rules. Violations can lead to penalties, fines, and license suspension.

Specific Rules for Commercial Vehicles

Commercial vehicles in Mississippi must adhere to strict regulations, including speed limits, weight restrictions, and hours-of-service rules. CDL drivers are prohibited from operating under the influence of alcohol or drugs, with a lower BAC limit of 0.04%. Drivers must also comply with pre-trip and post-trip inspection requirements. Additionally, Mississippi enforces specific rules for hazardous materials transport and oversized loads, requiring proper permits and safety measures. Violations can result in severe penalties, fines, and license suspension. These rules ensure road safety and professional driving standards.

Consequences of Violating Traffic Laws

Violating traffic laws as a CDL driver in Mississippi can lead to severe penalties, including hefty fines, license suspension, and disqualification. Accumulating too many points on your driving record can result in losing your CDL, impacting your career. Repeat offenses may lead to permanent disqualification. Additionally, violations involving hazardous materials or reckless driving can result in criminal charges. These consequences emphasize the importance of adhering to traffic laws to maintain your commercial driving privileges and ensure public safety.

Disqualifications and Penalties for CDL Drivers

CDL drivers in Mississippi face penalties, including fines and license disqualification, for offenses like reckless driving or DUI. Severity varies based on the violation type.

Offenses That Can Lead to CDL Disqualification

Offenses such as reckless driving, DUI, speeding, and serious traffic violations can result in CDL disqualification. These penalties aim to ensure public safety by holding commercial drivers to higher standards. Repeat offenses may lead to permanent disqualification, severely impacting a driver’s career. Understanding these offenses is crucial for maintaining a valid CDL in Mississippi.

How to Reinstate Your CDL After Disqualification

To reinstate your CDL after disqualification, complete the required waiting period and fulfill specific requirements, such as retaking necessary tests or paying fees. Some offenses may require completing a driver improvement course. Once all conditions are met, submit your application and fees to the Mississippi Department of Public Safety. Consult the CDL manual or contact local authorities for detailed reinstatement procedures.

Resources for CDL Preparation and Study

Utilize Mississippi’s official CDL manual, free online practice tests, and interactive study guides to master commercial driving requirements and prepare confidently for your exams.

Free Online Practice Tests and Study Guides

Mississippi offers free online practice tests and interactive study guides to help CDL applicants prepare effectively. These resources cover various topics, including traffic laws, vehicle safety, and endorsements. Utilize these tools to familiarize yourself with exam formats and improve your knowledge. Additionally, AI-powered study aids and audio guides provide personalized learning experiences, ensuring you are well-prepared for both written and skills tests.

Additional Materials for Mastering the CDL Manual

Beyond the manual, Mississippi offers supplementary resources to enhance your CDL preparation. Checklists for pre-trip inspections, detailed infographics on endorsements, and official state publications provide in-depth insights. Online forums and communities also share tips from experienced drivers. Utilize these materials alongside practice tests to ensure comprehensive understanding and confidence for your CDL exams.

b550i aorus pro ax manual

Welcome to the official user manual for the Gigabyte B550I Aorus Pro AX motherboard․ This comprehensive guide provides detailed instructions for installation, BIOS setup, and troubleshooting․ Designed for both novice and experienced users, it covers key features, hardware components, and optimization tips to ensure optimal performance․ Use this manual to explore and maximize the potential of your motherboard․

1․1 Overview of the Motherboard

The B550I Aorus Pro AX is a Mini-ITX motherboard designed for AMD Ryzen processors, featuring Socket AM4 compatibility․ It supports DDR4 memory up to 3200 MHz, with a PCIe 4․0 x16 slot and dual M․2 slots for storage․ The board is equipped with Direct 8 Phases Digital VRM and advanced thermal solutions․

1․2 Importance of the Manual for Users

This manual is essential for understanding the B550I Aorus Pro AX motherboard’s features, installation, and configuration․ It provides detailed instructions for setup, BIOS navigation, and troubleshooting, ensuring safe and optimal use․ Users can avoid common mistakes and maximize performance by following the guidelines outlined in this comprehensive guide․

Key Features of the B550I Aorus Pro AX

The B550I Aorus Pro AX features a mini-ITX form factor, Socket AM4 compatibility, dual DDR4 memory support, PCIe 4․0 x16 slots, and advanced thermal and VRM designs․ It also includes Wi-Fi 6 and high-speed connectivity options, ensuring robust performance and versatility for both gaming and professional use․

2․1 Form Factor and Socket Compatibility

The B550I Aorus Pro AX features a mini-ITX form factor, ideal for compact builds, and supports Socket AM4, compatible with AMD Ryzen processors․ Its design ensures efficient space utilization while maintaining full functionality, making it suitable for both small-form-factor PCs and high-performance systems․ PCIe 4․0 support enhances connectivity and expansion capabilities․

2․2 Memory and Expansion Slot Details

The B550I Aorus Pro AX supports 2x DDR4 memory slots, enabling dual-channel memory configurations with speeds up to 3200 MHz․ It features 1x PCIe 4․0 x16 slot for graphics cards and 2x M․2 slots for NVMe SSDs, ensuring versatile expansion capabilities for both storage and high-performance components․

2․3 Advanced Thermal Design and VRM

The B550I Aorus Pro AX features an advanced thermal design with an extended VRM heatsink and thermal baseplate, ensuring efficient heat dissipation․ Its direct 8-phase digital VRM provides stable power delivery, enhancing system reliability and performance during intensive tasks․ This design optimizes cooling and maintains optimal temperatures for sustained operation․

Installation Guidelines

Ensure the chassis is suitable for the motherboard․ Carefully read the manual and follow procedures․ Handle components with caution, avoiding static discharge․ Always turn off the computer and unplug the power cord before installation․ Proceed methodically to ensure a secure and proper setup․ Follow safety guidelines meticulously․

3․1 Pre-Installation Checklist

  • Verify Package Contents: Ensure all components like the motherboard, manual, and accessories are included․
  • Inspect for Damage: Check the motherboard and parts for any physical damage․
  • Prepare Tools: Gather screwdrivers, cable ties, and other necessary tools․
  • Update BIOS: Download the latest BIOS version from GIGABYTE’s website․
  • Prepare Cables: Organize power, data, and GPU cables for easy access․
  • Set Up Workspace: Use an anti-static wrist strap and a clean, flat surface․
  • Read Manual: Familiarize yourself with the installation process and guidelines․
  • Power Off System: Ensure the computer is unplugged before starting installation․

3․2 Step-by-Step Installation Process

  1. Unbox and prepare the motherboard, ensuring all components are included and undamaged․
  2. Install the CPU and memory modules according to the manual’s instructions․
  3. Connect the front panel headers and other essential cables to the motherboard․
  4. Secure the motherboard to the chassis using screws, ensuring proper alignment․
  5. Install storage devices and expansion cards, such as the GPU, into their respective slots․
  6. Connect power cables from the PSU to the motherboard and components․
  7. Power on the system and enter the BIOS for initial setup and configuration․

Refer to the manual for detailed diagrams and specific instructions․

3․3 Safety Precautions and Best Practices

  • Ground yourself by touching a metal object or wear an anti-static wrist strap to prevent static discharge․
  • Power off the system and unplug the power cord before installing or removing components․
  • Handle components by the edges to avoid damage from static electricity or physical stress․
  • Avoid bending or flexing the motherboard to prevent damage to internal circuits․
  • Ensure proper cooling by installing fans and maintaining good airflow within the chassis․

Always follow these guidelines to ensure safe and successful installation․

BIOS Setup and Configuration

This section guides you through BIOS setup, including navigating the interface, setting boot priorities, and configuring advanced settings for optimal system performance and customization․

4․1 Navigating the BIOS Interface

Navigate the BIOS interface using keyboard shortcuts like F7 for Advanced Mode․ The main menu displays system info, while the Tweaker section offers overclocking options․ Favorites (F11) allow quick access to frequently used settings․ Use function keys to save changes or exit․ This section helps you master BIOS navigation for optimal system configuration․

4․2 Setting Up Boot Priorities

Access the BIOS to configure boot priorities․ Navigate to the Boot tab and select your preferred device․ Check the order and adjust as needed․ Save changes for proper system initialization․ This ensures your system boots correctly every time, optimizing performance and reliability․

4․3 Overclocking and Performance Tweaks

Access the BIOS to explore overclocking options․ Navigate to the Tweaker section and adjust CPU multipliers and voltage levels for enhanced performance․ Ensure stable power delivery and cooling to maintain system reliability․ The B550I Aorus Pro AX supports advanced tuning, enabling users to optimize their system for gaming or intensive tasks effectively․

Hardware Components and Specifications

The B550I Aorus Pro AX features a Mini-ITX form factor, Socket AM4, B550 chipset, dual DDR4 memory slots, PCIe 4․0 x16 slot, and dual M․2 slots for storage․

5․1 CPU and Chipset Overview

The B550I Aorus Pro AX supports AMD Socket AM4 processors, including Ryzen 3000 and 5000 series CPUs․ Equipped with the AMD B550 chipset, it offers enhanced performance, PCIe 4․0 support, and robust overclocking capabilities, making it ideal for gaming and high-performance computing tasks․

5․2 Storage and Connectivity Options

The B550I Aorus Pro AX features dual M․2 slots for NVMe SSDs and supports PCIe 4․0 for fast storage solutions․ It also includes Wi-Fi 6, Bluetooth 5․0, and USB 3․2 Gen 2 ports for enhanced connectivity․ HDMI and DisplayPort outputs provide versatile display options, ensuring seamless integration with modern peripherals and monitors․

5․3 PCIe and M․2 Slot Configurations

The B550I Aorus Pro AX offers a PCIe 4․0 x16 slot for graphics cards and dual M․2 slots supporting NVMe SSDs; It supports RAID configurations and high-speed data transfer rates, ensuring optimal performance for storage and expansion needs․ The motherboard’s compact design maximizes functionality without compromising on connectivity options․

Software and Driver Installation

Install essential drivers and software tools from GIGABYTE’s official website to ensure optimal performance․ Follow the manual’s instructions for proper installation and BIOS updates․

6․1 Downloading Drivers from GIGABYTE

Visit the official GIGABYTE website to download the latest drivers for the B550I Aorus Pro AX․ Select your motherboard model, choose the appropriate OS, and download the necessary files․ Ensure to verify driver compatibility and follow installation instructions carefully for optimal system performance and functionality․ Contact GIGABYTE support if issues arise․

6․2 Installing Essential Software Tools

Navigate to GIGABYTE’s official website and access the support section for the B550I Aorus Pro AX․ Download and install essential software tools, such as the GIGABYTE App Center for RGB control and system monitoring․ Additionally, install the Easy Tune utility for overclocking and performance optimization․ Follow on-screen instructions carefully to ensure proper installation and functionality․

6․3 Updating BIOS and Firmware

To update the BIOS and firmware for the Gigabyte B550I Aorus Pro AX, start by checking the current BIOS version in the BIOS setup․ Visit Gigabyte’s official website, navigate to the support section, and download the latest BIOS version for your model․ Read the release notes to understand the improvements․ Ensure you’re downloading from the official site to avoid malware; If the update is necessary, back up your BIOS settings or write them down․ Use the built-in BIOS update tool, like Q-Flash, by copying the BIOS file to a USB drive and following on-screen instructions․ Avoid interrupting the update process․ After completion, restart and verify the new BIOS version․ Consider running a stress test to ensure stability․ For firmware updates, check for separate updates and follow similar steps․ In case of issues, contact Gigabyte support for assistance․

Performance and Optimization

This section covers tips to enhance your system’s performance, including optimizing BIOS settings, utilizing Wi-Fi 6 for faster connectivity, and managing thermal levels for stable operation․

7․1 Enhancing System Performance

7․2 Monitoring and Managing Thermal Levels

Monitor temperatures using built-in sensors and software tools․ Ensure proper airflow and clean dust regularly․ Utilize advanced thermal design features like extended VRM heatsinks and thermal baseplates for optimal cooling․ Adjust fan curves in BIOS for efficient temperature management, ensuring stable performance during intensive tasks like gaming or overclocking․

7․3 Utilizing Wi-Fi 6 and Other Technologies

The B550I Aorus Pro AX supports Wi-Fi 6 (802․11ax) for faster speeds and lower latency․ Install drivers from GIGABYTE’s website and configure network settings in your OS․ Optimize your connection by positioning antennas correctly and using QoS settings for prioritized traffic, enhancing gaming and streaming experiences with stable wireless performance․

Troubleshooting and FAQs

Address common issues with the B550I Aorus Pro AX using this section․ Find answers to frequently asked questions and learn how to contact GIGABYTE support for assistance․

8․1 Common Issues and Solutions

Common issues include BIOS update failures, driver conflicts, and hardware incompatibility․ Ensure the motherboard supports the installed components․ Restart the system after installing drivers․ Check for BIOS updates regularly․ Contact GIGABYTE support for unresolved problems․ Refer to the manual for detailed troubleshooting steps and solutions to ensure optimal performance․

8․2 Frequently Asked Questions

Frequently asked questions include compatibility with specific CPUs, BIOS update procedures, and optimal RAM configurations․ Users often inquire about PCIe slot functionality and Wi-Fi 6 performance․ Ensure all components are compatible with the B550I Aorus Pro AX․ Refer to the manual or GIGABYTE support for detailed answers and solutions․

8․3 Contacting GIGABYTE Support

For technical assistance, visit GIGABYTE’s official website or regional support page․ Use the provided contact form or email for inquiries․ Ensure to include your motherboard model and revision when seeking help․ Download centers and FAQs are also available for quick solutions․ Check the manual for specific contact details and support options․

Environmental and Disposal Considerations

This section outlines eco-friendly practices for the B550I Aorus Pro AX, including proper disposal methods and recycling guidelines to minimize environmental impact and promote sustainability effectively․

9․1 Eco-Friendly Practices

GIGABYTE promotes environmentally responsible practices for the B550I Aorus Pro AX․ This includes energy-efficient design, reduced power consumption, and sustainable packaging․ Users are encouraged to recycle materials and dispose of electronics responsibly to minimize environmental impact and contribute to a greener future․

9․2 Proper Disposal Methods

Proper disposal of the B550I Aorus Pro AX involves safely recycling electronic components․ Separate batteries and hazardous materials, then use designated e-waste facilities․ Dispose of packaging responsibly, adhering to local regulations to prevent environmental contamination and ensure materials are processed safely, protecting both the environment and public health;

9․3 Recycling Guidelines

Recycle your B550I Aorus Pro AX motherboard responsibly by following local e-waste regulations․ Separate electronic components and batteries, ensuring they are processed at authorized recycling centers․ This prevents environmental harm and conserves resources․ Check with local authorities for guidelines on proper recycling procedures to support sustainable practices and reduce waste effectively․

This manual provides a comprehensive guide for the B550I Aorus Pro AX, ensuring optimal setup and performance․ Explore its features confidently, leveraging the detailed instructions to enhance your computing experience․

10․1 Summary of Key Points

The B550I Aorus Pro AX manual provides essential guidance for users, covering installation, BIOS setup, hardware specifications, and troubleshooting․ It ensures smooth operation and optimization of the motherboard, catering to both novice and experienced users․ This guide is indispensable for maximizing performance and understanding advanced features․

10․2 Encouragement for Further Exploration

Take the time to explore advanced features like BIOS customization and overclocking to unlock your system’s full potential․ Experiment with performance tweaks and utilize built-in tools for monitoring and optimization․ Dive deeper into the manual to discover more about Wi-Fi 6, thermal management, and other cutting-edge technologies designed to enhance your experience․

10․3 Final Remarks on the Manual

This manual serves as your comprehensive guide to unlocking the full potential of the B550I Aorus Pro AX․ With detailed instructions and expert insights, it empowers you to configure, optimize, and maintain your system effortlessly․ Refer to it often to ensure you’re getting the most out of your motherboard’s advanced features and technologies․

aprilaire 700 humidifier installation manual

The Aprilaire 700 is a whole-home‚ fan-powered humidifier designed to provide optimal humidity levels in large spaces. It offers high-capacity performance and efficient operation.

1.1 Overview of Aprilaire 700 Humidifier

The Aprilaire 700 is a high-capacity‚ fan-powered humidifier designed for whole-home use. It integrates seamlessly with HVAC systems‚ offering automatic humidity control. Suitable for large homes‚ it operates efficiently with both hot and cold water supply options. Installation requires professional setup‚ ensuring optimal performance and proper integration with existing systems for enhanced indoor air quality and comfort.

1.2 Key Features and Benefits

The Aprilaire 700 offers high-capacity humidification‚ delivering up to 18 gallons per day. Its fan-powered design ensures efficient moisture distribution across entire homes. Key benefits include automatic humidity control‚ reduced static electricity‚ and protection against dry air damage. Compatible with both hot and cold water supplies‚ it provides flexible installation options. Additionally‚ it operates quietly and requires minimal maintenance‚ enhancing overall comfort and indoor air quality.

Pre-Installation Requirements

Ensure adequate space for the unit‚ verify electrical requirements‚ and prepare water supply connections before installation.

2.1 Space and Location Considerations

The Aprilaire 700 requires adequate space for proper installation and airflow. Ideally‚ it should be mounted in the return duct or near the HVAC system to ensure efficient operation. Avoid locations where it may obstruct airflow or be exposed to extreme temperatures. Proper placement ensures optimal performance and prevents potential damage to the unit.

2.2 Electrical Requirements

The Aprilaire 700 requires a dedicated 120V electrical circuit. Ensure the power supply matches the humidifier’s specifications. Refer to the wiring diagram for proper connections. The humidifier control must be connected to the HVAC system’s blower motor. Always follow local electrical codes and safety guidelines during installation. Proper wiring ensures safe and efficient operation of the unit.

2.3 Water Supply and Drain Setup

Connect the humidifier to a water supply line with a shut-off valve. Use cold or hot water‚ depending on the system configuration. Install a drain line to direct excess water to a floor drain or condensate pump. Ensure proper slope and flow to prevent water buildup. Regularly inspect connections for leaks and tighten as needed. Follow local plumbing codes for a safe setup.

Unpacking and Inventory

Carefully unpack the Aprilaire 700 humidifier‚ ensuring all components are included. Check for the humidifier unit‚ control‚ hardware‚ and installation manual. Verify against the parts list to ensure completeness.

3.1 Unpacking the Humidifier

Carefully unpack the Aprilaire 700 humidifier from its box‚ ensuring all components are included. Handle the unit gently to avoid damage. Check for the humidifier unit‚ control‚ mounting hardware‚ and installation manual. Verify each item against the packing list provided. Ensure all parts are accounted for before proceeding with installation. This step ensures a smooth setup process.

3.2 Checking for Parts and Accessories

After unpacking‚ systematically verify all parts and accessories against the provided packing list. Ensure the humidifier unit‚ control panel‚ wiring components‚ water panel‚ and mounting hardware are present. Check for any visible damage or missing items. Confirm that all screws‚ brackets‚ and adaptors are included to avoid delays during installation. This step ensures all necessary components are available.

Humidifier Placement and Mounting

Ensure the Aprilaire 700 is placed in a well-ventilated area‚ avoiding direct sunlight and moisture. Mount securely to maintain balance and ensure proper operation.

4.1 Optimal Placement in the HVAC System

The Aprilaire 700 should be installed in the return duct or supply plenum of your HVAC system. This placement ensures even moisture distribution throughout your home. Avoid areas with restricted airflow or near cooling coils to prevent condensation issues. Proper installation in the HVAC system maximizes efficiency and humidity control‚ ensuring optimal performance during heating cycles. Always follow manufacturer guidelines for placement.

4.2 Mounting the Humidifier Unit

Mount the Aprilaire 700 unit securely in the return duct or supply plenum using screws or brackets provided. Ensure the unit is level to prevent vibration and noise. Follow the installation manual for precise mounting instructions to maintain proper airflow and drainage. Secure the unit firmly to avoid movement during operation‚ ensuring reliable performance and longevity of the humidifier.

Electrical Connections

Install the Aprilaire 700 humidifier control in the return duct‚ referencing the wiring diagram for proper connections. Ensure the power supply is correctly configured for safe operation.

5.1 Wiring the Humidifier Control

Refer to the wiring diagram provided in the installation manual. Connect the humidistat to the control unit‚ ensuring proper alignment with the HVAC system’s operation. Install the control in the return duct‚ following the enclosed instructions. Connect the power supply according to the wiring diagram‚ ensuring all safety guidelines are met. Consult a licensed electrician if unsure.

5.2 Connecting the Humidistat

Mount the humidistat in a location with consistent temperature and humidity levels‚ typically near the thermostat. Connect the humidistat to the control unit using the provided wires. Follow the wiring diagram to ensure correct connections. Set the humidistat to regulate humidity levels between 30-50%. Test the system to ensure proper operation and adjust settings as needed.

5.3 Power Supply Setup

Connect the Aprilaire 700 humidifier to a dedicated 120V power supply. Ensure the circuit is properly grounded for safety and functionality. Refer to the wiring diagram for correct connections. The control unit operates on low voltage‚ so ensure proper wiring to avoid damage. Do not use extension cords; hardwire directly to the power source for reliable operation.

Plumbing Connections

The Aprilaire 700 requires a water supply line and drain line setup. Ensure proper connections to avoid leaks and water damage. Follow installation manual for precise configuration properly.

6.1 Water Supply Line Installation

The Aprilaire 700 requires a water supply line installation. Connect the line to a nearby water source‚ ensuring proper pressure. Use a saddle valve for easy installation. For heat pump systems‚ use hot water to enhance evaporation. Secure all connections tightly to prevent leaks. Refer to the manual for specific fitting requirements and optimal water flow configuration.

6.2 Drain Line Setup and Configuration

Install a drain line to ensure proper water discharge. Use PVC or vinyl tubing and direct it to a floor drain or utility sink. Ensure the line has a proper slope to prevent backflow. Avoid kinks or restrictions in the tubing. Secure the drain line to prevent movement during operation. This setup ensures efficient water drainage and maintains system performance.

Final Checks and Testing

After installation‚ test the humidifier to ensure proper operation. Check for leaks in water and drain lines. Verify the system turns on and off correctly. Ensure humidity levels are maintained and airflow is unrestricted. This step ensures the system is ready for reliable‚ efficient operation.

7.1 Testing the Humidifier Operation

Power on the HVAC system and ensure the humidifier activates. Check if the humidistat responds correctly to humidity levels. Verify water flow and drain operation. Ensure the unit shuts off when desired humidity is reached. Monitor for consistent performance and proper integration with the HVAC system. This test confirms the humidifier operates as intended.

7.2 Checking for Leaks and Proper Function

Turn on the HVAC system and humidifier to check for leaks at connections. Inspect water supply‚ drain lines‚ and electrical connections. Ensure the humidifier operates quietly and efficiently. Verify proper water flow and mist distribution. Check for unusual noises or odors. If issues arise‚ tighten connections or consult a professional. This step ensures the system functions safely and effectively.

Maintenance and Troubleshooting

Regular cleaning and filter replacement are essential for optimal performance. Check for mineral buildup and drain line blockages. Address issues promptly to ensure efficiency and longevity.

8.1 Regular Maintenance Tasks

Regular maintenance ensures the Aprilaire 700 operates efficiently. Clean the water panel and drain line monthly. Replace the humidifier filter annually or as needed. Check for mineral buildup and descale if necessary. Ensure the drain is clear to prevent water overflow. Inspect wiring and connections for damage. Perform these tasks to maintain humidity levels and system longevity effectively.

8;2 Common Issues and Solutions

Common issues with the Aprilaire 700 include water overflow‚ low humidity output‚ and sensor malfunctions. Solutions involve checking the drain line for blockages‚ cleaning the water panel‚ and ensuring proper installation of the humidistat. Regular maintenance‚ such as replacing filters and descaling‚ prevents these issues. Addressing these problems promptly ensures optimal performance and extends the unit’s lifespan.

The Aprilaire 700 installation process ensures efficient whole-home humidity control. The unit is backed by a comprehensive warranty‚ offering protection and peace of mind for years.

9.1 Summary of Installation Process

The Aprilaire 700 humidifier installation involves unpacking‚ placement‚ electrical connections‚ plumbing setup‚ and final testing. Ensure proper placement in the HVAC system‚ secure mounting‚ and correct wiring. Verify water supply and drain connections‚ then test operation. This process ensures optimal performance and efficient humidity control for your home. Follow all safety guidelines and manufacturer instructions for a successful installation.

9.2 Warranty and Customer Support

Aprilaire offers a comprehensive warranty for the Model 700 humidifier‚ covering parts and labor for a specified period. Dedicated customer support is available to address installation‚ maintenance‚ and repair inquiries. For warranty details and support‚ visit the Aprilaire website or contact their customer service team. This ensures long-term satisfaction and hassle-free ownership of the product.

singer classic 44s manual

The Singer Classic 44S manual provides a comprehensive guide to understanding and operating the machine. Designed for both beginners and experienced sewers, it covers setup, features, and maintenance.

1.1 Overview of the Singer Classic 44S Sewing Machine

The Singer Classic 44S is a heavy-duty mechanical sewing machine designed for everyday sewing tasks. It features a durable metal frame, ensuring stability and longevity. With 23 built-in stitches, including essential, stretch, and decorative options, it caters to both basic and complex projects. Ideal for beginners and experienced sewers, this machine is versatile and reliable for various fabric types, making it a practical choice for home use.

1.2 Importance of the Manual for Effective Usage

The Singer Classic 44S manual is essential for maximizing the machine’s potential. It provides clear instructions for setup, operation, and maintenance, ensuring users understand its features and capabilities. By following the manual, users can avoid common mistakes, troubleshoot issues, and optimize their sewing experience. It serves as a valuable resource for both beginners and experienced sewers, guaranteeing safe and efficient use of the machine.

Safety Precautions and Guidelines

Adhering to safety guidelines is crucial to prevent accidents. Always follow electrical safety, handle sharp objects carefully, and keep the machine out of children’s reach.

2.1 General Safety Instructions

Always unplug the machine when not in use and avoid wearing loose clothing or jewelry that could get caught. Keep children and pets away while operating. Use the correct needle size for your fabric to prevent breakage. Never touch sharp parts like needles or cutters. Ensure the work area is clean, dry, and well-lit. Follow these guidelines to ensure safe and effective operation of your Singer Classic 44S.

2.2 Electrical Safety Tips

Always use the Singer Classic 44S with a properly grounded electrical outlet. Avoid exposing the machine to water or moisture. Never use damaged cords or plugs, as this can cause electrical hazards. Keep the machine away from flammable materials. Unplug it when not in use or during maintenance. Ensure the voltage matches your region’s standards to prevent damage or electrical issues.

2.3 Handling Sharp Objects and Needle Safety

Handle sewing needles and sharp objects with care to avoid injuries. Always use a needle inserter to change needles, and never touch sharp edges with bare hands. Store needles in a protective case when not in use. Keep the sewing area clear of children and pets to prevent accidents. Regularly inspect needles for damage and replace them if necessary to ensure safe operation.

Threading and Basic Operations

The Singer Classic 44S manual includes a step-by-step threading guide and instructions for winding and installing the bobbin. It also covers setting up for your first stitch.

3.1 Step-by-Step Threading Guide

The Singer Classic 44S manual provides a clear threading guide. Start by locating the spool pin and gently pull the thread through the machine’s tension discs. Guide the thread through the take-up lever and needle bar, ensuring it’s seated properly. Leave a small tail before inserting the needle. Cut excess thread carefully. This process ensures smooth stitching and prevents thread breakage. Always refer to the manual for detailed visuals and troubleshooting tips.

3.2 Winding and Installing the Bobbin

Wind the bobbin by placing it on the winder and threading the machine. Guide the thread through the bobbin tension guide and begin winding slowly. Once full, cut the thread. Insert the bobbin into the machine’s bobbin case, ensuring it sits correctly. Pull the thread gently to secure it. Close the bobbin cover and test the tension by gently tugging the thread. Proper installation ensures even stitching and prevents issues.

3.3 Setting Up for Your First Stitch

Ensure the machine is properly threaded and the bobbin is installed. Select a straight stitch pattern and set the stitch length to medium. Place a scrap piece of fabric under the needle and gently lower it. Test the stitch by sewing a few inches. Adjust tension if necessary for even stitching. This setup ensures a smooth start for your sewing project.

Stitch Selection and Customization

The Singer Classic 44S offers 23 built-in stitches, including essential, stretch, and decorative options. Users can customize stitch length and width, enhancing versatility for various sewing projects.

4.1 Types of Built-in Stitches (23 Stitches)

The Singer Classic 44S features 23 built-in stitches, including six essential, four stretch, and 12 decorative stitches. These stitches cater to various sewing needs, from basic repairs to intricate designs. The essential stitches include straight and zigzag, while the stretch stitches are ideal for fabrics like knits. The decorative stitches add aesthetic value to projects, offering versatility for both practical and creative sewing tasks.

4.2 Adjusting Stitch Length and Width

The Singer Classic 44S allows users to customize stitch length and width, ensuring precise control over their sewing projects. The machine features adjustable dials that enable easy modification of these settings, catering to different fabric types and stitching needs. This flexibility enhances creativity and ensures professional-quality results, making it ideal for both basic repairs and complex designs.

4.3 Using Decorative and Stretch Stitches

The Singer Classic 44S offers 12 decorative stitches and 4 stretch stitches, perfect for enhancing fabric with intricate designs or sewing elastic materials. Users can explore various stitch patterns to add creativity to projects. The machine’s stitch selection dial makes it easy to choose the desired stitch type. Experimenting with different stitches on scrap fabric is recommended to achieve the best results for specific sewing tasks.

Maintenance and Troubleshooting

This section covers essential maintenance routines, troubleshooting common issues, and tips for keeping your Singer Classic 44S in optimal working condition.

5.1 Regular Maintenance Tips

Regular maintenance ensures optimal performance of the Singer Classic 44S. Clean the machine thoroughly, paying attention to the bobbin area and tension discs, to remove lint and debris. Lubricate moving parts as specified in the manual to prevent friction and wear. Check and replace needles frequently to maintain stitch quality. Proper care extends the machine’s lifespan and ensures smooth operation.

5.2 Common Issues and Solutions

The Singer Classic 44S manual addresses common issues such as thread bunching, uneven stitches, and bobbin jams. To resolve these, ensure proper threading, check tension settings, and clean lint from the bobbin area. For needle breakage, replace the needle with a compatible Singer part. Regular oiling and maintenance can prevent mechanical issues. Refer to the manual for detailed troubleshooting steps to restore smooth operation.

5.3 Lubrication Points and Oiling Instructions

The Singer Classic 44S manual highlights key lubrication points, such as the hook area and shuttle race, to ensure smooth operation. Use only Singer-approved sewing machine oil, applying a few drops to the specified points. Oil every 10-15 hours of use to maintain performance. Avoid household oils, as they may damage the machine. Gently turn the handwheel to distribute the oil evenly and wipe off any excess with a clean cloth for optimal functioning.

Accessories and Compatibility

The Singer Classic 44S comes with essential accessories like bobbins, needles, and a seam ripper. It is compatible with various Singer sewing tools and optional add-ons for enhanced functionality.

6.1 Included Accessories

The Singer Classic 44S includes essential accessories like bobbins, assorted needles, a spool pin, and a seam ripper. These tools enhance sewing efficiency and cater to various projects. The machine also supports optional accessories like an auxiliary spool pin and a hard case for storage and portability. These additions ensure compatibility with Singer sewing tools, offering users a comprehensive sewing experience tailored to their needs.

6.2 Optional Accessories for Enhanced Functionality

The Singer Classic 44S offers optional accessories to enhance sewing. These include an extension table for large projects, extra bobbins, specialized presser feet, and a notions kit with needles and threads. These additions boost versatility and efficiency, ideal for various sewing tasks.

6.3 Compatibility with Additional Sewing Tools

The Singer Classic 44S is compatible with a range of additional sewing tools to enhance functionality. These include extension tables, specialized presser feet, and Singer-brand sewing accessories. This compatibility allows users to expand their sewing capabilities, making the machine versatile for various projects. The machine is designed to work seamlessly with these tools, ensuring optimal performance and ease of use for both beginners and experienced sewers.

Warranty and Customer Support

The Singer Classic 44S comes with a warranty and dedicated customer support. Singer offers resources like manuals, machine updates, and expert assistance to ensure user satisfaction and troubleshooting.

7.1 Warranty Information

The Singer Classic 44S is backed by a warranty that covers mechanical parts and labor for a specified period. This warranty ensures protection against manufacturing defects, providing users with peace of mind. Certain parts, such as needles and belts, may be excluded. For full details, refer to the manual or visit Singer’s official website to understand coverage and claim procedures.

7.2 Contacting Singer Customer Service

Singer offers dedicated customer support to assist with inquiries, repairs, and troubleshooting. You can contact them via phone, email, or live chat through their official website. Support is available Monday-Friday, 9 AM-6 PM ET. For technical issues, warranty claims, or general questions, Singer’s team is ready to provide prompt and reliable assistance. Visit their website for contact details and additional resources.

7.3 Online Resources and Community Support

The Singer Classic 44S manual is supported by extensive online resources, including downloadable PDF guides, tutorials, and troubleshooting tips. Singer’s official website offers access to user manuals, stitch guides, and FAQs. Additionally, sewing communities, forums, and social media groups provide peer support and tips for optimizing machine performance. YouTube tutorials and expert blogs further enhance your sewing experience with the Classic 44S.

Comparing the Singer Classic 44S to Other Models

The Singer Classic 44S stands out for its mechanical design and heavy-duty frame, offering 23 stitches. It is a cost-effective option compared to advanced models with more features.

8.1 Key Features vs. Other Singer Sewing Machines

The Singer Classic 44S is distinguished by its mechanical simplicity and heavy-duty metal frame, offering durability and stability. With 23 built-in stitches, including essential, stretch, and decorative options, it provides versatility for various projects. Unlike more advanced Singer models, the 44S focuses on core functionality, making it an excellent choice for those seeking reliability without unnecessary complexity.

8.2 Unique Selling Points of the Classic 44S

The Singer Classic 44S stands out with its robust metal frame, ensuring long-lasting durability and minimal vibration. Its intuitive design and mechanical operation make it user-friendly for sewers of all skill levels. The inclusion of 23 versatile stitches and a free-arm option enhances its adaptability for various sewing tasks, from heavy-duty projects to delicate fabrics, offering exceptional value for its class.

8.3 User Feedback and Market Reception

The Singer Classic 44S has received positive feedback for its durability and ease of use. Users praise its heavy-duty metal frame and versatility in handling various fabrics. The 23 built-in stitches are a highlight, offering flexibility for both simple and decorative projects. Some users noted initial challenges with threading, but overall, the machine is well-regarded for its reliability and value, making it a popular choice among sewers of all levels.

Advanced Sewing Techniques

Master advanced techniques like perfect straight stitches, intricate zigzag patterns, and sewing heavy-duty fabrics. Explore decorative and stretch stitches for professional-level projects with ease and precision.

9.1 Mastering Straight and Zigzag Stitches

Mastering straight and zigzag stitches is essential for versatile sewing. The Singer Classic 44S offers precise control, ensuring smooth, consistent results. Practice adjusting stitch length and width to achieve professional-quality seams and decorative effects. Use these stitches for basic repairs, tailored garments, and creative projects, enhancing your sewing skills with confidence and precision.

9.2 Sewing Heavy-Duty Fabrics

The Singer Classic 44S excels at sewing heavy-duty fabrics like denim and canvas. Its powerful motor and heavy-duty metal frame ensure stability and durability. For best results, use heavy-duty needles and adjust stitch length and tension as needed. Always guide fabric smoothly and use a walking foot or Teflon foot for effortless handling of thick materials, ensuring professional-quality results for heavy-duty projects.

9.3 Tips for Professional-Level Sewing

Achieve professional-level sewing with the Singer Classic 44S by using high-quality threads and needles. Pre-wash fabrics to ensure shrinkage control. Utilize the machine’s built-in stitches creatively, and maintain consistent seam allowances. Regularly clean and lubricate the machine for optimal performance. Experiment with decorative stitches for unique finishes, and consider using specialized feet for tasks like buttonholes or zippers to enhance your sewing projects.

The Singer Classic 44S manual is essential for maximizing the machine’s potential. It offers clear guidance for both beginners and experienced sewers, ensuring efficient and professional results.

10.1 Summary of Key Features

The Singer Classic 44S manual highlights a heavy-duty metal frame, 23 built-in stitches, and ease of use for both beginners and experienced sewers. It emphasizes durability, versatility, and user-friendly operation, making it ideal for various sewing projects. The manual ensures users can fully utilize the machine’s capabilities, from basic repairs to complex designs, with clear instructions for setup, maintenance, and troubleshooting.

10.2 Final Tips for Getting the Most Out of Your Machine

Regularly clean and lubricate your Singer Classic 44S to ensure smooth operation. Always use high-quality threads and needles suitable for your fabric. Experiment with the 23 built-in stitches to enhance your projects. Refer to the manual for troubleshooting common issues. Practice on scrap fabric before sewing final pieces. Store the machine in a dry, cool place to prolong its lifespan. Happy sewing!

elkay drinking fountain repair manual

Identifying Your Elkay Drinking Fountain Model and Serial Number

Your Elkay drinking fountain’s model and serial number are typically located on a label attached to the unit. These numbers are essential for identifying the correct repair parts and ensuring compatibility. Always refer to the manual or manufacturer’s guide for precise location details‚ as this information is critical for ordering replacements and troubleshooting effectively.

1.1 Step-by-Step Guide to Locating the Model and Serial Number

To locate the model and serial number of your Elkay drinking fountain‚ follow these steps: First‚ turn off the power to the unit for safety. Open the access panel or compartment‚ usually found at the bottom or rear of the fountain. Inside‚ you’ll typically find a label or plate with the model number and serial number printed on it. If not visible‚ check the manufacturer’s manual or guide for specific location details‚ as placement may vary by model. These numbers are crucial for ordering the correct repair parts and ensuring compatibility.

1.2 Understanding the Importance of Model and Serial Numbers for Repair

Model and serial numbers are vital for identifying the correct repair parts for your Elkay drinking fountain. These numbers ensure compatibility and prevent installation issues. Without them‚ ordering the right components becomes challenging‚ potentially leading to delays or incorrect purchases. Additionally‚ these identifiers help technicians diagnose issues accurately and access specific repair resources. Referencing the model and serial numbers ensures you receive manufacturer-approved parts‚ maintaining warranty validity and safety standards. Always record these numbers for future maintenance and repairs‚ as they are essential for efficient troubleshooting and part replacement.

Common Issues and Troubleshooting Tips

Common issues include low water flow‚ leaks‚ and push bar malfunctions. Troubleshooting involves checking water supply‚ filter cleanliness‚ and proper installation of parts. Regular maintenance helps prevent these problems.

2.1 Diagnosing Low Water Flow or No Water Dispensing

Low water flow or no dispensing can result from a blocked filter‚ closed water supply valve‚ or obstructed water lines. Check the filter for dirt or clogs and replace it if necessary. Ensure the water supply valve is fully open and verify that there are no kinks in the supply lines. Inspect the control valve for proper function and clean or replace it if needed. Additionally‚ check for mineral buildup in the dispenser nozzle‚ which may require descaling. Addressing these issues promptly ensures optimal water flow and fountain performance.

2.2 Addressing Leaks and Water Damage

Leaks and water damage in Elkay drinking fountains often stem from worn-out O-rings‚ gaskets‚ or loose connections. Inspect the water supply lines and connections for any signs of moisture or wear. Tighten loose fittings and replace damaged O-rings or gaskets immediately. If water damage is present‚ disconnect the fountain from the power supply and drain the system. Clean or replace corroded parts to prevent further damage. Regularly checking for condensation and ensuring proper drainage can also help mitigate water damage issues. Addressing leaks promptly prevents costly repairs and extends the fountain’s lifespan.

Essential Tools and Parts for Repair

Essential tools include adjustable wrenches‚ pliers‚ and screwdrivers. Common replacement parts are O-rings‚ gaskets‚ and water filters. Always refer to the manual for specific part numbers required.

3.1 Identifying the Correct Replacement Parts

To identify the correct replacement parts for your Elkay drinking fountain‚ always refer to the model number and serial number. These are located on the product label or in the manual. Use the Elkay parts breakdown guide to match your model with the required components. Common parts include water filters‚ valves‚ and seals. Ensure compatibility by purchasing parts from authorized dealers or the manufacturer. Avoid using non-genuine parts‚ as they may void the warranty or cause further issues. If unsure‚ consult the troubleshooting guide or contact Elkay support for assistance.

3.2 Tools Required for DIY Repairs

For DIY repairs‚ essential tools include screwdrivers (Phillips and flathead)‚ adjustable wrenches‚ pliers‚ and a bucket or container to catch water. A towel or sponge is useful for spills. Ensure you have replacement parts compatible with your Elkay model. Safety precautions‚ such as shutting off water and power supplies‚ are crucial before starting. Refer to the repair manual for specific tool requirements‚ as some repairs may need specialized equipment. Gathering these tools beforehand ensures a smooth and efficient repair process.

Step-by-Step Repair Procedures

Follow detailed guides for replacing filters‚ fixing push bars‚ and addressing leaks. Refer to the manual for specific instructions and safety precautions to ensure successful repairs.

4.1 Replacing the Water Filter

To replace the water filter in your Elkay drinking fountain‚ start by locating the filter housing‚ usually found near the water inlet. Turn off the water supply valve to prevent leaks. Remove the housing by twisting it counterclockwise‚ then pull out the old filter. Insert the new filter‚ ensuring it aligns properly‚ and reattach the housing securely. Turn the water supply back on and check for leaks. This process ensures clean water flow and maintains the fountain’s performance. Always refer to the manual for specific model instructions.

4.2 Fixing the Push Bar or Button Mechanism

To fix the push bar or button mechanism on your Elkay drinking fountain‚ start by turning off the water supply to avoid leaks. Remove any screws holding the front panel and gently pull it away to access the mechanism. Inspect for blockages or debris and clean as needed. If the push bar is loose‚ tighten the mounting screws. If damaged‚ replace the push bar or spring. Refer to the manual for specific adjustment instructions‚ ensuring proper alignment and function. After repairs‚ test the mechanism by dispensing water to confirm it works smoothly.

Maintenance and Upkeep

Regular maintenance involves purging air from water lines‚ checking for blockages‚ and ensuring filters are clean to maintain optimal performance and prevent common issues.

5.1 Cleaning and Sanitizing the Fountain

Clean and sanitize your Elkay drinking fountain regularly to maintain hygiene and functionality. Start by turning off the power and water supply. Drain the system thoroughly and purge air from the water lines. Use a mild detergent to wipe down all surfaces‚ ensuring no chemical residue remains. Sanitize by applying a food-safe solution‚ letting it sit briefly before rinsing. Regular cleaning prevents mineral buildup and bacterial growth‚ ensuring safe and clean water dispensing. Always follow the manufacturer’s guidelines for cleaning products and procedures to avoid damage or contamination.

5.2 Regular Maintenance to Prevent Common Issues

Regular maintenance is crucial to prevent common issues with your Elkay drinking fountain. Check and replace the water filter as recommended to ensure clean water flow. Inspect the push bar or button mechanism for proper function and alignment. Monitor the water lines for leaks or blockages and address them promptly. Clean the fountain surfaces regularly to prevent mineral buildup and bacterial growth. Additionally‚ purge air from the water lines after maintenance or filter changes to restore proper water flow. Routine checks and timely replacements will help extend the lifespan of your Elkay drinking fountain and maintain its performance.

Advanced Troubleshooting Techniques

Diagnose internal component malfunctions and electrical issues. Use specialized tools to detect hidden blockages and test water pressure. Ensure proper voltage supply to the unit.

6.1 Checking for Blockages in Water Lines

To check for blockages‚ turn off the water supply and disconnect the lines from the fountain; Inspect the tubing and filters for debris or mineral buildup. Use a soft brush or plumber’s snake to clear any obstructions. Ensure all connections are secure and free from kinks. After clearing‚ flush the system by running water through it to ensure proper flow. Regular maintenance can prevent future blockages and maintain optimal performance.

6.2 Resetting or Replacing the Control Valve

To reset the control valve‚ turn off the water supply and inspect for debris. Clean or replace the valve if necessary. If resetting doesn’t resolve the issue‚ replacement may be required. Use an adjustable wrench to disconnect the valve from the water lines. Install the new valve‚ ensuring proper alignment and secure connections. Turn the water supply back on and test the fountain for leaks or proper function. Regular maintenance of the control valve is crucial for ensuring consistent water flow and preventing operational disruptions.

Maintaining and repairing your Elkay drinking fountain is essential for ensuring long-term functionality and user satisfaction. By following the guidelines outlined in this manual‚ you can identify issues‚ perform necessary repairs‚ and conduct routine maintenance to prevent future problems. Always use genuine Elkay parts for optimal performance and durability. Regular inspection and timely troubleshooting will help extend the lifespan of your fountain. With proper care‚ your Elkay drinking fountain will continue to provide clean‚ reliable water access for years to come.

trane 824 thermostat user manual

The Trane 824 is a sleek, Wi-Fi-enabled smart thermostat designed for seamless HVAC control. It offers a user-friendly color touchscreen, energy-efficient scheduling, and smart home compatibility, ensuring optimal comfort and convenience.

Overview of the Trane 824 Thermostat

The Trane 824 is a sophisticated smart thermostat designed for seamless integration with modern HVAC systems. It features a vibrant color touchscreen display, intuitive navigation, and advanced Wi-Fi connectivity for remote control via smartphones. The thermostat supports energy-efficient scheduling, smart home integration, and adaptive learning capabilities to optimize comfort and energy savings. Its compact design and user-friendly interface make it a versatile solution for both residential and light commercial applications, ensuring precise temperature control and enhanced system performance.

Key Features of the Trane 824 Thermostat

The Trane 824 thermostat boasts a high-resolution color touchscreen, Wi-Fi connectivity, and compatibility with smart home systems. It offers advanced scheduling, humidity control, and energy-saving modes. The thermostat features a user setup wizard for easy configuration and integrates seamlessly with Trane’s home automation platform. Additional features include remote access through the Trane Home app, system alerts, and energy usage reports, ensuring enhanced comfort, efficiency, and convenience for users while optimizing HVAC performance and reducing energy costs effectively.

Installation and Setup

Installation involves turning off power, mounting the thermostat, and following the step-by-step wizard. Ensure proper wiring and system compatibility for smooth setup and operation.

Installation Wizard: Step-by-Step Guide

The Trane 824’s Installation Wizard simplifies setup. Begin by turning off HVAC system power. Mount the thermostat, connect wires, and follow on-screen prompts. Select system type, configure wiring, and test connections. The wizard ensures proper installation and compatibility. After completion, restore power and verify system operation. This guide ensures a smooth, error-free installation process, even for those with limited technical expertise. Proper setup guarantees optimal performance and functionality.

Mounting the Thermostat: Safety Precautions and Instructions

Before mounting the Trane 824, ensure the wall is clean and level. Turn off all power to HVAC equipment at the circuit breaker. Remove the existing thermostat and carefully label wires. Mount the base plate using screws provided, ensuring secure installation. Avoid over-tightening, which may damage the wall or thermostat. Connect wires to the appropriate terminals, following the wiring diagram. After mounting, restore power and test the system. Always follow safety guidelines to prevent electrical hazards or system damage.

User Configuration and Settings

The Trane 824 offers a User Setup Wizard for configuring settings like schedules, presets, and smart home integrations. Customize temperature, humidity, and energy-saving preferences effortlessly.

User Setup Wizard: Navigating Configurable Settings

The Trane 824’s User Setup Wizard simplifies configuring settings like temperature, humidity, and schedules. It guides users through selecting preferences, enabling smart features, and connecting to Wi-Fi for remote control. Step-by-step prompts ensure easy navigation, allowing users to customize their comfort settings efficiently. The wizard also helps integrate with Nexia Home, offering advanced smart home capabilities. This intuitive tool ensures a seamless setup experience, making it easy to optimize heating and cooling systems for energy savings and comfort.

Configuring Schedules and Presets

The Trane 824 allows users to create custom schedules and presets for optimal comfort and efficiency. Through the thermostat or Nexia Home system, users can set daily and weekly schedules, adjusting temperatures for different times. Presets enable quick changes, such as energy-saving modes or vacation settings. The 1-Touch feature simplifies switching between configurations, while the schedule wizard helps users maintain consistent settings across multiple days. These tools ensure seamless control over heating and cooling, enhancing both convenience and energy efficiency.

Advanced Features and Functionality

The Trane 824 offers advanced features such as smart home integration, humidity control, and energy-saving modes for enhanced efficiency and convenience.

Smart Home Integration and Wi-Fi Connectivity

The Trane 824 thermostat seamlessly integrates with smart home systems, enabling voice control through platforms like Amazon Alexa and Google Assistant. Its built-in Wi-Fi capability allows users to remotely monitor and adjust settings via the Trane Home app, ensuring comfort and energy efficiency from anywhere. The thermostat also supports geofencing, automatically adjusting temperatures based on your location. This advanced connectivity ensures a convenient and intelligent heating and cooling experience.

Humidity Control and Dehumidification Settings

The Trane 824 thermostat includes advanced humidity control features, allowing users to manage indoor humidity levels effectively. By enabling dehumidification settings, the system works to maintain optimal moisture levels, preventing mold growth and enhancing comfort. AUX 1 or AUX 2 must be configured for dehumidification, and the onboard humidity sensor must be activated in the Installer Setup. This ensures precise control over humidity, providing a healthier indoor environment year-round while optimizing system performance.

Technical Specifications and Compatibility

The Trane 824 thermostat is compatible with most HVAC systems, requiring 24V AC and a C-wire. It supports Wi-Fi connectivity and is designed for efficient performance across various setups.

System Requirements and Compatibility

The Trane 824 thermostat is compatible with most HVAC systems, including conventional, heat pump, and dual-fuel systems. It requires a 24V AC power supply and a common wire (C-wire) for reliable operation. The thermostat supports up to four stages of heating and two stages of cooling, making it versatile for various home setups. Additionally, it works seamlessly with smart home systems, enhancing its functionality and user convenience through integrated controls and remote access features.

Electrical and Wiring Requirements

The Trane 824 thermostat requires a 24V AC power supply and a common wire (C-wire) for proper operation; Ensure all wiring connections are secure to prevent electrical interference, which can cause system malfunctions. Follow recommended wiring practices to avoid noise issues. Compatible with most standard HVAC systems, the thermostat supports up to four stages of heating and two stages of cooling. Proper wiring ensures reliable performance, while failure to adhere to guidelines may lead to erratic operation.

Maintenance and Troubleshooting

Regularly clean the touchscreen and check wiring connections to ensure optimal performance. Resetting the thermostat or checking system diagnostics can resolve common issues efficiently.

Regular Maintenance Tips for Optimal Performance

Ensure the Trane 824 thermostat operates efficiently by cleaning its touchscreen regularly and checking wiring connections. Update software periodically for enhanced functionality. Schedule annual professional HVAC system checks to maintain performance. Reset the thermostat if issues arise, and monitor system diagnostics for early fault detection. Proper maintenance extends the lifespan of your Trane 824, ensuring consistent comfort and energy savings throughout the year.

Troubleshooting Common Issues

If the Trane 824 thermostat displays an error, restart it by turning off power at the breaker. Check wiring connections for loose links and ensure all cables are secure. For Wi-Fi issues, reset the network settings or restart your router. If the touchscreen is unresponsive, clean it with a soft cloth. Addressing these common problems quickly restores functionality, ensuring your HVAC system operates smoothly without prolonged interruptions or discomfort.

Energy Efficiency and Savings

The Trane 824 thermostat optimizes energy usage through smart scheduling and adaptive learning, reducing utility bills while maintaining comfort. Its eco-friendly design ensures efficient HVAC operation.

Energy-Saving Features of the Trane 824

The Trane 824 thermostat features advanced energy-saving capabilities, including smart scheduling, geofencing, and adaptive learning. These technologies learn your preferences and adjust temperatures when you’re away, optimizing energy use. The thermostat also offers remote access via Wi-Fi, allowing you to monitor and control your HVAC system from anywhere. Additionally, it provides detailed energy reports to help you identify usage patterns and make informed decisions to reduce consumption. These features collectively contribute to significant energy savings and lower utility bills while maintaining a comfortable environment year-round.

Optimizing Energy Usage with Smart Scheduling

The Trane 824 thermostat excels at optimizing energy usage through smart scheduling. By creating custom heating and cooling schedules, you can ensure your system operates efficiently, reducing energy waste. The thermostat learns your daily routines and preferences, automatically adjusting temperatures when you’re away or sleeping. Geofencing technology further enhances energy savings by detecting your location and adjusting settings accordingly. With smart scheduling, you can lower utility bills while maintaining a comfortable environment, making it an essential feature for energy-conscious users.

Warranty and Support

The Trane 824 thermostat is backed by comprehensive warranty options, including base limited and optional extended warranties. Dedicated customer support and online resources ensure seamless assistance and troubleshooting.

Understanding the Warranty Options

The Trane 824 thermostat offers multiple warranty options to protect your investment. The base limited warranty provides coverage for parts and labor under normal use. For extended protection, optional extended warranties are available, offering additional years of coverage. These warranties ensure peace of mind, covering repairs and replacements for defective parts. Additionally, registering your product can enhance warranty benefits, providing priority support and exclusive service options. Always review the terms and conditions to understand what is covered and for how long.

Accessing Customer Support and Resources

Trane provides comprehensive support options for the XL824 thermostat. Visit www.Trane.com/residential for access to user manuals, software updates, and troubleshooting guides. Customers can also contact Trane’s dedicated support team via phone or online chat for assistance. Additional resources include installation guides, warranty information, and FAQs to address common inquiries. For advanced issues, Trane’s network of certified technicians is available to ensure optimal performance and resolve any technical challenges efficiently.

manual honda crv 2014

The 2014 Honda CR-V Owner’s Manual is a comprehensive guide to understanding and maintaining your vehicle. It provides detailed information on features, maintenance, and troubleshooting, ensuring optimal performance and safety. This manual is essential for all owners to maximize their driving experience and keep their CR-V in top condition.

1.1 Importance of the Owner’s Manual

The owner’s manual is a vital resource for understanding and maintaining the 2014 Honda CR-V. It provides essential information on vehicle features, maintenance schedules, and troubleshooting tips, ensuring optimal performance, safety, and longevity. Regularly referencing the manual helps owners make informed decisions and address issues promptly, enhancing overall driving experience and vehicle reliability.

1.2 Key Features of the 2014 Honda CR-V

The 2014 Honda CR-V features a 2.4-liter inline-4 engine, producing 185 horsepower, paired with a smooth 5-speed automatic transmission. It offers advanced technology, including a touchscreen infotainment system, rearview camera, and Bluetooth connectivity. With its spacious interior, fuel-efficient design, and robust safety features, the CR-V combines practicality, comfort, and reliability for a versatile driving experience.

Downloading and Accessing the 2014 Honda CR-V Owner’s Manual

The 2014 Honda CR-V Owner’s Manual is available as a free PDF download from sources like CarManualsOnline.info and Honda’s official website, ensuring easy access for viewing or printing.

2.1 Sources for the PDF Manual

The 2014 Honda CR-V Owner’s Manual can be downloaded from trusted sources like CarManualsOnline;info, Honda’s official website, or authorized dealerships. These platforms offer free access to the PDF version, ensuring authenticity and convenience for owners seeking detailed information about their vehicle;

2.2 Steps to Download the Manual

Visit the official Honda website or trusted sources like CarManualsOnline.info. Navigate to the owner’s manual section, select the 2014 Honda CR-V model, and click the download link. Save the PDF file to your device for easy access and reference.

2.3 Navigating the Digital Manual

Once downloaded, the digital manual can be easily navigated using bookmarks, a table of contents, and a search function; Users can zoom in for detailed text and images, or print specific sections. This format ensures quick access to information, making it convenient for owners to find what they need efficiently.

Understanding the 2014 Honda CR-V Owner’s Manual Structure

The manual is structured to guide owners through maintenance, troubleshooting, and advanced features. It covers all models, with detailed sections for easy navigation and comprehensive understanding.

3.1 Table of Contents Overview

The table of contents in the 2014 Honda CR-V manual provides a clear outline of sections, including maintenance schedules, troubleshooting guides, and feature explanations. It helps owners quickly locate specific information, ensuring efficient navigation through the document for optimal vehicle care and operation.

3.2 Symbols and Abbreviations Used

The manual uses specific symbols and abbreviations to convey important information quickly. Common symbols include warning signs and maintenance indicators, while abbreviations like “ATF” for transmission fluid are defined to avoid confusion. Understanding these symbols ensures safe and effective use of the vehicle’s features and maintenance procedures.

3.3 Sections Specific to the 2014 Model

The 2014 Honda CR-V manual includes sections unique to this model year, such as updates to the Eco Assist technology, revised infotainment system instructions, and specific details about the 2.4-liter engine enhancements. These sections highlight features exclusive to the 2014 model, ensuring owners can fully utilize its improved capabilities and technologies.

Maintenance Schedule and Service Requirements

The 2014 Honda CR-V Owner’s Manual outlines a detailed maintenance schedule, including oil changes and tire rotations, to ensure optimal performance and reliability. Regular servicing is essential.

4.1 Recommended Maintenance Intervals

The 2014 Honda CR-V Owner’s Manual recommends regular maintenance intervals to ensure optimal performance and reliability. Oil changes are required every 5,000 to 7,500 miles, while tire rotations should occur every 7,500 miles. Air filter inspections are needed every 15,000 miles, and spark plugs should be replaced at 105,000 miles. These intervals help maintain efficiency and prevent potential issues.

4.2 DIY Maintenance Tips

Perform regular oil changes using the recommended viscosity for your 2014 Honda CR-V. Check and maintain proper tire pressure for optimal fuel efficiency. Inspect and clean the air filter every 15,000 miles, and replace it as needed. Additionally, monitor the condition of your spark plugs and replace them at 105,000 miles for consistent engine performance.

4.3 Importance of Regular Servicing

Regular servicing ensures your 2014 Honda CR-V performs optimally, prevents mechanical issues, and maintains fuel efficiency. It validates your warranty and enhances safety. Follow the recommended schedule to protect your investment and enjoy a reliable driving experience.

Operating the 2014 Honda CR-V

Learn how to start, stop, and drive your CR-V safely. Understand transmission modes, safety features, and best practices for optimal performance and fuel efficiency.

5.1 Starting and Stopping the Engine

To start the engine, insert the key, turn the ignition, and press the start button. For temporary measures, hold the ENGINE START/STOP button for 15 seconds while pressing the brake pedal to initiate manual start. Always follow proper procedures to ensure safe engine operation and shutdown.

5.2 Transmission and Driving Modes

The 2014 Honda CR-V features a Continuously Variable Transmission (CVT) for smooth acceleration. Driving modes include Normal, Sport, and Low for optimal performance in various conditions. Use the shift lever to switch modes, ensuring enhanced fuel efficiency and better traction on different terrains. Always select the appropriate mode for your driving environment.

5.3 Safety Features and Precautions

The 2014 Honda CR-V is equipped with advanced safety features, including airbags, ABS, and stability control. Always wear seat belts and ensure proper child seat installation. Check mirrors and blind spots before maneuvers. Follow precautions for securing cargo and avoid driving distractions. Regularly inspect brakes and tires for optimal safety on the road.

Troubleshooting Common Issues

The section provides guidance for identifying and resolving common issues with the 2014 Honda CR-V, ensuring proper diagnosis and repair for optimal vehicle performance and safety.

6.1 Identifying Warning Lights

The 2014 Honda CR-V Owner’s Manual details various dashboard warning lights, such as oil, battery, and brake indicators. Understanding these symbols is crucial for diagnosing issues promptly. Refer to the manual for explanations of each light and recommended actions to ensure safety and prevent potential damage to your vehicle.

6.2 Solving Basic Mechanical Problems

The 2014 Honda CR-V Owner’s Manual guides owners through resolving common mechanical issues such as flat tires and battery problems. It provides step-by-step instructions for checking fluid levels, belt inspections, and restarting systems after maintenance. Regular checks and timely repairs ensure optimal performance, longevity, and prevent costly repairs.

6.3 Resetting the Maintenance Minder

The 2014 Honda CR-V Owner’s Manual explains how to reset the Maintenance Minder after servicing. This system tracks scheduled maintenance and notifies when service is due. Resetting it ensures accuracy and prevents false alerts, keeping you informed about your vehicle’s needs and maintaining its reliability over time.

Advanced Features of the 2014 Honda CR-V

The 2014 Honda CR-V features advanced technologies like a touchscreen infotainment system, Bluetooth connectivity, and eco-assist for improved fuel efficiency, enhancing both convenience and performance.

7.1 Navigation and Infotainment System

The 2014 Honda CR-V features an advanced navigation and infotainment system, offering a touchscreen interface, Bluetooth connectivity, and voice command functionality. It supports smartphone integration, enabling seamless access to music, maps, and apps. The system also includes eco-assist to monitor and improve fuel efficiency, enhancing both convenience and driving efficiency for a modern experience.

7.2 Fuel Efficiency and Economy

The 2014 Honda CR-V is designed for optimal fuel efficiency, delivering an estimated 23 MPG in the city and 31 MPG on the highway. The Eco Assist feature helps drivers improve fuel economy by monitoring acceleration and braking patterns, while the direct fuel injection system ensures efficient combustion, reducing emissions and maximizing mileage.

7.3 Technology and Connectivity Options

The 2014 Honda CR-V features advanced technology, including a touchscreen infotainment system with Bluetooth connectivity, USB ports, and steering wheel-mounted controls. It supports smartphone integration, offering access to apps like Pandora and HondaLink. The optional navigation system provides voice-activated controls and real-time traffic updates, enhancing convenience and connectivity for a modern driving experience.

Safety Features and Emergency Procedures

The 2014 Honda CR-V features an advanced airbag system, safety belts, and emergency procedures to ensure occupant protection. It provides clear guidelines for accident response and vehicle stabilization.

8.1 Airbag System and Safety Belts

The 2014 Honda CR-V is equipped with a multi-angle rearview camera and an advanced airbag system, including dual-stage front airbags and side airbags. The airbag system deploys in the event of a collision to protect occupants, while safety belts with pretensioners and load limiters ensure optimal restraint and minimize injury risk effectively.

8.2 Emergency Brake Assistance

The 2014 Honda CR-V features an advanced emergency brake assistance system designed to enhance safety during sudden stops. The system automatically applies maximum braking force when an emergency stop is detected, reducing stopping distance and improving control. This technology works in conjunction with the vehicle’s electronic control systems to ensure optimal performance in critical situations.

8.3 What to Do in Case of an Accident

In the event of an accident, ensure everyone’s safety by checking for injuries and securing the scene. Contact emergency services immediately and exchange information with all parties involved. Document the incident with photos and notes. Assess vehicle damage and consult the owner’s manual for specific guidance on post-accident procedures and seeking professional assistance.

Warranty Information and Support

The 2014 Honda CR-V warranty provides coverage for parts and labor, ensuring protection against defects. Honda Support offers assistance, while authorized service centers guarantee expert maintenance and repairs for your vehicle.

9.1 Understanding the Warranty Coverage

The 2014 Honda CR-V warranty provides comprehensive coverage for parts and labor, protecting against defects in materials and workmanship. The warranty typically lasts for 3 years or 36,000 miles, with powertrain coverage extending to 5 years or 60,000 miles. It does not cover normal wear items or damage caused by misuse.

9.2 Contacting Honda Support

For assistance, visit Honda’s official website at world.honda.com and select your vehicle’s year, model, and trim for specific support. You can also contact Honda’s customer service directly via phone or through authorized dealerships. The support team is available to address warranty questions, service needs, and provide general guidance for your 2014 Honda CR-V.

9.3 Authorized Service Centers

For genuine parts and expert service, visit authorized Honda Service Centers. These centers are equipped to handle maintenance and repairs for your 2014 CR-V. To find a nearby center, visit world.honda.com, select your vehicle’s year, model, and trim, and access the service locator tool for convenient scheduling and support.

Comparison with Other Honda CR-V Models

The 2014 Honda CR-V stands out with its 2.4L engine, advanced features, and sleek design, offering improvements over previous models while maintaining the reliability Honda is known for.

10.1 Differences from Previous Models

  • The 2014 Honda CR-V features a more powerful 2.4L engine, producing 185 horsepower.
  • It includes updated exterior and interior designs for enhanced aesthetics and comfort.
  • Advanced technology additions, such as improved infotainment systems, were introduced.
  • Safety features like forward collision warning became standard.
  • Fuel efficiency was optimized, offering better mileage than earlier models.
  • Suspension improvements provided a smoother ride and better handling.

10.2 Upgrades and Improvements

  • The 2014 Honda CR-V received a more powerful 2.4L engine, delivering 185 horsepower for enhanced performance.
  • New safety features, including forward collision warning and lane departure warning, were added.
  • The infotainment system was upgraded with improved connectivity options like Bluetooth and USB ports.
  • Exterior and interior designs were refreshed with modern styling and premium materials;
  • Fuel efficiency was improved through aerodynamic enhancements and optimized transmission.
  • Additional noise-reduction measures were implemented for a quieter cabin experience.
  • Suspension refinements provided a smoother and more responsive ride.

10.3 Model Variants and Trim Levels

The 2014 Honda CR-V is available in multiple trim levels, including LX, EX, and EX-L. Each variant offers unique features, with the EX-L providing luxury additions like leather upholstery and a premium sound system. These options cater to diverse driver preferences, ensuring a tailored ownership experience.

Environmental Impact and Fuel Efficiency

The 2014 Honda CR-V features eco-friendly technologies, including the Eco Assist system, to enhance fuel efficiency and reduce emissions, promoting environmentally responsible driving while maintaining performance.

11.1 Eco-Friendly Features

The 2014 Honda CR-V incorporates eco-friendly features like the ECON mode, which optimizes fuel efficiency by adjusting engine and transmission settings. Additionally, the Eco Assist system provides feedback to drivers, encouraging fuel-efficient driving habits. These technologies contribute to reduced emissions and lower environmental impact without compromising performance or comfort.

11.2 Fuel Consumption and Emissions

The 2014 Honda CR-V features a fuel-efficient 2.4-liter engine, delivering up to 23 mpg in the city and 31 mpg on the highway. Its advanced emissions control system ensures reduced environmental impact, making it a more eco-conscious choice for drivers seeking balance between performance and sustainability.

11.3 Sustainable Driving Practices

To minimize environmental impact, adopt eco-friendly driving habits such as maintaining consistent speeds, avoiding sudden acceleration, and using the ECON mode. Regular tire pressure checks and proper vehicle maintenance also enhance fuel efficiency. These practices not only reduce emissions but also contribute to a more sustainable driving experience for the 2014 Honda CR-V.