maplestory commerci guide

San Commerci is a crucial daily activity in MapleStory, offering access to Best-in-Slot (BIS) gear – Eye, Face, and Pendant accessories.

This system, introduced recently, requires understanding its mechanics for optimal rewards and efficient progression within the game’s endgame content.
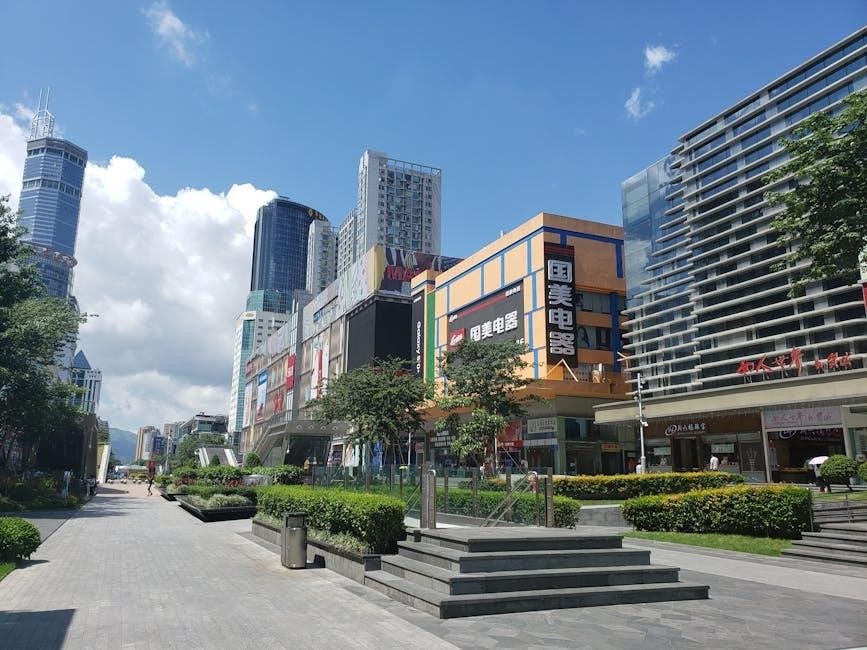
What is Commerci?

Commerci represents a unique trade voyage system within MapleStory, located in the area of San Commerci. Players engage in voyages facilitated by Maestra Fiammeta at the Trading Post. These voyages involve clearing maps and defeating monsters to earn Commerci Denaro, a special currency.

This currency is then used to purchase coveted Best-in-Slot (BIS) accessories: the Eye, Face, and Pendant. Accessing Commerci requires completing initial quests from Cassandra, unlocking a significant pathway for character progression and gear optimization.

Why is Commerci Important? (BIS Gear)

Commerci is paramount due to its exclusive offering of Best-in-Slot (BIS) gear – the Eye Accessory, Face Accessory, and Pendant. These items provide substantial stat boosts, significantly enhancing a character’s damage output and overall effectiveness. Acquiring BIS gear from Commerci is a core component of endgame progression.

Without these accessories, reaching peak performance becomes considerably more challenging. Consistent Commerci runs are therefore essential for players striving to optimize their characters and tackle high-level content effectively.

Unlocking San Commerci

Accessing San Commerci requires completing a prerequisite questline initiated by Cassandra, who contacts players via a lightbulb icon, directing them to Maestra Fiammeta.

Prerequisites for Access

Before embarking on Commerci voyages, players must ensure they’ve met the initial requirements to unlock access to San Commerci. This isn’t a level-gated area; instead, it’s unlocked through a specific questline. The journey begins when Cassandra initiates contact, appearing as a lightbulb above your character.

This signals the start of the introductory quest, guiding you towards Maestra Fiammeta located at the Trading Post within San Commerci. Successfully completing this initial quest is absolutely essential to begin participating in Commerci trade voyages and pursuing BIS gear.

Cassandra’s Initial Quest

Cassandra’s quest serves as the gateway to San Commerci, initiating the Commerci experience for players. Upon receiving her lightbulb notification, accept the quest and follow her instructions. The quest primarily directs you to locate and speak with Maestra Fiammeta at the Trading Post within San Commerci.

Fiammeta will comprehensively explain the core mechanics of Commerci voyages, detailing the process of item selection and the overall objective. Completing this short, straightforward quest unlocks access to the entire Commerci system, allowing you to begin your voyages.

Understanding Commerci Voyages

Commerci Voyages involve selecting items and dispatching them via Maestra Fiammeta at the Trading Post, aiming to complete trade routes for rewards.

These voyages are central to acquiring Commerci Denaro and BIS gear.

Maestra Fiammeta and the Trading Post

Maestra Fiammeta, located at the Trading Post within San Commerci, is the key NPC for initiating voyages. Cassandra directs players to her after initial access is granted.

Fiammeta explains the voyage system, detailing how players select items from their inventory to send on trade routes. She manages the dispatch and return of these voyages, providing Commerci Denaro upon successful completion.

The Trading Post serves as the central hub for all Commerci-related activities, making Fiammeta a frequently visited character for BIS gear acquisition.

Types of Voyages Available

Commerci voyages primarily involve selecting items and sending them on trade routes for Commerci Denaro. While the core mechanic remains consistent, the efficiency varies based on item choices.

Currently, there aren’t distinctly different voyage types beyond the standard trade route. The focus is on optimizing the items brought, as this directly impacts the Denaro earned.

Players aim for quick map clears to maximize voyage attempts daily, focusing on item selection for optimal returns.

Commerci Denaro and Item System

Commerci Denaro is the currency earned through voyages, used to purchase BIS accessories. Item selection is key; each run allows a limited number of items.

Earning and Using Commerci Denaro

Commerci Denaro is acquired by successfully completing trade voyages within San Commerci. The amount earned depends on the voyage type and efficiency of map clearing. This unique currency is exclusively used at Maestra Fiammeta’s Trading Post.

Players exchange Denaro for Voyage Coins, which are then used to purchase the coveted Best-in-Slot (BIS) accessories: Eye, Face, and Pendant. Careful management of Denaro is vital, as it directly impacts your ability to acquire these powerful items.

Item Selection for Voyages

Selecting voyage items is a key aspect of Commerci. Each run allows players to bring a limited number of items, influencing potential rewards. The type of item doesn’t drastically alter the outcome, but maximizing the item count is crucial.

Prioritize bringing readily available, low-cost items to increase voyage frequency. Remember, more voyages equate to more opportunities to earn Commerci Denaro and ultimately, acquire BIS gear. Strategic item selection boosts efficiency!

Voyage Item Limits

Commerci voyages have a strict item limit, impacting how frequently players can attempt to obtain rewards. Players can bring a specific number of items per voyage, though the exact quantity isn’t always explicitly stated. Maximizing this limit is vital for efficient Commerci runs.

Focus on utilizing inexpensive, easily obtainable items to fill these slots, ensuring consistent voyage attempts. Understanding and respecting this limit is fundamental to optimizing your Commerci experience.

Optimizing Commerci Runs

Efficient map clearing and monster prioritization are key to fast Commerci voyages. Party play can significantly speed up runs, but solo play is viable.

Efficient Map Clearing Strategies

Maximizing speed during Commerci runs hinges on effective map clearing. Focus on quickly eliminating monsters, prioritizing those clustered together for area-of-effect (AoE) skills. Utilize movement skills to traverse maps swiftly, minimizing downtime between monster spawns.

Understanding map layouts is crucial; identify choke points and optimal routes. Pre-planning your path and skill rotation will dramatically improve efficiency. Remember, the goal is to complete the voyage as quickly as possible to maximize Denaro gains.

Monster Types and Prioritization

Commerci voyages feature diverse monster types, demanding strategic prioritization. Generally, focus on eliminating monsters with high health pools first, as they impede progress. Prioritize those inflicting significant damage or status ailments to minimize incoming harm.

Certain monsters may be more susceptible to specific damage types; exploit these weaknesses for faster clears. Efficiently dispatching troublesome enemies ensures smoother navigation and quicker voyage completion, ultimately boosting your Denaro income.

Party Play vs. Solo Play

Commerci voyages can be tackled solo or with a party, each offering distinct advantages. Solo play allows for focused farming and eliminates competition for monster kills, maximizing individual Denaro gains. However, party play significantly speeds up map clearing, especially with coordinated damage output.

Consider your class and gear when deciding; stronger characters may excel solo, while others benefit from party support. Communication and synergy are key for efficient party runs, leading to faster voyage completions.

Best-in-Slot (BIS) Gear from Commerci

San Commerci provides access to highly sought-after Best-in-Slot accessories: the Eye Accessory, Face Accessory, and Pendant, significantly boosting character stats.

Eye Accessory

The Eye Accessory obtained through Commerci is a pivotal piece of Best-in-Slot gear, offering substantial stat increases crucial for endgame progression. Acquiring it involves completing specific Commerci Voyages and exchanging accumulated Commerci Denaro.

Players should prioritize efficient map clearing during voyages to maximize Denaro earnings. The Eye Accessory’s potential is significant, impacting damage output and overall character effectiveness. It’s a core component for optimizing builds and tackling challenging content within MapleStory.

Face Accessory

The Face Accessory, sourced from San Commerci, represents another essential Best-in-Slot item for maximizing character stats. Like the Eye Accessory, it requires consistent Commerci Voyage completion and strategic Denaro spending.

Efficiently clearing maps during voyages is key to accumulating sufficient Denaro for purchase. This accessory provides a significant boost to core stats, enhancing overall combat capabilities. Obtaining it is a high priority for players aiming to optimize their builds and conquer end-game challenges.

Pendant

The Pendant, acquired through San Commerci, completes the trio of Best-in-Slot accessories – Eye, Face, and Pendant – vital for endgame progression. Consistent voyage runs and careful Denaro management are crucial for obtaining this powerful item.

The Pendant offers substantial stat increases, significantly impacting damage output and survivability. Prioritizing efficient map clearing and understanding voyage item limits will accelerate the acquisition process, allowing players to reach their full potential.

Commerci Job-Specific Considerations

Certain MapleStory jobs, like Dual Blade, Cygnus Knights, and Aran, may find specific voyage strategies more effective due to their unique skillsets.

Dual Blade

Dual Blade’s high mobility and burst damage are exceptionally well-suited for quickly clearing Commerci maps. Focus on chaining skills like Soul Blade and Final Flash to efficiently eliminate monster groups. Prioritize maps with tightly packed enemies to maximize damage output.

Utilize Shadow Step for rapid repositioning, ensuring consistent damage application. Consider party play for increased clear speed, but Dual Blade excels at solo runs due to its self-sufficiency.

Cygnus Knights

Cygnus Knights benefit from their consistent damage and supportive capabilities within Commerci. Utilize skills like Holy Arrow and area-of-effect attacks to clear maps steadily. Their buffs can enhance party efficiency, making them valuable assets in group runs.

Focus on maintaining high uptime on damage buffs and strategically using crowd control skills to manage monster density. Solo runs are viable, but party play maximizes potential.

Aran

Aran excels in Commerci due to their high mobility and burst damage. Utilize Combo Kill effectively for swift monster elimination, prioritizing maps with dense monster populations. Their swift movement allows for efficient map clearing and quick repositioning.

Aran’s ability to quickly navigate maps makes solo runs particularly effective, maximizing Commerci Denaro gains. Focus on maintaining combo chains for optimal damage output throughout each voyage.

Advanced Commerci Techniques

Optimizing routes and buff utilization are key to faster, more profitable Commerci runs. Strategic potion use and efficient map navigation maximize rewards.

Voyage Route Optimization

Efficient map clearing is paramount for successful Commerci voyages. Prioritize routes with high monster density and minimal travel time between areas. Focus on maps where your class excels, maximizing damage output and minimizing clear times.

Consider monster placement and spawn rates; some maps offer quicker completion than others. Experiment with different routes to discover what works best for your character and playstyle. Remember, faster runs translate directly into more voyages completed per hour, boosting your chances for BIS gear!

Utilizing Buffs and Potions

Maximizing damage output during Commerci runs is crucial. Employ damage-boosting buffs from sources like Hyper Stats, Legion, and event buffs. Utilize potions – especially EXP and Meso boosters – to gain additional benefits while efficiently clearing maps.

Consider party buffs if running with others. Strategic potion usage, timed with high-density monster spawns, significantly reduces clear times. Remember, faster runs mean more voyages and a higher probability of acquiring coveted BIS items!

Commerci and Daily Routines

Integrating Commerci into your daily MapleStory schedule is vital for consistent BIS gear progression. Efficient time management ensures completion alongside other essential daily quests.

Integrating Commerci into Daily Quests

Seamlessly blending Commerci voyages with your existing daily quest routine maximizes efficiency. Prioritize quests offering movement speed buffs or those completed in areas near San Commerci’s entrance.

This minimizes travel time and allows for quicker transitions between activities. Consider completing Commerci after quests requiring extensive map travel, preserving energy for focused voyage runs.

Remember, consistent Commerci runs are key to obtaining BIS gear, making it a non-negotiable part of your daily MapleStory regimen.

Time Management for Efficient Runs

Effective time management is paramount for maximizing Commerci output. Pre-select voyage items to avoid delays at the Trading Post. Optimize your route within each map, prioritizing monster density and minimizing backtracking.

Utilize quick-move skills and consider party play for faster clear times. Schedule dedicated Commerci blocks, avoiding interruptions. Remember, even short, focused runs are more productive than lengthy, distracted ones.

Consistency is key; integrate it into your daily routine!

Troubleshooting Commerci Issues

Common errors during Commerci runs can often be resolved by restarting the client or checking your item limits. Contact MapleStory support for persistent problems.

Common Errors and Solutions

Experiencing issues with Commerci? Several common errors can disrupt your voyages. A frequent problem is failing to meet voyage requirements, easily fixed by verifying you have the correct items. If the game freezes, a simple client restart often resolves it.

Item selection errors can occur if you exceed the voyage limit; double-check your choices. For persistent bugs, consult the official MapleStory forums or submit a support ticket. Remember to provide detailed information about the error for faster assistance.

Contacting Support for Assistance

Encountering unsolvable Commerci issues? Don’t hesitate to reach out to MapleStory’s official support team. Access their website and navigate to the support section, typically requiring an account login. Prepare a detailed description of your problem, including screenshots or video recordings if possible.

Clearly outline the steps leading to the error and any error messages received. Be patient, as response times can vary. Providing comprehensive information significantly speeds up the resolution process, ensuring a smoother Commerci experience.

Commerci Updates and Changes

Stay informed! Recent patches may alter Commerci mechanics, voyage availability, or reward structures. Regularly check official patch notes for updates and future developments impacting your runs.

Recent Patch Notes

Tracking changes is vital for maximizing Commerci efficiency. While specific dates vary, updates frequently adjust voyage item limits, monster spawn rates within San Commerci maps, and even the Denaro exchange rates. Players should consistently review the official MapleStory website or dedicated community resources like StrategyWiki for detailed patch notes.

These notes often outline bug fixes related to Commerci quests or voyage completion, ensuring a smoother experience. Ignoring these updates can lead to suboptimal runs and missed opportunities for acquiring BIS gear. Prioritize staying current!

Future Developments

Speculation surrounds potential expansions to San Commerci. Players anticipate the addition of new voyage routes, potentially introducing maps with varying difficulty and reward tiers. There’s also hope for increased item variety available for voyages, broadening strategic options.

Further integration with the Digital Crown content seems likely, possibly offering exclusive rewards or enhanced Denaro gains. Community feedback consistently requests quality-of-life improvements, such as automated voyage selection. Monitoring official announcements is key.

Resources and Further Learning

StrategyWiki provides a detailed Commerci guide, while Reddit’s r/Maplestory offers player discussions and shared strategies for efficient voyages and BIS gear.

StrategyWiki Commerci Guide

StrategyWiki serves as a comprehensive resource, detailing the entire Commerci process from initial access through voyage completion. The guide meticulously outlines prerequisites, including unlocking San Commerci and Cassandra’s introductory questline.

It breaks down voyage types, item selection, and Denaro usage, offering a structured approach to maximizing rewards. Furthermore, it provides a foundational understanding of the trading post and Maestra Fiammeta’s role, making it an invaluable starting point for new players.

Reddit Discussions on Commerci

Reddit’s r/Maplestory hosts numerous threads dedicated to Commerci, offering player insights and practical advice. Discussions frequently center around efficient map clearing, emphasizing that runs primarily involve monster elimination.

Users share strategies for maximizing Commerci Denaro earnings and optimizing item selection for voyages. These community-driven conversations provide valuable, up-to-date information, supplementing official guides and offering diverse perspectives on tackling this daily content.

Commerci and the Digital Crowns

San Commerci directly relates to Digital Crown content, providing essential BIS gear. Maximizing rewards from voyages is key to enhancing your character’s power efficiently.

Relationship to Digital Crown Content

Commerci is intrinsically linked to the Digital Crown system within MapleStory, serving as a primary source for acquiring Best-in-Slot (BIS) accessories. These accessories – specifically the Eye, Face, and Pendant – significantly boost character stats, directly impacting performance in Digital Crown-related content like challenging boss battles and high-level maps.

Successfully navigating Commerci voyages and obtaining these BIS items is therefore crucial for players aiming to maximize their rewards and efficiently progress through the Digital Crown’s endgame challenges. It’s a vital component of gear progression.

Maximizing Rewards

To maximize Commerci rewards, consistent daily runs are paramount, focusing on efficient map clearing and prioritizing monster types. Utilizing voyage item limits strategically, and understanding the exchange rates for desired accessories, is key. Party play can accelerate progress, but solo runs offer focused farming.

Optimizing voyage routes and leveraging buffs/potions further enhances efficiency. Regularly checking patch notes ensures awareness of any changes impacting reward structures or voyage mechanics, leading to optimal gains.

Commerci Exchange Quests

Commerci offers exchange options for acquired items, allowing players to trade for specific accessories. Optimizing these rates requires careful consideration of current market demands and availability.

Available Exchange Options

The Commerci system presents diverse exchange possibilities, primarily focused on converting voyage-obtained items into desired BIS accessories. Players can trade accumulated materials for Eye Accessories, Face Accessories, and pendants, each with varying exchange rates. These rates fluctuate based on item rarity and demand within the Commerci system.

Understanding which items are most valuable for exchange is key to maximizing efficiency. Regularly checking the current exchange rates and prioritizing the collection of high-value materials will significantly improve your chances of acquiring the desired gear quickly.

Optimizing Exchange Rates

Maximizing Commerci exchange rates requires strategic item collection and timing. Monitor fluctuations in demand for specific voyage items; rarer materials generally yield better returns. Prioritize completing voyages that offer items currently valued highly for accessory exchanges.

Consider utilizing community resources, like Reddit discussions, to identify trending exchange rates. Efficiently managing your inventory and converting items during peak value periods will accelerate your BIS gear acquisition process, saving time and resources.

honeywell th6210u2001 user manual

Honeywell TH6210U2001 User Manual: A Comprehensive Guide

Welcome! This manual expertly guides you through setup, operation, and maintenance of your Honeywell TH6210U2001 thermostat, ensuring optimal performance and comfort.

The Honeywell TH6210U2001 is a programmable thermostat designed to provide efficient and convenient control of your home’s heating and cooling systems. This user manual serves as a comprehensive resource, guiding you through every aspect of your thermostat – from initial installation and setup to daily operation and advanced feature utilization. Understanding your thermostat’s capabilities will allow you to optimize energy usage, reduce utility costs, and maintain a comfortable indoor environment;

This model offers a user-friendly interface and a range of programmable schedules to suit your lifestyle. Whether you prefer a simple, set-it-and-forget-it approach or a more customized heating and cooling plan, the TH6210U2001 provides the flexibility you need. This guide will also cover troubleshooting common issues and provide maintenance tips to ensure long-lasting performance. Explore the features and unlock the full potential of your Honeywell thermostat!

What’s Included in the Box

Upon opening your Honeywell TH6210U2001 package, please verify that all components are present. Your thermostat kit should include the following items: the TH6210U2001 thermostat unit itself, a mounting base plate for wall installation, and installation screws and anchors for secure attachment. You will also find wire labels to help identify your existing HVAC wiring during installation – a crucial step for correct functionality.

Additionally, the box contains this comprehensive user manual, providing step-by-step instructions and helpful tips. While batteries are sometimes included, it’s advisable to confirm their presence and freshness. If not, you’ll need to supply two AA batteries for optimal operation. Carefully inspect all components for any signs of damage during shipping. If anything is missing or damaged, contact Honeywell customer support immediately for assistance and replacements.

Installation Guide

Begin installation carefully! This section details safe wiring, mounting, and HVAC system connection procedures for your Honeywell TH6210U2001 thermostat.

Safety Precautions Before Installation

Crucially, disconnect power to your HVAC system at the breaker box before beginning any installation work. Failure to do so presents a serious risk of electrical shock or damage to your equipment; Verify the power is off with a non-contact voltage tester.

Always read all instructions thoroughly before starting. Incorrect wiring can lead to system malfunction or even create a fire hazard. If you are uncomfortable with electrical work, consult a qualified HVAC technician.

Wear appropriate safety gear, including insulated gloves and eye protection. Be mindful of potential hazards like sharp edges on the thermostat base or wiring. Ensure the installation location is dry and free from obstructions.

Proper grounding is essential for safe operation. Follow all local electrical codes and regulations during installation. Keep this manual readily available for future reference and troubleshooting.

Wiring Diagram and Terminal Identification

Carefully examine the wiring diagram included with this thermostat and compare it to your existing HVAC system’s wiring. Common terminals include Rh (heating power), Rc (cooling power), W (heat), Y (cool), G (fan), and C (common – 24V power).

The ‘C’ wire is often required for consistent power and advanced features. If you don’t have a C wire, a C-wire adapter may be necessary – consult a professional for assistance. Incorrectly connecting wires can damage your thermostat or HVAC system.

Terminal blocks are clearly labeled on the thermostat base. Ensure wires are securely inserted into the correct terminals. Use appropriately sized wire connectors and avoid loose connections. Double-check all connections before restoring power.

Refer to your HVAC system’s documentation for specific wiring configurations. If unsure about any wiring aspect, seek guidance from a qualified HVAC technician to prevent potential issues.

Mounting the Thermostat Base

Before mounting, ensure the HVAC system’s power is completely switched off at the breaker box. Remove your old thermostat from the wall plate, carefully noting the wire connections. Use the included level to mark screw locations for the new thermostat base, ensuring it’s straight.

Drill pilot holes if necessary, using appropriate wall anchors for drywall or other wall materials. Secure the base plate to the wall using the provided screws. Gently push any excess wire back into the wall opening.

Verify the base is firmly attached and level before proceeding. A secure mount is crucial for proper operation and prevents potential damage. Ensure no wires are pinched or strained during the mounting process.

Connect the wires to the corresponding terminals on the base plate, referencing the wiring diagram. Once connected, carefully attach the thermostat body to the base.

Connecting to HVAC System

Double-check that the HVAC system’s power remains off at the breaker. Carefully match each wire to its corresponding terminal on the thermostat base, using the wiring diagram as a guide. Common terminals include Rh, Rc, W, Y, G, and C.

Securely tighten each screw terminal to ensure a firm connection, preventing loose wires and potential malfunctions. A ‘C’ wire (common wire) is often required for consistent power; if absent, a C-wire adapter may be necessary.

Verify all connections are accurate before restoring power. Incorrect wiring can damage the thermostat or HVAC system. Once confirmed, gently push any excess wire back into the wall cavity.

Restore power at the breaker box and proceed to the thermostat setup process. If the system doesn’t power on, re-check all wiring connections and the breaker status.

Thermostat Operation

Effortlessly control your home’s climate with intuitive features! This section details display icons, mode settings, temperature adjustments, and scheduling options for ease of use.

Understanding the Display Icons

The Honeywell TH6210U2001 utilizes a clear and informative display featuring several key icons to communicate the thermostat’s status. A flame icon indicates the heating system is actively running, providing warmth to your home. Conversely, a snowflake icon signifies the cooling system is engaged, delivering refreshing air. When the thermostat is in “Auto” mode, both icons may illuminate, demonstrating the system’s ability to switch between heating and cooling as needed to maintain your desired temperature.

A fan icon displays the fan’s operational status; a steady icon means the fan is on, while a flashing icon might indicate a specific fan setting or issue. Battery indicators alert you to low battery levels, prompting replacement to ensure continuous operation. Other icons may represent system errors or specific programmed settings, detailed further in the troubleshooting section. Familiarizing yourself with these icons allows for quick and easy interpretation of your thermostat’s current state and efficient management of your home’s comfort.

Setting the System Mode (Heat, Cool, Auto, Off)

The Honeywell TH6210U2001 offers four primary system modes: Heat, Cool, Auto, and Off. To select a mode, navigate through the thermostat’s menu using the up and down arrow buttons. In “Heat” mode, the thermostat activates the heating system when the room temperature falls below the setpoint; “Cool” mode engages the cooling system when the temperature rises above the setpoint.

“Auto” mode intelligently switches between heating and cooling to maintain your desired temperature, optimizing comfort and energy efficiency. The “Off” mode disables both heating and cooling systems, allowing for manual control or when the HVAC system isn’t needed. Ensure the correct mode is selected for your current needs. Incorrect mode selection can lead to discomfort or unnecessary energy consumption. Refer to the display icons to confirm your chosen mode is active and functioning as expected.

Adjusting the Temperature

The Honeywell TH6210U2001 allows for precise temperature control. To adjust the desired temperature, utilize the up and down arrow buttons on the thermostat’s interface. Each press will typically increment or decrement the temperature by one degree Fahrenheit or Celsius, depending on your settings. The current setpoint temperature is prominently displayed on the screen.

Observe the display to confirm the new setpoint. The thermostat will then work to achieve and maintain this temperature based on the selected system mode (Heat, Cool, or Auto). For optimal comfort and energy savings, avoid drastic temperature adjustments. Small, incremental changes are generally more efficient. Remember to allow sufficient time for the HVAC system to respond to temperature changes, especially in larger spaces. Regularly check and adjust the temperature as needed to suit your preferences.

Programming a Schedule

The Honeywell TH6210U2001 offers programmable scheduling for enhanced energy efficiency and comfort. Access the programming mode through the thermostat’s menu, typically by pressing the “Menu” or “Schedule” button. You can then define different temperature settings for various times of the day and days of the week.

Common programming options include “Wake,” “Leave,” “Return,” and “Sleep” periods. Customize these periods to match your daily routine. For example, lower the temperature while you’re away at work and raise it before you return home. The thermostat stores these settings and automatically adjusts the temperature accordingly. Review your schedule regularly to ensure it aligns with your lifestyle and optimize energy savings. Detailed instructions for schedule programming are available within the full user manual;

Advanced Features

Explore enhanced control! This thermostat boasts filter reminders, temperature limits, vacation mode, and customizable fan settings for optimal comfort and efficiency.

Using the Filter Change Reminder

Maintaining optimal air quality relies heavily on a clean HVAC filter. The Honeywell TH6210U2001 simplifies this with a built-in filter change reminder. This feature proactively alerts you when it’s time to replace your filter, ensuring consistent airflow and system efficiency. You can customize the reminder timeframe based on your filter type and usage – typically every 1-3 months is recommended.

To activate or adjust the filter change reminder, navigate through the thermostat’s menu settings. The manual details the precise steps, but generally involves accessing the “Maintenance” or “Settings” section. You’ll then be prompted to set the number of days until the reminder appears. Ignoring this reminder can lead to reduced airflow, increased energy consumption, and potentially damage to your HVAC system. Regularly replacing your filter contributes to a healthier home environment and prolongs the life of your equipment.

Setting Temperature Limits

Protecting your HVAC system and managing energy costs is easily achieved by utilizing the temperature limit settings on your Honeywell TH6210U2001. These limits prevent the thermostat from calling for heating or cooling beyond pre-defined ranges, safeguarding against extreme temperatures and potential equipment strain. You can establish both heating and cooling limits, providing a comprehensive safety net.

Accessing these settings typically involves navigating the thermostat’s menu to the “Settings” or “Preferences” section. Here, you’ll be able to input maximum heating and minimum cooling temperatures. Setting appropriate limits can prevent unnecessary operation during mild weather, reducing energy bills. It’s crucial to understand your HVAC system’s operational capabilities when setting these limits to avoid compromising comfort or causing system inefficiencies. Refer to the full manual for detailed instructions and recommended temperature ranges.

Vacation Mode Configuration

Planning an extended absence? The Honeywell TH6210U2001’s Vacation Mode is designed to maintain a safe indoor temperature while minimizing energy consumption during your trip. This feature overrides your regular programming schedule, setting a constant, energy-efficient temperature for both heating and cooling. Activating Vacation Mode prevents pipes from freezing in winter and protects belongings from excessive heat and humidity during warmer months.

To configure Vacation Mode, access the thermostat’s menu and select the “Vacation” option. You’ll then be prompted to enter the desired start and end dates, along with the hold temperatures for both heating and cooling. The thermostat will automatically revert to your programmed schedule upon your return. Remember to consider external temperature forecasts when setting vacation temperatures to ensure optimal comfort and energy savings. Detailed instructions are available within the complete user manual.

Fan Control Options

Customize your airflow! The Honeywell TH6210U2001 offers versatile fan control options to enhance your comfort and indoor air quality. Beyond the standard “Auto” setting, where the fan operates only during heating or cooling cycles, you can select “On” for continuous airflow. Continuous fan operation promotes more even temperature distribution throughout your home and can improve air circulation, potentially reducing allergens and stale air.

Within the thermostat’s menu, you’ll find settings to adjust fan speed if your HVAC system supports it. Some models allow for scheduled fan operation, enabling you to run the fan during specific times of the day, even when heating or cooling isn’t active. Utilizing these features can contribute to energy efficiency and a more comfortable living environment. Refer to the full user manual for detailed instructions and compatibility information regarding your specific HVAC setup.

Troubleshooting

Resolve common issues! This section provides solutions for problems like power failures, inaccurate readings, unresponsive systems, and communication errors with your thermostat.

Thermostat Not Powering On

Problem: If your Honeywell TH6210U2001 thermostat displays a blank screen or shows no signs of power, begin with basic checks. First, verify the circuit breaker controlling your HVAC system hasn’t tripped. Reset it if necessary. Next, ensure the thermostat is securely mounted to the baseplate, establishing a solid electrical connection.

Check Wiring: Carefully inspect the wiring connections at both the thermostat and the HVAC system; Loose or disconnected wires are a frequent cause of power issues. Refer to the wiring diagram in the installation section to confirm correct connections. If batteries are required (depending on your model), replace them with fresh ones.

Further Steps: If the problem persists, disconnect power to the HVAC system at the breaker. Remove the thermostat from the baseplate and visually inspect for any damaged components or corrosion. If you suspect a more complex issue, consult a qualified HVAC technician for assistance. Do not attempt repairs beyond your expertise.

Incorrect Temperature Readings

Problem: If your Honeywell TH6210U2001 thermostat displays a temperature significantly different from the actual room temperature, several factors could be at play. First, ensure the thermostat isn’t directly exposed to sunlight, drafts, or heat-generating appliances, as these can skew readings. Check for obstructions blocking airflow around the thermostat.

Calibration & Location: Some models allow for temperature calibration within the settings menu; consult the programming section for instructions. Verify the thermostat is mounted on an interior wall, away from exterior doors or windows. Consider the thermostat’s location relative to heat sources like fireplaces or kitchen appliances.

Sensor Issues: If calibration doesn’t resolve the issue, the internal temperature sensor may be faulty. In this case, contacting Honeywell customer support or a qualified HVAC technician is recommended for potential repair or replacement. Avoid attempting to disassemble or repair the thermostat yourself.

HVAC System Not Responding

Troubleshooting Steps: If your Honeywell TH6210U2001 thermostat isn’t controlling your heating or cooling system, begin by verifying the system’s power supply at the breaker box. Ensure the thermostat is set to the correct system mode (Heat, Cool, Auto) and that the set temperature is appropriately adjusted. Double-check the wiring connections at both the thermostat and the HVAC unit, ensuring they are secure and match the wiring diagram.

Check System Switch: Confirm the emergency shut-off switch near your furnace or air conditioner hasn’t been activated. A tripped breaker affecting the HVAC system itself can also cause this issue. If wiring appears correct and power is confirmed, the problem may lie within the HVAC system itself.

Professional Help: Contact a qualified HVAC technician for diagnosis and repair if the issue persists. Do not attempt complex repairs yourself.

Communication Errors

Identifying Communication Issues: If your Honeywell TH6210U2001 displays a communication error, it indicates a problem with the connection between the thermostat and the HVAC system’s control board. This often manifests as erratic behavior or a complete lack of response from the system. First, power cycle both the thermostat and the HVAC system by turning off their respective power sources for several minutes, then restoring power.

Wiring Inspection: Carefully inspect the wiring connecting the thermostat to the HVAC system, looking for loose connections, corrosion, or damaged wires. Ensure the wires are securely fastened to the correct terminals. If the problem persists, a faulty control board within the HVAC system might be the cause.

Professional Assistance: Contact a qualified HVAC technician for further diagnosis and repair, as resolving communication errors often requires specialized knowledge and tools.

Maintenance and Care

Regular upkeep ensures longevity! Gently clean the thermostat, replace batteries when prompted, and routinely check/replace your HVAC air filter for peak efficiency.

Cleaning the Thermostat

Maintaining a clean thermostat is crucial for accurate readings and optimal performance. Before cleaning, always ensure the system is switched off or set to “Off” to prevent accidental operation or damage. Begin by gently removing the thermostat faceplate from its base – consult your installation guide if unsure of the process.

Use a soft, dry microfiber cloth to wipe down the faceplate and the base. Avoid abrasive cleaners, solvents, or excessive moisture, as these can damage the sensitive electronic components or the display screen. For stubborn smudges, lightly dampen the cloth with water, ensuring it’s almost dry before wiping.

Pay particular attention to the display area and any vents. Do not attempt to disassemble the thermostat further than removing the faceplate. Once cleaned, allow all parts to dry completely before reattaching the faceplate to the base. Regular, gentle cleaning will keep your Honeywell TH6210U2001 looking and functioning its best.

Replacing Batteries (if applicable)

The Honeywell TH6210U2001 may operate on battery power or utilize a common wire (C-wire) for continuous power. If your model requires batteries, the thermostat will display a low battery indicator when replacement is needed. Typically, this thermostat uses two AA alkaline batteries.

To replace them, gently remove the thermostat faceplate. Locate the battery compartment, usually on the back of the unit, and open it. Remove the old batteries, noting the correct polarity (+ and -) indicated inside the compartment. Insert fresh AA alkaline batteries, ensuring proper alignment.

Close the battery compartment and reattach the faceplate. The thermostat should now power on. Dispose of used batteries responsibly, following local regulations. If the low battery indicator persists after replacement, double-check the battery polarity and ensure a secure connection. A C-wire eliminates the need for battery replacements.

Filter Replacement Guidance

While the Honeywell TH6210U2001 is a thermostat and doesn’t directly have a filter, maintaining a clean air filter within your HVAC system is crucial for optimal performance and air quality, impacting the thermostat’s efficiency. Regularly replacing your HVAC system’s air filter protects the unit and ensures accurate temperature readings.

Filter replacement frequency depends on factors like household size, pet ownership, and air quality. Generally, a monthly check is recommended, with replacement every 1-3 months. Use a filter size compatible with your HVAC system, as indicated on the filter frame or in your HVAC system’s manual.

Turn off the HVAC system before replacing the filter. Locate the filter access panel, remove the old filter, and insert the new one, ensuring the airflow direction arrow matches the system’s airflow. A clean filter improves airflow and system longevity;

Honeywell Brand Overview

Honeywell, a diversified technology and manufacturing leader with over $30 billion in revenue, boasts a rich history of innovation spanning aerospace to building technologies.

Honeywell’s History and Innovation

Honeywell International Inc. has a remarkable legacy stretching back to 1885, initially founded as the Minneapolis Heat Regulator Company. This early focus on temperature control foreshadowed its future as a thermostat leader. Over decades, Honeywell evolved through strategic mergers and acquisitions, notably with the Honeywell Heating Specialty Company, solidifying its position in building automation.

The company’s commitment to innovation extends far beyond thermostats, encompassing aerospace, building technologies, performance materials, and safety and productivity solutions. Honeywell consistently invests in research and development, pioneering advancements in areas like automation, sensing, and connectivity. This dedication has resulted in numerous patents and industry-first technologies.

From pioneering automated flight control systems to developing advanced materials for space exploration, Honeywell’s impact is globally recognized. Their continued focus on creating sustainable and efficient solutions demonstrates a commitment to a better future, reflected even in products like the TH6210U2001.

Honeywell Product Range (Beyond Thermostats)

Honeywell’s diverse portfolio extends significantly beyond home comfort solutions like the TH6210U2001. A major player in the aerospace industry, they provide engines, avionics, and safety systems for aircraft worldwide. Their building technologies division offers comprehensive solutions for fire safety, security, and access control, protecting people and property.

Furthermore, Honeywell excels in performance materials and technologies, creating specialized chemicals, polymers, and advanced fibers used in various industries, including healthcare and automotive. They are also a leader in productivity and safety solutions, offering personal protective equipment, gas detection systems, and workflow solutions for industrial environments.

Recent innovations include air purifiers, like the KJ455F-TAC2022WS, and even automotive products such as car chargers. This broad range demonstrates Honeywell’s commitment to solving complex challenges across multiple sectors, consistently delivering innovative and reliable products.

sole e25 elliptical manual

Sole E25 Elliptical Manual: A Comprehensive Guide

This manual serves as your detailed resource for the Sole E25 elliptical, offering insights into assembly, operation, maintenance, and troubleshooting procedures.
It’s crucial to carefully review this guide before initial use, ensuring a safe and effective workout experience with your new fitness equipment.

Welcome to the world of effective and convenient fitness with the Sole E25 Elliptical! This machine is engineered to deliver a low-impact, full-body workout, suitable for users of various fitness levels; The E25 combines performance, connectivity, and results-driven programming to help you achieve your health and wellness goals.

This elliptical is designed for home use, offering a space-saving footprint without compromising on functionality. The Sole E25 boasts a robust construction and user-friendly console, providing a comfortable and engaging exercise experience. Access to a comprehensive user manual, like the ones available through ManualsLib and Sole Fitness directly, is key to maximizing your investment.

Whether you’re a seasoned athlete or just beginning your fitness journey, the E25’s adjustable resistance levels and pre-programmed workouts cater to your individual needs. Remember to consult the provided documentation for safe operation and optimal performance.

Safety Precautions and Warnings

Prioritize your safety during every workout with the Sole E25 Elliptical. Before operation, carefully read the entire owner’s manual – a crucial step emphasized in all documentation. Ensure the elliptical is placed on a level surface with ample space around it, free from obstructions.

Always inspect the machine for any damage before each use. Never operate the elliptical if it appears faulty. Keep children and pets away from the equipment during operation. Use caution when mounting and dismounting, utilizing the handlebars for support.

Consult your physician before starting any new exercise program. Pay attention to your body and stop immediately if you experience pain, dizziness, or shortness of breath. Never exceed the maximum weight capacity. Proper use, as detailed in the manual, is essential for preventing injuries and ensuring a safe workout experience.

Assembly and Setup

Proper assembly is vital for optimal performance and safety. This section details unboxing, parts identification, step-by-step instructions, and initial calibration procedures for your Sole E25.

Unboxing and Parts Identification

Carefully unpack all components from the shipping carton, verifying the contents against the parts list included within the manual. Lay out all pieces on a protected surface to prevent scratches or damage during assembly. Key components include the main frame, base, console, handlebars, foot pedals, and various hardware such as bolts, screws, and washers.

Refer to the detailed parts diagram to accurately identify each item. Pay close attention to the different types of screws and bolts, as using the incorrect hardware can compromise the structural integrity of the elliptical. Ensure all protective packaging is removed before proceeding. If any parts are missing or damaged, immediately contact Sole Fitness customer support for assistance and replacement parts. A thorough inventory at this stage will streamline the assembly process and prevent delays later on.

Step-by-Step Assembly Instructions

Begin by attaching the base to the main frame using the provided bolts and washers, ensuring proper alignment before fully tightening. Next, install the handlebars, connecting them securely to the frame according to the diagram. Proceed to mount the console, carefully routing the cables to avoid pinching or damage. Attach the foot pedals, verifying they are firmly secured and move freely.

Follow the sequential steps outlined in the manual, paying close attention to the illustrations. Do not fully tighten all bolts until the entire structure is assembled, allowing for adjustments. Double-check all connections for stability and proper function. If encountering difficulties, refer back to the parts identification section or contact Sole Fitness support for guidance. A properly assembled elliptical ensures safe and effective operation.

Initial Setup and Calibration

After assembly, plug in the elliptical and power on the console. The initial setup will guide you through user profile creation, prompting for personal data like age, weight, and height – crucial for accurate calorie and distance calculations. Calibrate the console by following the on-screen prompts, ensuring the resistance levels function correctly. Test the heart rate monitoring features, verifying accurate readings with your pulse.

Familiarize yourself with the console’s settings, adjusting display preferences and sound volume. Perform a brief test workout at various resistance levels to confirm smooth operation. Regularly check for software updates to optimize performance and access new features. Proper initial setup and calibration are vital for maximizing the benefits and ensuring the longevity of your Sole E25 elliptical.

Console Overview and Functionality

The Sole E25 console provides a user-friendly interface with a clear display panel, intuitive buttons, and diverse program options for customized and effective workout experiences.

Display Panel and Buttons

The Sole E25 elliptical’s console features a bright, easy-to-read LCD display panel that clearly presents crucial workout data. This includes time, distance, speed, incline, calories burned, and heart rate. The display dynamically updates, providing real-time feedback throughout your exercise session. Below the screen, you’ll find a series of buttons designed for intuitive navigation and control.

These buttons allow you to power the elliptical on and off, adjust resistance levels, control incline, select pre-programmed workouts, and manually set workout parameters. Dedicated buttons are also provided for quick start and stop functions. The console also incorporates heart rate monitoring buttons, compatible with chest straps (sold separately), for accurate pulse tracking. The overall layout is designed for ease of use, even during intense workouts, ensuring you can effortlessly manage your fitness routine.

Program Options and Descriptions

The Sole E25 elliptical offers a diverse range of pre-programmed workout programs designed to cater to various fitness levels and goals. These programs automatically adjust resistance and incline, providing a challenging and engaging workout experience. Options include Manual, Interval, Hill, Strength, Cardio, and Fat Burn programs, each simulating different terrains and intensities.

The Manual program allows for fully customized workouts, where you control both resistance and incline. Interval training alternates between high-intensity bursts and recovery periods. Hill programs mimic outdoor climbs, while Strength focuses on building lower body power. Cardio programs are designed for sustained aerobic exercise, and Fat Burn aims to maximize calorie expenditure. Each program displays estimated calorie burn and workout duration, helping you track your progress and achieve your fitness objectives effectively.

Heart Rate Monitoring Features

The Sole E25 elliptical incorporates multiple heart rate monitoring options to help you optimize your workouts and stay within your target heart rate zone. Integrated pulse sensors are conveniently located on the handlebars, providing real-time heart rate feedback during exercise. These sensors detect your pulse through gentle contact, displaying the data on the console.

For users preferring wireless monitoring, the E25 is also compatible with chest straps (sold separately). Chest straps generally offer more accurate readings than handlebar sensors. The console displays your current heart rate, average heart rate, and calories burned, allowing you to track your cardiovascular performance. Utilizing heart rate monitoring ensures you’re exercising at an appropriate intensity, maximizing results and minimizing risk of overexertion, contributing to a safer and more effective fitness journey.

Operation and Workout Programs

The Sole E25 offers diverse workout options, including manual mode and pre-programmed routines, catering to varied fitness levels and goals for a personalized experience.

Starting and Stopping Workouts

Initiating a workout on your Sole E25 elliptical is straightforward. Begin by ensuring the power cord is securely connected and the console displays power. Step onto the pedals and the console will automatically activate. To start, simply press the ‘Start’ button. You can then adjust the resistance level using the increase/decrease buttons, or select a pre-programmed workout for guided intensity changes.

Monitoring your progress is easy with the console’s display, showing metrics like time, distance, speed, incline, and calories burned. During your workout, you can pause using the ‘Pause’ button, which temporarily halts the exercise data recording. To resume, press ‘Start’ again.

To conclude your workout, press the ‘Stop’ button. The console will display a summary of your session. It’s recommended to cool down with a few minutes of low-intensity exercise before dismounting. Always step off carefully, ensuring the elliptical has come to a complete stop.

Manual Workout Mode

The Manual Workout mode on the Sole E25 elliptical provides complete control over your exercise session. After powering on, select ‘Manual’ from the program options. This mode allows you to customize both the resistance level and the incline independently, tailoring the workout to your specific fitness goals and preferences.

Adjusting resistance is done using the ‘Increase’ and ‘Decrease’ buttons on the console. Similarly, incline adjustments are made with dedicated buttons. Observe the console display to monitor your chosen settings and their impact on your workout intensity. You can make changes dynamically throughout your session.

This mode is ideal for users who prefer a self-directed workout experience, allowing for spontaneous adjustments based on how you feel. Remember to focus on maintaining a consistent pace and proper form throughout your manual workout, maximizing effectiveness and minimizing risk of injury.

Pre-programmed Workout Programs

The Sole E25 elliptical boasts a variety of pre-programmed workout programs designed to cater to diverse fitness levels and objectives. These programs automatically adjust resistance and incline, providing a structured and challenging workout experience. Options typically include Hill, Interval, Fat Burn, Cardio, and Strength programs.

To select a program, navigate through the ‘Program’ menu on the console using the arrow buttons. Each program displays a profile illustrating the intensity variations throughout the duration. The console will guide you through the warm-up, work, and cool-down phases of each selected program.

These programs are excellent for users seeking guided workouts or those looking to break up the monotony of a manual routine. Experiment with different programs to discover which best suits your fitness goals and provides the most engaging and effective workout. Remember to consult the console display for program-specific details.

Maintenance and Troubleshooting

Regular cleaning and lubrication are vital for optimal performance. Addressing common issues promptly, like console errors or unusual noises, ensures longevity and a smooth workout experience.

Cleaning and Lubrication

Maintaining your Sole E25 elliptical requires consistent cleaning and lubrication to ensure smooth operation and extend its lifespan. Regularly wipe down the frame, console, and handrails with a damp cloth and mild soap to remove dust, sweat, and grime. Avoid abrasive cleaners, as they can damage the finish.

Pay particular attention to the elliptical’s moving parts. The stride rail requires periodic lubrication to prevent friction and noise. Use a silicone-based lubricant specifically designed for fitness equipment; avoid oil-based lubricants, as they can attract dust. Apply a small amount of lubricant along the entire length of the stride rail, then wipe away any excess.

Inspect the rollers and wheels for debris and clean them as needed. Check the power cord and plug for any signs of damage. A clean and well-lubricated elliptical will provide a more enjoyable and effective workout experience, while also minimizing the risk of premature wear and tear.

Troubleshooting Common Issues

Encountering issues with your Sole E25 elliptical? Several problems have straightforward solutions. If the console doesn’t power on, check the power cord connection and ensure the outlet is working. Unusual noises often indicate a need for lubrication of the stride rail – apply silicone lubricant as detailed in the maintenance section.

Resistance issues can often be resolved by restarting the console. If the heart rate monitor isn’t functioning, ensure proper hand placement on the grips or a compatible chest strap is correctly paired. A slipping belt may require tightening; consult the assembly instructions for proper adjustment.

For more complex problems, refer to the full owner’s manual or contact Sole Fitness customer support. Documenting the issue and any error codes displayed on the console will expedite the troubleshooting process. Regular maintenance significantly reduces the likelihood of encountering these common issues.

Parts Replacement Information

Need to replace parts on your Sole E25 elliptical? Sole Fitness offers a comprehensive selection of replacement components directly through their website and authorized retailers. Common replacement parts include the stride rail, foot pedals, console components, and various hardware like bolts and screws.

When ordering parts, having the model number (E25) and serial number of your elliptical is crucial for ensuring compatibility. Diagrams and parts lists are available in the owner’s manual and often online, aiding in accurate identification. Sole Fitness also provides customer support to assist with part selection.

For safety and optimal performance, it’s recommended to have a qualified technician perform any complex repairs or part replacements. Always disconnect the power cord before attempting any maintenance or repair work. Genuine Sole Fitness parts are recommended to maintain the elliptical’s warranty and functionality.

Technical Specifications

The Sole E25 boasts a robust motor, comfortable dimensions, and user-friendly console features, including connectivity options, designed to deliver a premium elliptical workout experience.

Dimensions and Weight Capacity

Understanding the physical specifications of the Sole E25 elliptical is crucial for ensuring it fits comfortably within your designated workout space and safely accommodates all users. The overall dimensions of the E25 typically measure approximately 79.5 inches in length, 28 inches in width, and 68 inches in height. These measurements are essential for planning room layout and accessibility.

Regarding weight capacity, the Sole E25 is designed to support a maximum user weight of 300 pounds. This robust capacity ensures stability and durability during intense workout sessions. It’s important to adhere to this weight limit to prevent potential damage to the machine and ensure user safety. The elliptical itself weighs around 210 pounds, contributing to its overall stability and solid feel during operation. Consider these factors when choosing a location and verifying suitability for all potential users.

Motor Specifications

The Sole E25 elliptical boasts a powerful and durable motor designed to deliver a smooth and consistent workout experience. It features a 3.0 CHP (Continuous Horsepower) motor, providing ample power for a wide range of resistance levels and workout intensities. This motor is specifically engineered for extended use, making it suitable for both casual and dedicated fitness enthusiasts.

The motor’s construction utilizes high-grade components, ensuring reliability and longevity. It operates quietly, minimizing noise disruption during workouts. The E25’s motor allows for a speed range of 0.5 to 10 mph, catering to various fitness levels and training goals. Furthermore, the motor is coupled with a precision flywheel, contributing to the elliptical’s natural and fluid motion. This combination of power and engineering delivers a high-quality, effective, and enjoyable workout experience.

Console Features and Connectivity

The Sole E25 elliptical’s console is designed for user-friendliness and provides a wealth of information during your workouts. It features a bright, backlit LCD display showcasing essential metrics like time, distance, speed, incline, calories burned, and heart rate. The console offers multiple program options, including manual, pre-set workouts, and custom programs, catering to diverse fitness preferences.

Connectivity options enhance the workout experience. While specific details vary by model year, the E25 generally includes a USB port for software updates and data transfer. Some versions may offer compatibility with fitness apps, allowing users to track progress and participate in online challenges. The console also incorporates integrated speakers and an audio input, enabling users to enjoy music during exercise. Heart rate monitoring is facilitated through both hand pulse sensors and wireless chest strap compatibility (chest strap often sold separately).

manual for breadman bread machine

Breadman offers convenient home baking with models like the TR2500BC and BK2000BQ, supported by extensive online resources and recipe guides.

Manuals, available through the Internet Archive and Breadman’s website, detail initial setup, cycles, and troubleshooting for optimal results.

The Ultimate Plus requires a “burn off” cycle to eliminate manufacturing oils, ensuring fresh, flavorful loaves from your new appliance.

What is a Breadman Bread Machine?

Breadman bread machines are automatic appliances designed to simplify the bread-making process at home. These machines, exemplified by models like the TR2500BC and BK2000BQ, handle kneading, proofing, and baking – all within a single unit.

According to available manuals and resources from Breadman’s official website and the Internet Archive, these machines aim to “bring home the bakery.” They offer pre-programmed cycles for various bread types, from basic white bread to whole wheat and sweet doughs.

Initial use often involves a “burn off” cycle to eliminate manufacturing oils, ensuring the first loaf is pure and flavorful. Breadman provides comprehensive instruction manuals and recipe guides to assist users.

Benefits of Using a Breadman Bread Machine

Breadman bread machines offer convenience and control over ingredients, allowing bakers to avoid preservatives and additives found in store-bought bread. Manuals highlight the ease of use, with pre-programmed cycles for diverse bread types, simplifying the baking process.

Resources like those found on Breadman’s website and the Internet Archive demonstrate the machines’ versatility – from basic loaves to dough for rolls and pizza. The “burn off” cycle ensures a fresh start, while recipe guides inspire experimentation.

Ultimately, a Breadman machine delivers fresh, homemade bread with minimal effort, promoting a healthier and more satisfying baking experience.

Understanding Your Breadman Model

Breadman machines come in various models like TR2500BC, TR2200C, and BK2000BQ; manuals detail each model’s specific components and control panel functions.

Refer to your machine’s guide for accurate identification and operation.

Identifying Your Specific Breadman Model (TR2500BC, TR2200C, BK2000BQ etc.)

Determining your exact Breadman model – whether it’s a TR2500BC, TR2200C, BK2000BQ, or another variation – is crucial for accessing the correct instruction manual and recipes.

Locate the model number typically found on a sticker on the bottom or back of the machine.

This number is essential when searching for downloadable manuals on the Breadman website (www.breadman.com) or resources like the Internet Archive.

Using the correct manual ensures you understand your machine’s specific features and cycles.

Key Components of the Breadman Bread Machine

Essential components include the bread pan, which holds ingredients during baking, and the kneading paddle, responsible for mixing and developing the dough’s gluten structure.

The heating element ensures even baking, while the control panel allows cycle selection and customization.

A viewing window, present on some models, lets you monitor the baking process without interrupting it.

Understanding each part, as detailed in your model’s manual, is vital for proper operation and maintenance.

Control Panel Overview & Functions

The Breadman control panel features buttons for cycle selection – White, Rapid, Whole Wheat, and Sweet, among others – allowing tailored baking.

Settings for crust color (light, medium, dark) and loaf size (1lb, 1.5lb, 2lb) provide customization.

A start/stop button initiates and pauses the baking process, while a delay timer enables pre-programmed baking.

Refer to your specific model’s manual for detailed explanations of each function and optimal settings for various recipes.

Getting Started: Initial Setup

Before first use, the Breadman manual recommends a “burn off” cycle, utilizing the Rapid White cycle, to eliminate any residual manufacturing oils.

Carefully assemble components and understand the ingredient pan and paddle functions for successful bread making.

First-Time Use: Burning Off Manufacturing Oils

The Breadman instruction manual explicitly details the importance of a first-time “burn off” cycle. This crucial step eliminates any lingering manufacturing oils present within the machine after production.

Utilize the Rapid White cycle program for this initial burn-off process; no ingredients are needed.

This ensures your first loaf isn’t tainted with unwanted flavors and guarantees a clean, fresh baking experience.

Following these instructions safeguards the quality of your baked goods and prepares your Breadman for consistent performance;

Assembling the Bread Machine Components

Before your first bake, ensure all Breadman components are correctly assembled. This typically involves securely placing the bread pan within the machine’s housing.

Next, carefully insert the kneading paddle into the designated shaft inside the bread pan, ensuring a snug fit.

Double-check that the pan is properly seated and the paddle is firmly attached to guarantee effective kneading during the baking cycle.

Refer to your model’s manual (like the TR2500BC or BK2000BQ) for specific diagrams and guidance.

Understanding the Ingredient Pan and Paddle

The Breadman ingredient pan securely holds your dough during mixing and baking. It’s designed for even heat distribution, crucial for consistent results.

The kneading paddle, inserted into the pan, mimics hand-kneading, developing gluten for a perfect texture.

Ensure the paddle is firmly attached before each cycle; a loose paddle can lead to uneven mixing.

Refer to your model’s manual (TR2500BC, BK2000BQ) for specific pan and paddle details, and cleaning instructions.

Basic Bread Making: The White Bread Cycle

The “White” cycle is ideal for beginners, offering a simple path to homemade bread. Breadman manuals provide specific ingredient lists and step-by-step instructions.

Follow the recipe guide closely for best results, ensuring proper ingredient order and amounts.

Ingredients for Basic White Bread

For a classic loaf, you’ll typically need 1 ¼ cups of warm water (around 105-115°F), 3 cups of bread flour, 2 tablespoons of granulated sugar, 1 ½ teaspoons of salt, and 2 ¼ teaspoons of active dry or instant yeast.

Breadman recipe guides often specify precise measurements for optimal results, emphasizing the importance of accurate ingredient ratios.

Some recipes may include 2 tablespoons of softened butter or oil for added richness and a softer crumb, enhancing the final texture of your homemade bread.

Step-by-Step Instructions for the White Bread Cycle

First, add wet ingredients (water, oil/butter) to the bread pan, followed by dry ingredients (flour, sugar, salt, yeast), ensuring yeast doesn’t directly contact liquid.

Select the “White Bread” cycle on your Breadman machine, choosing the desired loaf size (1.5lb, 2lb, etc.). Press start to begin the kneading, rising, and baking process.

Monitor the dough during the initial kneading stages; adjust liquid or flour if needed for proper consistency, referencing your machine’s manual for guidance.

Troubleshooting Common Issues with White Bread

If your bread doesn’t rise, check yeast freshness and proper activation; ensure liquid temperature is within the recommended range (typically 105-115°F).

For a collapsed loaf, reduce yeast quantity or liquid amount in subsequent attempts, and avoid opening the lid during baking.

If the paddle remains stuck, ensure sufficient liquid is used and ingredients are added in the correct order, as outlined in the Breadman manual.

Exploring Different Bread Cycles

Breadman machines feature cycles like Rapid Bake, Whole Wheat, and Sweet Bread, each optimized for specific dough types and baking requirements.

Refer to your model’s manual (TR2200C, BK2000BQ) for cycle-specific ingredient adjustments and baking times for best results.

Rapid Bake Cycle: For Faster Bread Making

The Rapid Bake cycle on your Breadman machine significantly reduces baking time, ideal for when you need fresh bread quickly. Manuals indicate this cycle is designed for simpler loaves, often utilizing a quicker rise and bake process.

However, be aware that the resulting bread may have a slightly different texture compared to breads made using standard cycles. Refer to your specific model’s recipe guide (BK2000BQ, TR2500BC) for recommended ingredient amounts and adjustments when utilizing this expedited baking option.

It’s crucial to follow the manual’s guidance to ensure a successful and tasty outcome with the Rapid Bake cycle.

Whole Wheat Cycle: For Nutritious Whole Wheat Bread

The Whole Wheat cycle on your Breadman machine is specifically calibrated for the unique properties of whole wheat flour, ensuring optimal rise and texture. Manuals emphasize the importance of using bread machine yeast and adjusting liquid levels, as whole wheat absorbs more moisture.

Recipe guides, like those for the BK2000BQ and TR2500BC, provide tailored ingredient ratios for this cycle. Expect a slightly denser loaf compared to white bread, but rich in fiber and nutrients.

Always consult your machine’s manual for specific instructions and recommended recipes.

Sweet Bread Cycle: For Enriched Doughs

The Sweet Bread cycle, detailed in Breadman manuals, is designed for recipes containing higher sugar and fat content, like brioche or cinnamon swirl bread. This cycle features a slower rise and longer kneading time to properly develop the enriched dough.

Recipe guides for models like the TR2200C and BK2000BQ offer specific ingredient proportions for optimal results. Be mindful of ingredient order, as suggested by the manual, to prevent issues.

Always monitor the dough’s consistency during mixing.

Ingredient Considerations & Ratios

Breadman manuals emphasize using bread flour for structure, while all-purpose flour yields a softer loaf. Yeast type—active dry or instant—impacts rise time and flavor.

Precise liquid ratios, detailed in recipe guides, are crucial for proper dough consistency.

Flour Types: Bread Flour vs. All-Purpose Flour

Breadman bread machine manuals frequently address the importance of flour selection for optimal results. Bread flour, with its higher protein content, develops more gluten, creating a stronger structure ideal for loaves that need to rise significantly and maintain their shape during baking.

Conversely, all-purpose flour contains less protein, resulting in a softer, more tender crumb. While suitable for some recipes, it may not provide the necessary support for taller loaves or those with heavier additions like fruits or nuts.

Experimentation is encouraged, but understanding these differences, as outlined in Breadman resources, is key to achieving desired textures.

Yeast: Active Dry vs. Instant Yeast

Breadman bread machine manuals detail proper yeast usage for successful baking; Active dry yeast requires proofing – dissolving in warm water with a bit of sugar – to ensure viability before adding to ingredients. This step confirms the yeast is alive and active.

Instant yeast, also known as bread machine yeast, can be added directly to the dry ingredients, streamlining the process. However, always check your Breadman manual for specific recommendations regarding quantities and usage.

Using the correct type and amount of yeast is crucial for proper rising and loaf texture.

Liquid Ratios and Adjustments

Breadman bread machine recipes rely on precise liquid-to-dry ingredient ratios for optimal dough consistency. Manuals emphasize that humidity and flour type can necessitate adjustments. Too much liquid results in sticky dough, potentially causing collapse, while too little yields a dry, dense loaf.

Start with the recipe’s recommended amount, then observe the dough during kneading. Add liquid, one tablespoon at a time, if it appears too dry, or flour if overly wet.

Consistent measurements are key to repeatable baking success.

Advanced Techniques & Recipes

Breadman machines excel beyond basic loaves; explore adding fruits, nuts, or seeds for customized flavors. Utilize the dough cycle for rolls and pizza, expanding culinary possibilities.

Adding Fruits, Nuts, and Seeds

Enhance your Breadman creations by incorporating fruits, nuts, and seeds, but timing is crucial. Generally, add these ingredients during the second knead cycle, signaled by the machine beeping.

This prevents them from becoming overly processed or sinking to the bottom of the loaf. Dried fruits, like raisins or cranberries, add sweetness and texture.

Nuts, such as walnuts or pecans, provide a delightful crunch. Seeds, like sunflower or flax, contribute nutritional value and subtle flavor.

Avoid overloading the pan, as this can hinder the rising process and affect the final texture of your bread.

Making Dough Only: For Rolls and Pizza

The Breadman machine isn’t limited to loaves; utilize the “Dough” cycle for versatile baking! Select this cycle, and the machine will complete kneading and the first rise, stopping before the baking phase.

This perfectly prepared dough is then ready for shaping into rolls, pizza crusts, or other favorite creations. Gently remove the dough from the pan after the cycle completes.

Remember to punch down the dough to release air before shaping. Adjust baking times and temperatures according to your specific roll or pizza recipe for optimal results.

Gluten-Free Bread Making with Breadman

Breadman machines can tackle gluten-free baking, though results differ from traditional bread. Specialized gluten-free flour blends are crucial, often requiring xanthan gum for structure.

Consult recipes specifically designed for bread machines and gluten-free flours, as ingredient ratios and cycle selections are vital. The machine may require a slightly longer kneading time.

Expect a denser loaf compared to wheat bread; gluten-free dough lacks the same elasticity. Experiment with different blends and cycles to achieve your desired texture and taste.

Cleaning and Maintenance

Regularly clean the bread pan and paddle after each use to prevent residue buildup. Wipe the machine’s housing with a damp cloth for longevity.

Proper storage ensures your Breadman remains in optimal condition for years of delicious homemade bread.

Cleaning the Bread Pan and Paddle

After each baking cycle, promptly remove the bread pan and paddle from the Breadman machine. Allow both components to cool completely before handling to avoid burns.

Wash the bread pan and paddle with warm, soapy water. Avoid using abrasive cleaners or scouring pads, as these can damage the non-stick coating.

Ensure all traces of dough and residue are removed. A soft brush can be helpful for reaching tight corners. Thoroughly rinse and dry both components before reassembling.

Some models may have dishwasher-safe pans and paddles; consult your specific Breadman manual for confirmation.

Cleaning the Bread Machine Housing

To maintain your Breadman bread machine, regularly clean the exterior housing. Always unplug the appliance and allow it to cool completely before cleaning.

Wipe down the housing with a damp, soft cloth. Avoid getting water inside the machine, especially near the control panel and electrical components.

For stubborn stains, use a mild detergent solution, but ensure no residue remains. Dry the housing thoroughly with a clean cloth after wiping.

Never immerse the bread machine in water or any other liquid. This could cause electrical shock or damage the appliance.

Proper Storage of Your Bread Machine

When not in use, store your Breadman bread machine in a cool, dry place, away from direct sunlight and extreme temperatures. Ensure the appliance is completely clean and dry before storing.

Avoid storing the machine in a damp environment, as this can lead to corrosion or electrical issues. Keep the original packaging if possible, for protection during storage.

Do not wrap the power cord tightly around the machine, as this could damage the cord over time. Store it loosely or separately.

Regular checks during storage can help maintain the machine’s longevity and ensure it’s ready for your next baking adventure.

Troubleshooting Common Problems

Breadman manuals address issues like dough not rising or collapsing, and paddle malfunctions. Online resources and guides offer solutions for common baking challenges.

Refer to your model’s specific instructions for error code resolutions and optimal performance.

Bread Not Rising

If your bread isn’t rising, consult the Breadman manual for troubleshooting steps; Ensure the yeast is fresh and properly activated; expired or inactive yeast won’t provide the necessary lift.

Check liquid temperatures – too hot or cold can kill the yeast. Verify ingredient measurements are accurate, as imbalances can hinder rising.

Also, confirm the machine’s lid is securely closed during the cycle, and the heating element is functioning correctly. Ambient temperature can also affect the process, so a warmer environment may help.

Bread Collapsing

If your Breadman loaf collapses, the manual suggests checking for excessive liquid. Too much moisture weakens the gluten structure, leading to a sunken center. Conversely, insufficient flour can also cause collapse.

Ensure you’re using the correct flour type – bread flour provides more gluten than all-purpose. Avoid interrupting the baking cycle, as sudden temperature changes can destabilize the loaf.

Over-proofing can also contribute to collapse; follow recipe timings closely. Finally, a faulty heating element might not fully bake the bread, resulting in a fragile structure.

Paddle Not Kneading Properly

If the Breadman paddle isn’t kneading effectively, first verify it’s securely attached to the drive shaft. A loose paddle won’t properly incorporate ingredients. Check for obstructions – excessive flour clinging to the paddle or pan sides can hinder movement.

Ensure the dough isn’t too dry; a stiff dough requires more effort to knead. Also, avoid overloading the machine; exceeding the maximum dough capacity strains the motor and paddle.

Finally, inspect the paddle for damage; a bent or broken paddle won’t knead efficiently.

Recipe Resources & Where to Find More

Breadman’s official website and online communities offer diverse recipes. Recipe books, like those for the BK2000BQ, provide additional inspiration for your bread machine!

Breadman Official Website Recipes

The Breadman website, www.breadman.com, serves as a central hub for recipes specifically designed for their machines. These recipes are often categorized by bread cycle, making it easy to find options compatible with your model – whether it’s a TR2500BC or BK2000BQ.

You’ll discover a range of recipes, from basic white bread to more complex sweet doughs and whole wheat variations. The site also provides helpful tips and instructions, complementing the information found in your bread machine’s instruction manual.

Regularly checking the website ensures access to new recipes and updates, expanding your baking repertoire and maximizing the potential of your Breadman appliance.

Online Bread Machine Recipe Communities

Beyond the Breadman website, numerous online communities cater to bread machine enthusiasts. These platforms offer a wealth of recipes, troubleshooting advice, and shared experiences with various Breadman models, including the TR2200C and BK2000BQ.

Forums and social media groups allow users to exchange tips, adapt recipes, and overcome challenges, supplementing the guidance in your machine’s manual.

These communities are invaluable for discovering innovative recipes and gaining insights from fellow bakers, enhancing your bread-making journey.

Using Recipe Books for Breadman Machines (BK2000BQ)

Dedicated recipe books, like those accompanying the Breadman BK2000BQ, provide a curated collection of recipes specifically tailored for your machine. These books often include detailed instructions, ingredient lists, and cycle recommendations, complementing the information found in the main instruction manual.

They offer a convenient starting point for beginners and a source of inspiration for experienced bakers.

Referencing these resources alongside online communities ensures successful and delicious bread-making experiences.

Safety Precautions

Always prioritize electrical safety and handle hot components with care when operating your Breadman machine.

Proper usage prevents damage and ensures a safe baking experience, as outlined in the manual.

Electrical Safety

Ensure the bread machine is properly grounded to prevent electrical shock, a crucial safety measure detailed in the Breadman manual. Never immerse the appliance, cord, or plug in water or other liquids.

Always unplug the machine from the outlet when not in use, before cleaning, or if any malfunction occurs. Do not operate the appliance with a damaged cord or plug, and if it malfunctions, seek professional repair.

Avoid using extension cords, but if necessary, use a heavy-duty extension cord suitable for the appliance’s wattage. Keep the cord away from hot surfaces and sharp edges to prevent damage and potential hazards.

Handling Hot Components

Exercise extreme caution when handling the bread pan and paddle immediately after baking, as they become very hot. Always use oven mitts or pot holders to remove these components from the machine.

Avoid touching the heating elements inside the bread machine, as they reach high temperatures during operation. Allow the machine to cool completely before cleaning or storing it.

Be mindful that the exterior of the bread machine may also become warm during the baking process. Never attempt to disassemble or repair the machine while it is still hot.

Proper Usage to Avoid Damage

Ensure the bread machine is placed on a stable, level surface away from water sources. Do not overload the ingredient pan beyond the maximum fill line indicated in the manual.

Avoid using abrasive cleaners or scouring pads on the machine’s housing, as they can cause scratches. Always unplug the machine before cleaning or performing maintenance.

Never immerse the bread machine in water or any other liquid. Follow the recommended cycle settings and ingredient ratios for optimal performance and longevity.

Understanding Error Codes

Breadman machines utilize error codes to signal issues; consult your model’s manual for specific decoding. Resolving these codes often involves simple adjustments or troubleshooting steps.

Refer to the Breadman documentation for a comprehensive list and solutions to ensure proper operation and baking success.

Decoding Breadman Error Messages

Breadman bread machines communicate issues through specific error messages, requiring manual interpretation for effective resolution. The instruction manual is crucial for understanding these codes, as they vary between models like the TR2200C and BK2000BQ.

Common errors might indicate issues with the heating element, sensor malfunctions, or ingredient imbalances. Carefully referencing the manual’s troubleshooting section will guide you through diagnosing and rectifying the problem. Ignoring error messages can lead to further damage or inconsistent baking results, so prompt attention is vital.

Always disconnect the machine before attempting any repairs or adjustments based on the error code’s guidance.

Resolving Error Code Issues

Addressing Breadman error codes begins with consulting your model’s instruction manual – essential for accurate diagnosis. Often, a simple power cycle can resolve temporary glitches. If the error persists, verify ingredient measurements and ensure proper placement within the pan, as imbalances trigger errors.

For heating element errors, discontinue use and contact customer support. Sensor issues may require professional repair. The Internet Archive’s user guides can supplement the official manual, offering community-sourced solutions, but prioritize manufacturer instructions.

Always prioritize safety; disconnect the machine before troubleshooting.

Tips for Perfecting Your Bread

Experiment with ingredient amounts and baking times, guided by your Breadman manual, to achieve desired texture and flavor. Flavor customization is key!

Online communities offer valuable insights for refining your bread-making process.

Adjusting Ingredient Amounts

The Breadman manual emphasizes that slight adjustments to ingredient amounts can significantly impact the final bread texture. Humidity and altitude play crucial roles; drier climates may require increased liquid, while higher altitudes often necessitate reduced yeast.

Experimentation is encouraged, starting with small changes – a tablespoon more or less of liquid, or a quarter teaspoon of yeast. Carefully observe the dough’s consistency during kneading; it should form a smooth, elastic ball. Refer to recipe notes within your Breadman recipe book for specific guidance on ingredient modifications for different bread types.

Optimizing Baking Times

Breadman manuals suggest that baking times aren’t always fixed; they can vary based on ambient temperature and the bread machine’s internal heating element. Monitoring the bread’s crust color is key – a golden-brown hue indicates doneness.

If the crust is pale, extend the baking time in short increments (5-10 minutes). Conversely, if it’s browning too quickly, reduce the time or consider using the “crust control” setting, if available. Always use a toothpick to confirm the interior is fully baked before removing the loaf.

Experimenting with Flavors

Breadman machines excel at flavor infusions! Recipe guides and online communities offer inspiration, but don’t hesitate to personalize. Adding fruits, nuts, and seeds is simple – typically during the second knead cycle.

Consider herbs, spices, or even cheeses for savory variations. Remember to adjust liquid levels slightly when adding moist ingredients. The BK2000BQ and other models handle enriched doughs well, perfect for sweet breads and cinnamon swirls – explore the possibilities!